| Author |
Message |
|
Norman
Firing on two.
Joined: May 11th, 2009, 3:17 pm
Posts: 198

|
 Re: AKS400 Pastis Weekend work on the body part 2 a
_________________

|
| June 22nd, 2010, 12:42 am |

|
|
|
Norman
Firing on two.
Joined: May 11th, 2009, 3:17 pm
Posts: 198
|
Re: AKS400 Pastis Weekend work on the body part 2 b
Heavy weekend but we seem to have made some real progress thanks to H and Russ hardwork with the welding. Thanks to you both.
Still got the rear cross member, the rear valance, the nearside rear panel and floor to sort when its home and back on the chassis.
Oh the chassis more on the work there later.
Bored yet?
_________________
|
| June 22nd, 2010, 12:46 am |
|
|
|
Joe
Firing on two.
Joined: July 23rd, 2009, 4:03 pm
Posts: 1019
Location: Bournemouth
|
Re: AKS400 Pastis Great work! i wish i had those skills!
_________________

Gas, Grass or Ass. No-one ride for free.
|
| June 22nd, 2010, 12:48 am |
|
|
|
twofifty AZU
Firing on two.
Joined: May 16th, 2010, 5:04 pm
Posts: 835
|
Re: AKS400 Pastis That's looking good. Where is the spare wheel going to live? There is enough room on the bulkhead to let a second battery tray into it.
|
| June 22nd, 2010, 12:53 am |
|
|
|
Norman
Firing on two.
Joined: May 11th, 2009, 3:17 pm
Posts: 198
|
Re: AKS400 Pastis twofifty AZU wrote: That's looking good. Where is the spare wheel going to live? There is enough room on the bulkhead to let a second battery tray into it. Spare wheel under the bonnet. yes could do as you suggested but doing it this way will allow other stuff to be stored in the spare wheel bay.
_________________
|
| June 22nd, 2010, 5:08 pm |
|
|
|
Russell
Firing on two.
Joined: November 29th, 2008, 10:05 pm
Posts: 9259
Location: West Sussex, U.K.
|
Re: AKS400 Pastis I realise most folk will think this is sad, but you've no idea how happy the doors on that van make me. Sounds like a Rolls Royce when they shut.
Thanks for the hospitality Norm/H/Frankie. I don't like vans at all, but it was still an enjoyable weekends work!
_________________
samfieldhouse wrote: What I like about I2F is that there is no pretence of democracy.
|
| June 22nd, 2010, 6:30 pm |
|
|
|
Norman
Firing on two.
Joined: May 11th, 2009, 3:17 pm
Posts: 198
|
Re: AKS400 Pastis more
Attachments:
 sIMG_1378.jpg [ 491.18 KiB | Viewed 4565 times ]
 sIMG_1379.jpg [ 661.44 KiB | Viewed 4565 times ]
_________________
|
| July 7th, 2010, 11:49 pm |
|
|
|
Norman
Firing on two.
Joined: May 11th, 2009, 3:17 pm
Posts: 198
|
Re: AKS400 Pastis Saturday effort... Boy was it hot out there. Body now back home and the rear valance/ Bulk head to replace plus the nearside rear wing. Day spent cutting and chopping. The more you dig the more you find! 
_________________
|
| July 10th, 2010, 11:20 pm |
|
|
|
Norman
Firing on two.
Joined: May 11th, 2009, 3:17 pm
Posts: 198
|
Re: AKS400 Pastis Ken I found this amongst your pictures on Flicker 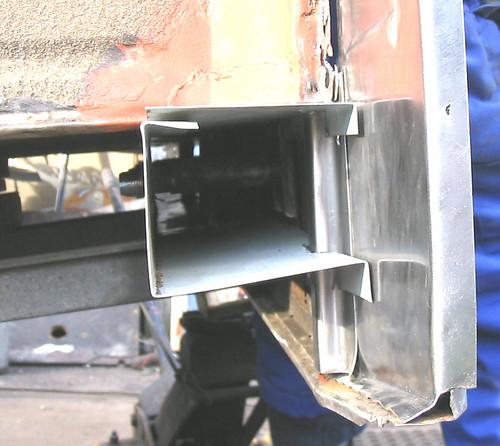 Where as Roy (ecas) as this as the way to fix this panel?  The Ecas picture allow for the front edge to be used to attach to the chassis doesnt it? I am also interested to know how you have constructed the supports for the 'bumper' tubes. The original has a strenthener on each back and front and 2 cross supports which you dont show. Is that over kill by Citroen? The ECAS way also allows the construction of the top section and the valance to put together off the vehicle and then after fixing allows the bottom L shape to be added it would seem to me? Any views greatly appreciated.
_________________
|
| July 10th, 2010, 11:34 pm |
|
|
|
ken
Agony Aunt - You have a car problem? Speak to Ken
Joined: March 6th, 2009, 1:40 am
Posts: 3675
|
Re: AKS400 Pastis Norman, have added another pictures on Flickr... John had bought the repair panels from SPOG and as there were no instructions provided, this was the only arrangement we could find in which they would fit. There was no chance at all of it fitting as shown on Roy's picture. Mind you, we had to take it apart and reassemble it with the top and bottom of the box not parallel, in order for it to sit correctly on the (Frome) chassis. These pictures are of that first (trial? ) fitting... 'Steadies' for the rear bumpers were made with tubes which were a push fit in the original items and these were welded into the front part of the box. The box and rear valance were assembled into one unit, which was slid (read as 'hammered'  ) into position, then plug welded to the van floor. I welded some extra brackets to the front of the box to bolt it to the chassis. ken. 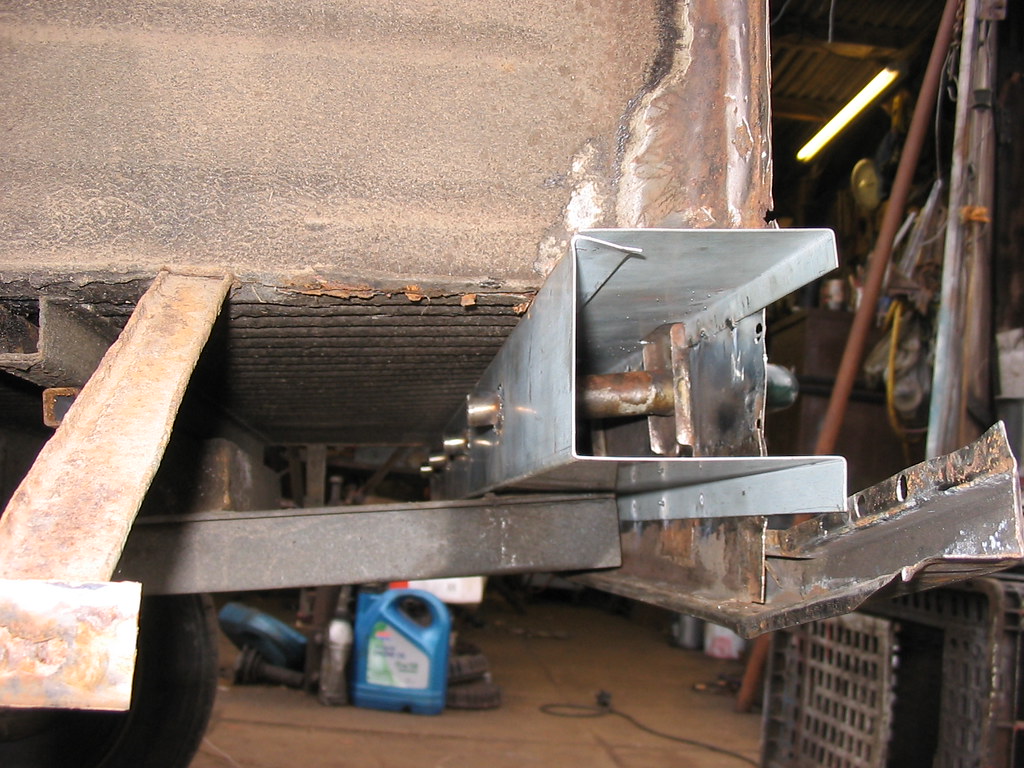 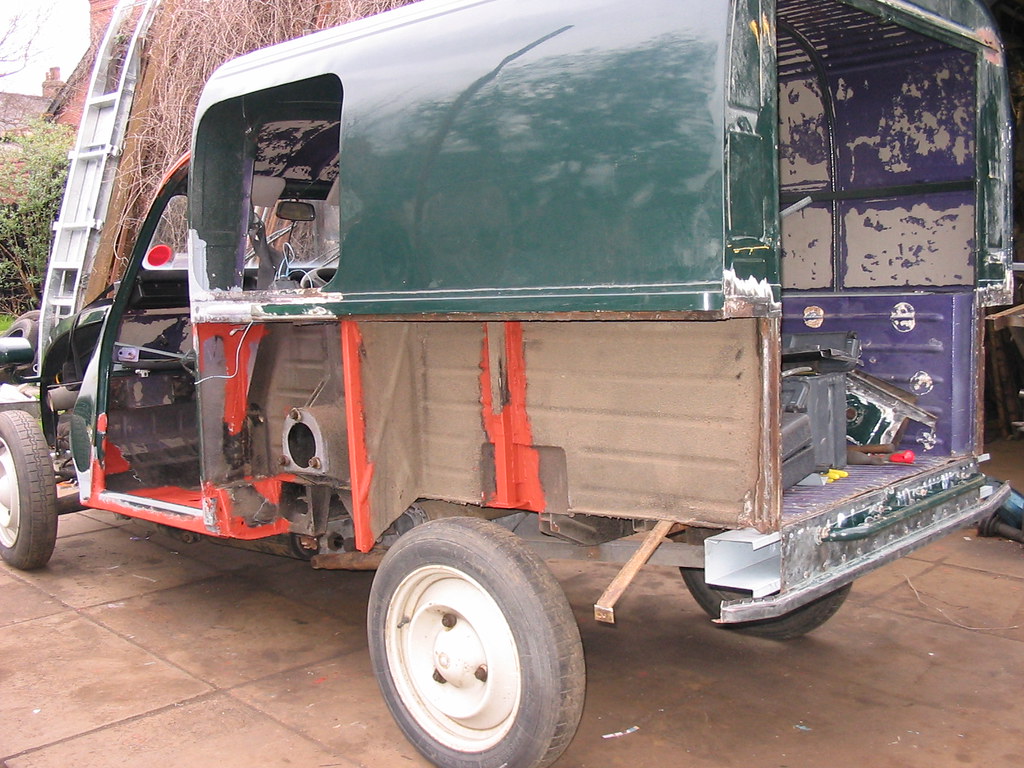
_________________

|
| July 11th, 2010, 12:13 am |
|
|