| Author |
Message |
|
Russell
Firing on two.
Joined: November 29th, 2008, 10:05 pm
Posts: 9259
Location: West Sussex, U.K.

|
 Re: My old Blue Bamboo Hmm, if you did that you'd be driving something like the ropey turds I do, not something to be proud of like you'll doubtless end up with.
_________________
samfieldhouse wrote: What I like about I2F is that there is no pretence of democracy.
|
| April 14th, 2010, 8:45 pm |

|
|
|
Old-Nail
Firing on two.
Joined: October 7th, 2009, 12:10 pm
Posts: 2192
Location: NWUK
|
Re: My old Blue Bamboo The weather recently has been fabulous, which has enabled me to get plenty done in terms of the type of jobs that just keep getting put off 'till another day'. In a week when most of Europe's airliners have been grounded due to volcanic dust from Iceland, I have been moving steadily closer toward finishing my little 2cv.  Above and below: I found these two photo's of an original 1966 2cv AZAM model on the net. This is the model I am hoping that mine will resemble when finished, and although my Vert Agave paintwork won't be quite so faded, and I don't have one of those wonderful front bench seats fitted (yet!) one thing that I do now have is the Quillery type steering wheel.  Bought from ebay, this wheel like most of the bakelite ones had a couple of minor cracks in it. I know that Frosts do a steering wheel repair kit for something like sixty quid which contains some epoxy to fill the cracks with, a file and some abrasive paper. Well I decided to do without that kit, and below is my version - epoxy resin from the local pound shop! 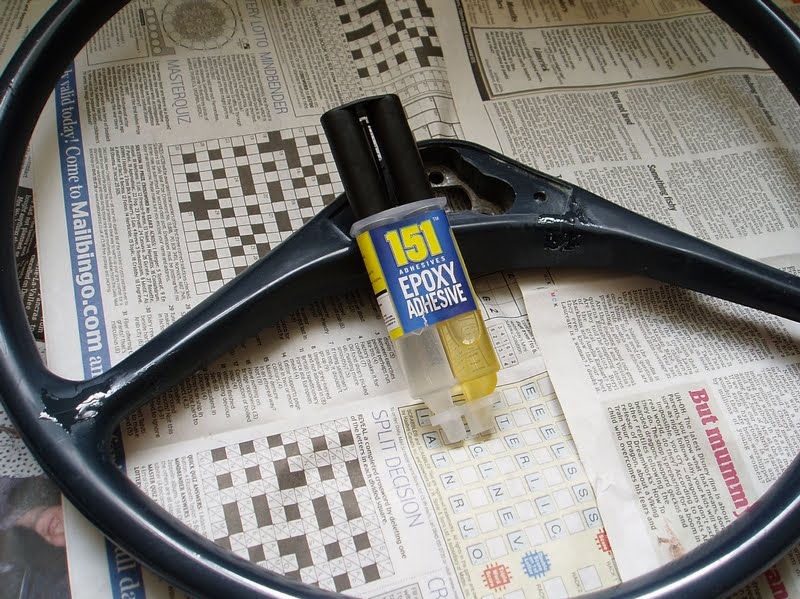 After degreasing the wheel I flowed the mixed epoxy into the cracks, leaving it proud of the surface as can be seen above, when it had hardened it was a simple case of flatting it back level and job done! As my wheel is blue, and I want to paint it white or light grey I needed to prep it further for paint. I'll say it here again because it's very important. ALWAYS degrease the item that you are about to flat with abrasive paper BEFORE you start to rub it. The reason for this is that nice shiny parts are likely at some point in their lifetime to have been given a polish with Mr. Sheen or whatever, which contains silicone. Sanding this stuff simply embeds it into the surface of the surface making it near impossible to remove. When this happens on a metal panel the only answer is to take it back to bare metal and start over, with a plastic item you're stuffed - so remember that.  Using the 320 open coat paper that I prefer I then gave the entire wheel a gentle flatting back to aid adhesion of the primer coat. Remember too that when scuffing the surface in preparation for paint you aren't 'sanding it down', you are only keying the surface. If this stage is done heavy handedly then it is all too easy to shave off some of the detail that belongs on the part. 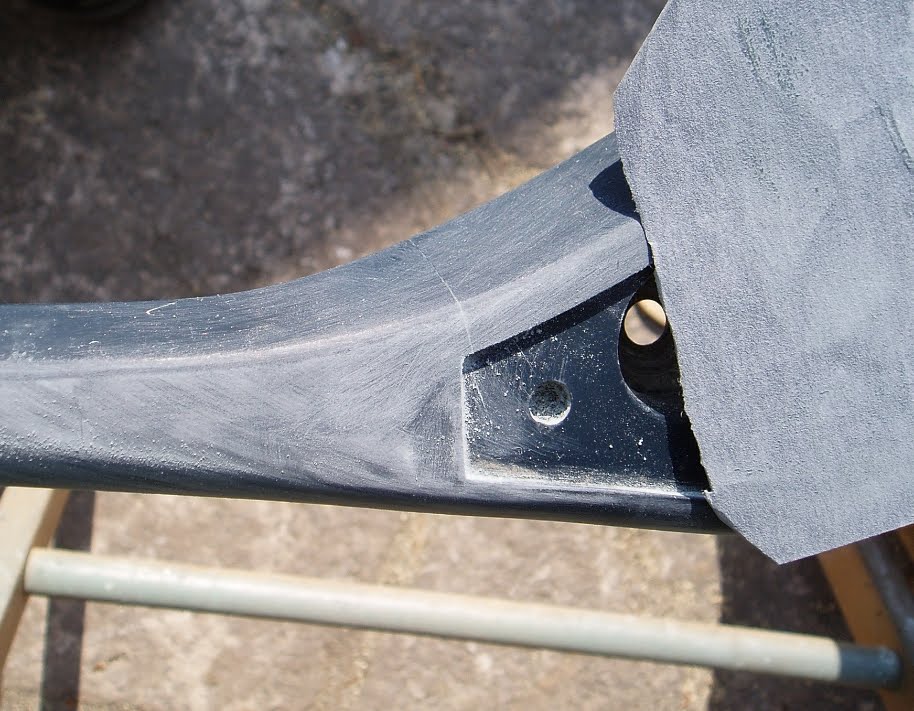 The close up above shows one of the previously filled cracks that now sits flush with the surface. I worked all around the wheel while once again wearing my 'snooker refs' cotton gloves to prevent the oils from my fingers contaminating the surface. Once I was happy that the whole wheel surface had been given a good key, and despite the gloves, I wiped the wheel withpanel wipe to once more remove any contaminants including any sanding dust.  Using one of my invaluable 'skyhooks' I then hung the part up and gave it a light dust coat of primer. This coat is known by various names, mist coat, dust coat, or perhaps more accurately grip coat, as it's function is to deposit a light coat of sticky paint over the surface to be covered which will later grip the next layer added and prevent runs. This grip coat is then left a couple of minutes, (just enough to go tacky but not long enough to dry properly) before the first thin coat of etch primer is applied. When using cellulose type paints which are applied very thin layers the grip coat should always be your first coat, all subsequent coats can then be applied as normal.  Above: The first 'grip' coat is applied. Below: Shortly after the first full coat of plastic primer is applied over the grip coat....  Before adding further thin coats to build up the primer. Each coat was given ten minutes or so in the sun to dry before the next was added. Finally, the wheel was removed from its hook and examined for specks of dust or whatever that may have found their way into the paint, a light rub with a scotchbrite pad is all that is needed to remove them. 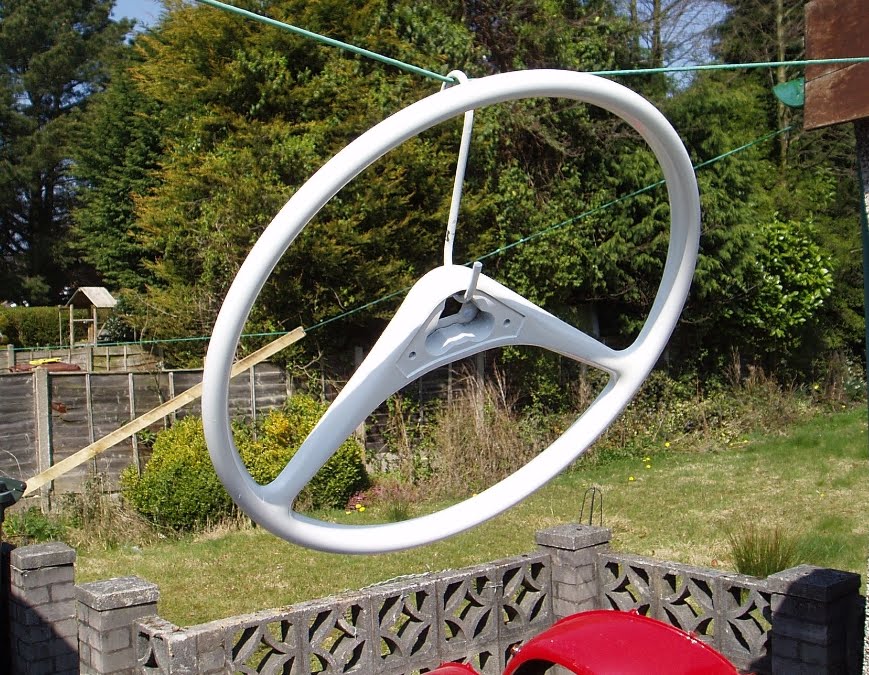 Once the primer had been built up to a smooth blemish free surface the wheel was left to dry for 24 hours as recommended by the paint manufacturers. I hung it in the garage where it now awaits the first of several topcoats. The were only two drawbacks to the process that I have shown here, the first was that the epoxy glue label said that it should be left for 16 hours before it could be sanded, and impatient me sanded after four. This resulted in some of it lifting beck out of the crack. The second thing was that later in the day when Mrs. Nail came out to hang her washing she reported to me that there seemed to be some strange white powdery stuff on the washing line that wasn't there before, well, what could I say? I had to admit to her that it was...well it was probably some of that volcano dust that we've been hearing about! 
_________________

'Democracy my Arse'
|
| April 18th, 2010, 9:43 pm |

|
|
|
Paul Narramore
Firing on two.
Joined: November 16th, 2009, 10:14 am
Posts: 211
Location: Aylesford, Kent
|
Re: My old Blue Bamboo Tut, look at the state of that border. And what happened to the coping stones on that wall? 
_________________

|
| April 19th, 2010, 10:49 am |
|
|
|
Old-Nail
Firing on two.
Joined: October 7th, 2009, 12:10 pm
Posts: 2192
Location: NWUK
|
Re: My old Blue Bamboo Paul Narramore wrote: Tut, look at the state of that border. And what happened to the coping stones on that wall? Sun spots mate. Must have been some sort of solar activity or something, combined with all that volcanic dust. Certainly not due to my neglect. Just a short post this one on the subject of paint stripper. Many of the books that I've read regarding the removal of paint down to bare metal advocate the use of a chemical paint stripper such as Nitromoors, and relate how after applying it thickly and leaving it to work the paint will then come off easily - Aye right... that's Bollocks!  I decided to strip of the paint from these two quarter panels using chemical stripper, and the first thing that I noticed was that it was certainly a method for the more patient folks amongst us. I left it for twenty minutes after which it took off next to bugger all, and what it did take off it took off unevenly. Using wire wool I removed the soft paint, washed the panel, and decided not to bother with paint stripper any more as it's a load of cobblers. It's messy, dangerous, and easily melted through my rubber gloves burning my fingertips but couldn't shift the factory paint.  It makes me wonder how those scrotes that poured the stuff all over my car one night a few years ago got it to perform so well, because for me it just isn't worth the bother. If you haven't tried paint stripper then don't bother. I'm off to get myself a stripping wheel which may or may not end up catching an edge and flinging these small panels across the room...but even that's better than paint stripper! 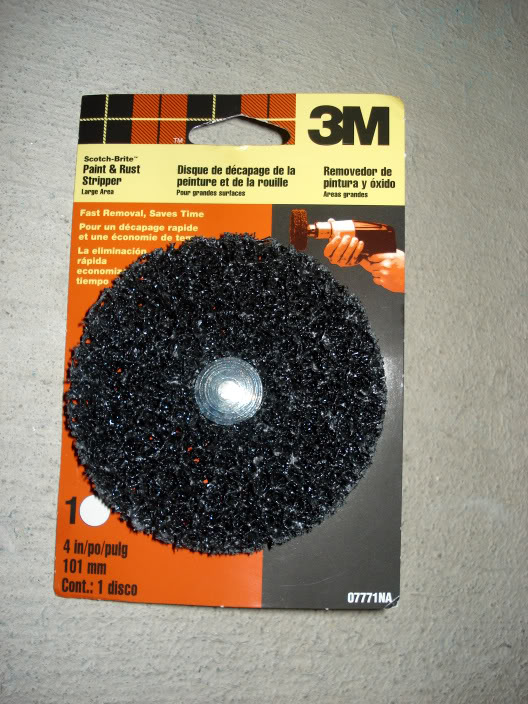
_________________
'Democracy my Arse'
|
| April 19th, 2010, 12:03 pm |
|
|
|
Russell
Firing on two.
Joined: November 29th, 2008, 10:05 pm
Posts: 9259
Location: West Sussex, U.K.
|
Re: My old Blue Bamboo Had you condsidered a smnall blast cabinet? It works wonders!
_________________
samfieldhouse wrote: What I like about I2F is that there is no pretence of democracy.
|
| April 19th, 2010, 6:28 pm |
|
|
|
Joe
Firing on two.
Joined: July 23rd, 2009, 4:03 pm
Posts: 1019
Location: Bournemouth
|
Re: My old Blue Bamboo Ive used nitromors on some of my bike frames. the best way i found of doing it was to cover it in the stuff, leave it for 10 minutes or so and then jetwash it off.
_________________

Gas, Grass or Ass. No-one ride for free.
|
| April 19th, 2010, 6:39 pm |
|
|
|
Old-Nail
Firing on two.
Joined: October 7th, 2009, 12:10 pm
Posts: 2192
Location: NWUK
|
Re: My old Blue Bamboo Nitromors is just a non starter for me now having tried it. Very messy, and not effective enough - too slow. A blast cabinet would be nice, but I've nowhere to put one really, and I do tend to move around a lot so the less kit that I have to carry from house to house each time the better. Having read a post about speedo's in another owners section I've had a go at a spare one of mine. If you're anything like me, then you'll find having to take your eyes off the road at night long enough for them to adjust to the dim glow of the speedo, just to see what speed you're doing, or how much fuel you have left is a pain. I had intended to paint my speedo face a little lighter, and add a brighter bulb to solve that but in the end I just added the 5w bulb. So my latest bit of tinkering was to open up my spare speedo and give it the treatment. I have painted the dial face the same colour as the car which just happens to work very well with both the white and red markings that are present. I had wanted to do it white, but then I'd not see the white markings on the underside of the glass when set against the white background.  Above: Above: The new green dial is quite restful on the eyes. Because the paint is considerably lighter than the dull grey of the original it should refect that bit more light too, so allied with the 5w (green) bulb that I put in all should be see-able when darkness falls.  There's also a tin plate inside the speedo which may or may not serve the purpose of reflecting light from the dismal bulb around the innards and thus around the face itself, so this was buffed up to a mirror finish also.  Finally, the fuel tank bit I wanted in a contrasting colour so I did it off white. I painted over the full and empty marks to start with a blank plate. Here I had the same problem of white on white when looking at the white fuel indicator needle against the white background, so I painted the needle red! For the 'full' and 'empty' marks all I did was to dip a pencil tip into red paint and place it on the surface where I wanted the 'empty' mark to be, then I did the same in green for the full. In the spirit of functional simplicity I didn't bother with a halfway mark, as that's where the needle points when it's half way between the red and green dot!  
_________________
'Democracy my Arse'
|
| April 19th, 2010, 7:32 pm |
|
|
|
hjbharry
Firing on two.
Joined: May 1st, 2009, 11:36 pm
Posts: 856
Location: hertfordshire
|
Re: My old Blue Bamboo Russell wrote: Had you condsidered a small blast cabinet? It works wonders! Old-Nail wrote: A blast cabinet would be nice, but I've nowhere to put one really, and I do tend to move around a lot so the less kit that I have to carry from house to house each time the better.
Here's my shot blasting unit
Attachments:
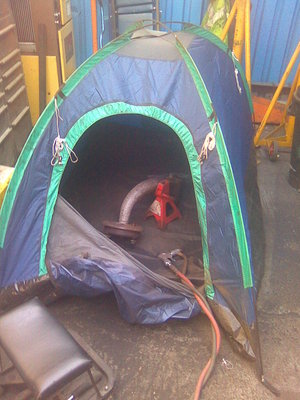 Image085.jpg [ 305.15 KiB | Viewed 3972 times ]
_________________

Low and Loud!
|
| April 20th, 2010, 11:03 pm |
|
|
|
Old-Nail
Firing on two.
Joined: October 7th, 2009, 12:10 pm
Posts: 2192
Location: NWUK
|
Re: My old Blue Bamboo 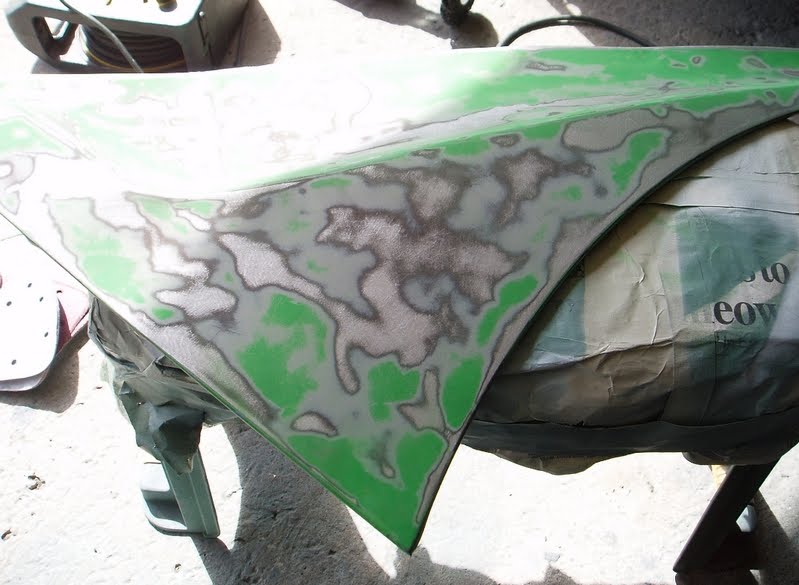 Following on from the post that I did the other day relating to the stripping of these quarter panels, I managed to get one of those nylon stripping wheels but I must have picked up a coarse one as the thing ripped the surface up pretty bad, so I fell back on a palm sander which did the job just fine. While sanding the panel below I came across what can only be described as a skim of plastic below the paint surface, I guess that it was some sort of brown/grey epoxy filler/primer, and it was a swine to remove as it choked up the sanding disks immediately. 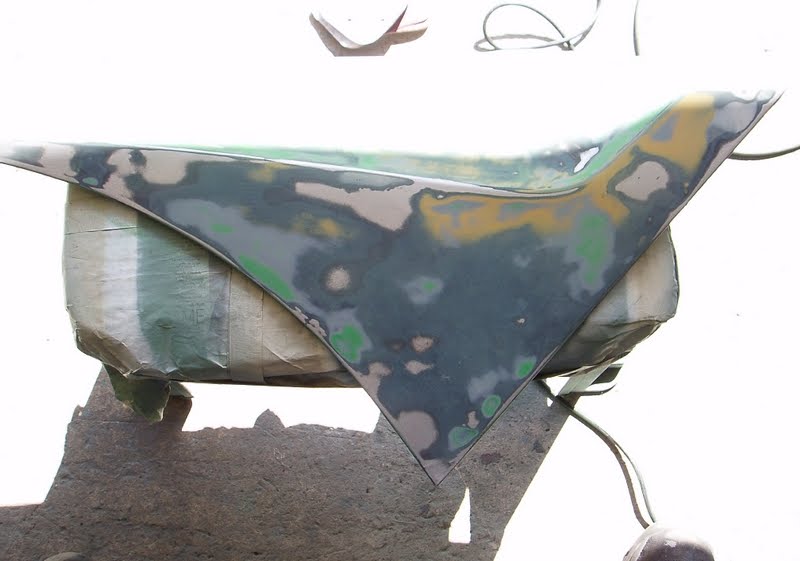 Once they were sanded and cleaned I gave them a coat of etch primer then turned them over and coated them with a thin coat of 3M stone-chip on the reverse side.  Those that know me by now will know that I often wander off at a tangent while working, and today has been no exception. While working on these small panels I had an idea... and then I had another! The purpose of this rebuild has been not only to build myself a car that I couldn't, or wouldn't pay the professionals to do for me, but also to gain some new skills and experience along the way. That's one of the reasons why this car has not been a 'cheque-book' rebuild, because what skills do you learn by doing that? - nothing. One of the things that I had wanted to try on this car was spraying two colour paintwork, talk about run before you can walk! In the end I decided to stay with a single colour car until I had learned to spray better, but now I'm quite confident with the gun so I have decided to paint the scalloped section of the quarter panel in a different shade to the car. Nothing fancy, I just want to do it in order to find out how difficult it is to spray two colour panels for future reference, and trying it out on a small panel like this will be instructive. That was the first idea, and I said that I'd had two, so before I primed the side panels I drilled two small holes in the off-side one (Below) to accommodate my second idea... but you'll have to wait to see what that is! 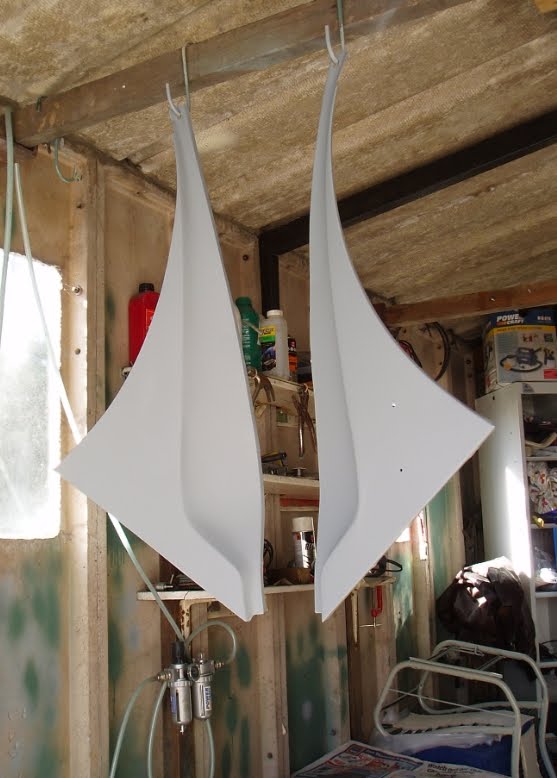 You can always tell when I don't want to do something - because I don't do it! Or, if it has to be done then I'll avoid it and leave it 'till last. I knew I was doing that when I started fannying about with the speedo instead of prepping the front wings for paint, but I couldn't find anything else to play with so now I've had to get on with them. 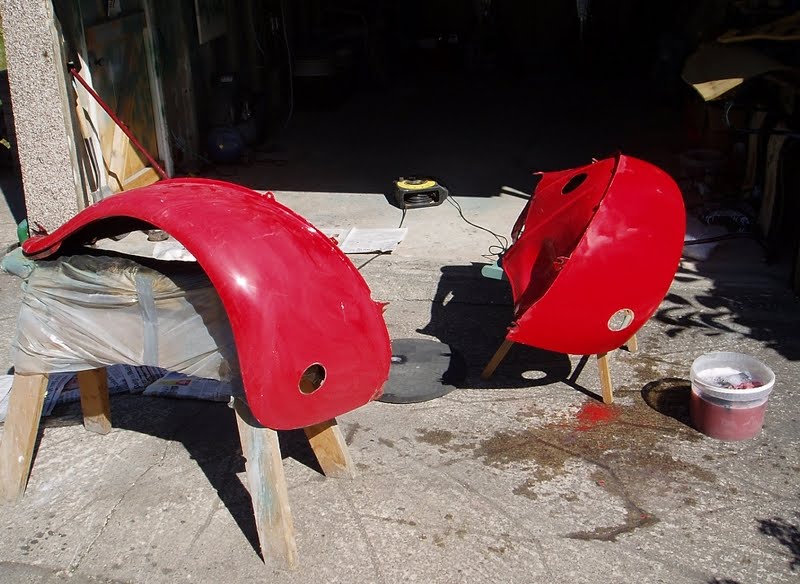 I didn't fancy this job because wings are awkward to handle, full of oil and shite, and usually rusty. It came as no surprise then that mine were all three. Once cleaned and degreased I began to sand them down, a depressing task that highlighted how poorly the 'professional' painter's previous effort had been, look at the orange peel and runs in this paint, a bloody scandalous finish to come from a proper garage I reckon.  The offside wing isn't in too good shape, but I'll use it for now until I can find or afford a replacement, it just means that the finish won't be the best until I do. While I had the schutz gun out I did the inner wings too which were then left in the hot sunshine to dry.  After a couple of hours the stone-chip was dry and I gave the components a couple of coats of primer. I don't have to worry about dust getting in the paint at this stage as most of the primer will get sanded back off again eventually, I'll apply several coats each of which will fill the sanding scratches of the one that went before, and by using finer and finer sanding paper between each successive coat the sanding scratches will eventually disappear. 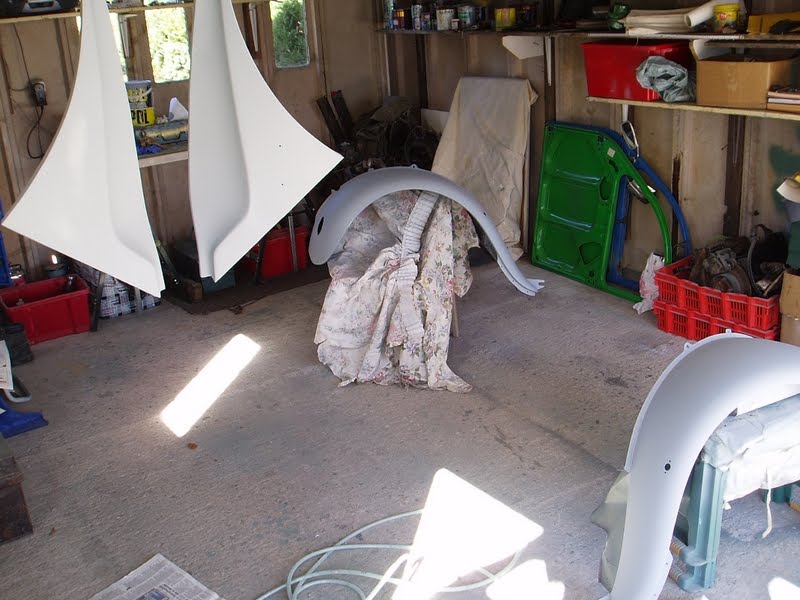 Once the primer was fully dry (overnight) I sprayed on a light guide coat of matt black paint. It doesn't matter what type of paint you use as it all comes off again with the next sanding, but using matt rather than gloss is better as gloss will clog up your paper. This guide coat helps you see highs and lows in the surface better as the high spots sand off, and the lows just sit there.  The panels were then flatted back (dry) again with fine paper and stopper was added to any nicks or chips in the surface that were still obvious, I don't want to go too mad with this as obviously it's not a custom hot rod or whatever which needs a glass like surface, but if 'glass like' is what you wanted from your paint then this is the process that would give it to you.  Finally for today I gave the quillery bakelite steering wheel another couple of coats of paint, allowing it to dry well and scuffing it up in between. Tomorrow I'm hoping to get more primer done on the wings followed by more sanding and maybe even a coat or two of topcoat. Gotta love this global warming!
_________________
'Democracy my Arse'
|
| April 21st, 2010, 7:40 pm |
|
|
|
Old-Nail
Firing on two.
Joined: October 7th, 2009, 12:10 pm
Posts: 2192
Location: NWUK
|
Re: My old Blue Bamboo The image below is of one of the front wings after I had (exaggeratedly) flatted back the primer that I applied yesterday. You can clearly see how that first coat has filled the sanding scratches from the first, rather aggressive grade of paper. 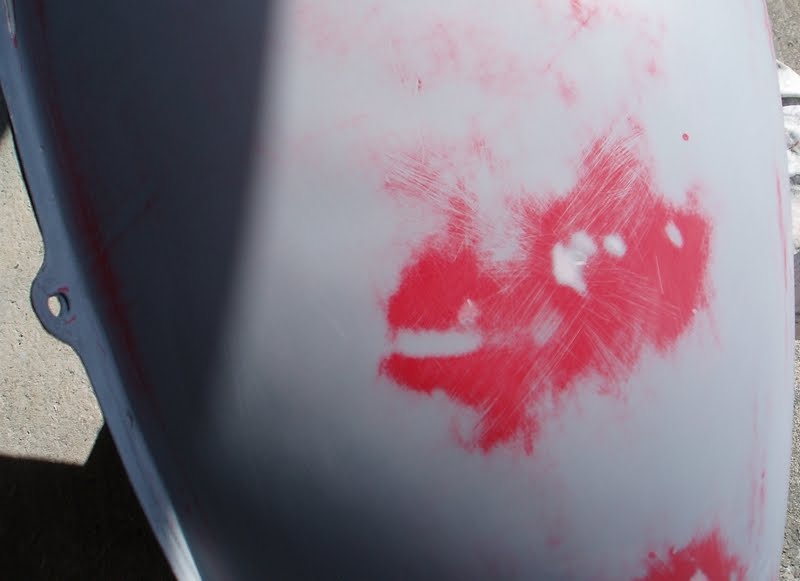 Another two coats was then applied followed by a further sanding, this time using finer 320 dry paper. I also used one of those soft sanding pads that are available from the usual places you get wet and dry paper from. Made by Oakey, (who also make the dry sanding paper I use) they are brilliant for flatting down curvaceous surfaces such as wings without the danger of sanding right through that using a hard block might pose.  Once the surface was smooth again the remaining little chips and nicks really began to stand out. It may be difficult to see in the photo below but there is a flaw in the surface. If this was a paid job, or some high class restoration then I'd have spot filled the chip and repeated the whole process until there wasn't a mark left anywhere, but this is my own 2cv that I do want to drive sometime soon So I left it! It's way too easy to get carried away otherwise.  Next I followed the same pattern as I had used on the other body parts, which was to put on a final coat of tinted primer, followed by three coats of colour. When dry the wings were then lightly flatted back again, this time done wet using 600 grade paper, before the final two glossy colour coats were laid on. The wings will now be put on the car as is, until several weeks have passed when the paint will have hardened enough and I'll then be able to rub out the finish with Farecla G3 for a nicer shine. 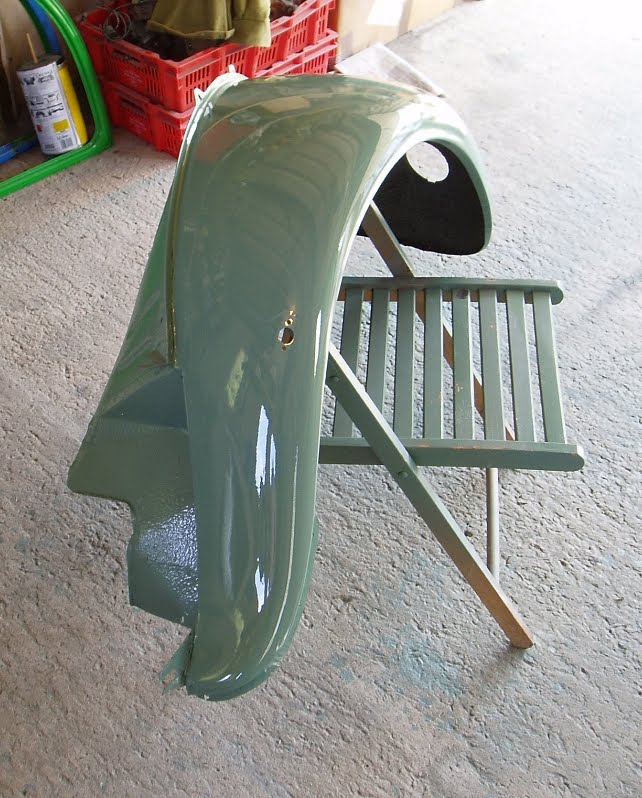 Finally I put some of the grey colour that I've used to paint the seat frames, hinges, and various other sundry items into the scalloped part of the upper wing quarter panels. I'm doing this simply to acquaint myself with the difficulties of two colour panel work so that I'll know how the next time I come to do some. 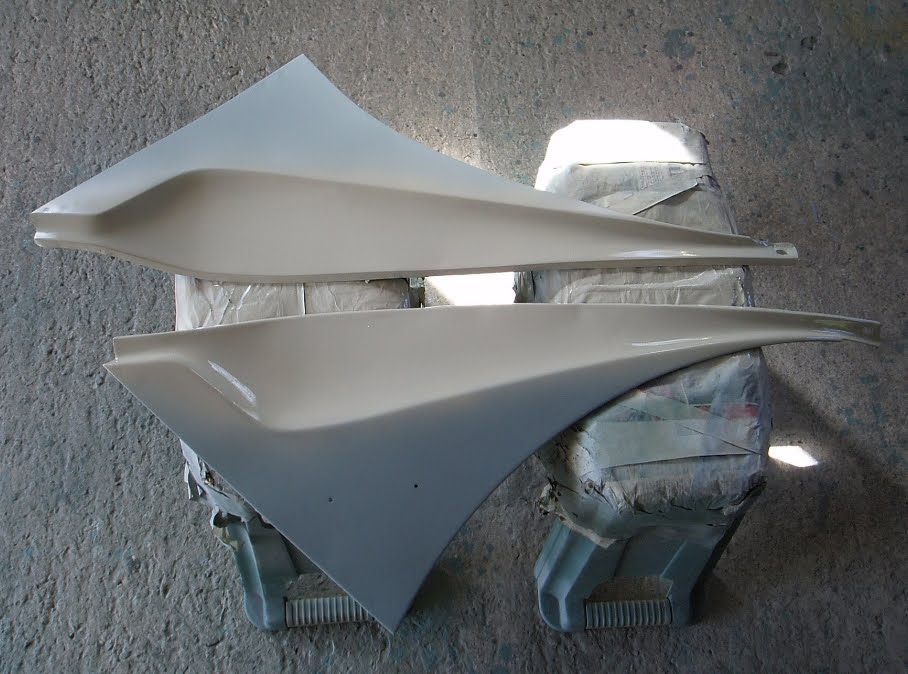 The masking up for the next colour isn't too difficult, but I'm wary of the fresh paint pulling off with the tape! Also, I'm being a bit finicky I know, but I don't want a ridge of paint where the two colours meet, or anywhere on the panel for that matter so I'll have to get my thinking cap on for this one to see how I can avoid it.
_________________
'Democracy my Arse'
|
| April 22nd, 2010, 8:44 pm |
|
|
Who is online |
Users browsing this forum: No registered users and 201 guests |
|
You cannot post new topics in this forum
You cannot reply to topics in this forum
You cannot edit your posts in this forum
You cannot delete your posts in this forum
You cannot post attachments in this forum
|

|