| Author |
Message |
|
Joolz
Firing on two.
Joined: January 5th, 2009, 5:48 am
Posts: 1687
Location: Haven't a clue

|
 Re: Joolz's Red One I already mentioned that I included an extra fuse for the wiper supply(fuse 6) and the wire from it can be seen joining the loom and disappearing through the bulkhead. I found the existing wiper supply behind the speedo panel in this crimped connection, 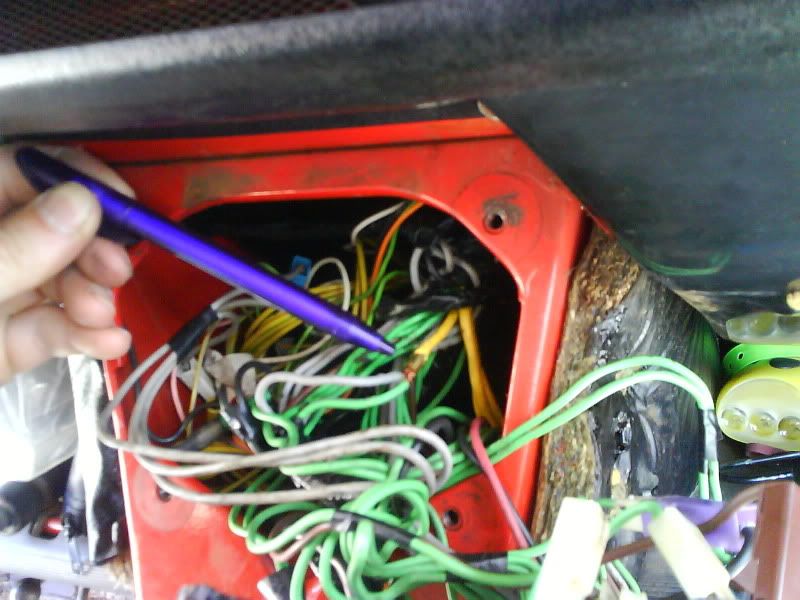 I'm afraid I can't remember exactly which wire was what, it was last summer, but it was basically a question of cutting the wire/wires from the connecter and connecting it/them to the new supply. Power is fed to the wiper circuit in two places, the switch, and the motor, and I can't remember if the supply splits at this crimped connection or further down the line.
_________________

|
| January 19th, 2010, 12:10 am |

|
|
|
Sean
Firing on two.
Joined: April 22nd, 2009, 11:06 pm
Posts: 3684
Location: Ecosse
|
Re: Joolz's Red One Joolz cant make out from your picks but waht chassis is it? and how did it tear at the cross member?  Sean
_________________
Kissing the Lash

"Any advice of a technical nature is given on the understanding that I've actually done this shit, not just read about it in D*lly club mag some time ago.
|
| February 5th, 2010, 8:40 am |
|
|
|
Joolz
Firing on two.
Joined: January 5th, 2009, 5:48 am
Posts: 1687
Location: Haven't a clue
|
Re: Joolz's Red One I believe it's a Frome chassis. The damage was caused when I drove over a 'gate stop bracket thing' and caught the cross box, a dent corresponding with the top edge of the crossmember can be seen in the righthand downpipe, just above the box. I was surprised that the crossmember came off so badly, I'd have thought it would've just ripped the bottom out of the box.
_________________
|
| February 5th, 2010, 2:30 pm |
|
|
|
Joolz
Firing on two.
Joined: January 5th, 2009, 5:48 am
Posts: 1687
Location: Haven't a clue
|
Re: Joolz's Red One I'd been having a little trouble with the brakes recently, the first press was seeing the pedal go to the floor, the second was better and the third was just about acceptable. I've always thought that air in the system would give a consistently soft pedal, but seeing as the problem arose after changing the callipers it was unlikely to be anything else. I bleed them the best I could on my own, but with no great improvement I was beginning to scratch my head. So I hatched a plan, call in the cavalry so to speak. It consisted of, a homemade U clamp, an exhaust flange, a piece of old innertube with the valve removed, and a very large washer. 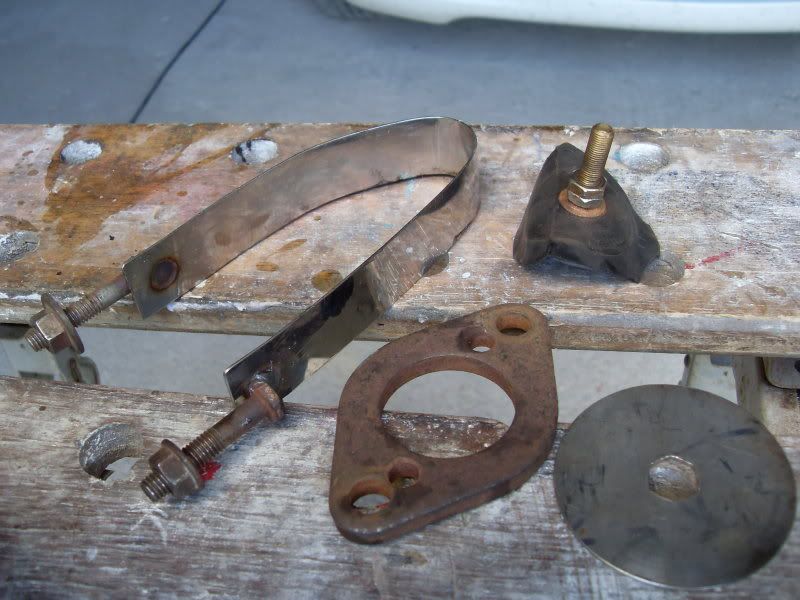 I assembled it up on the master cylinder and connected it to an air compressor with the regulator set at 20psi. 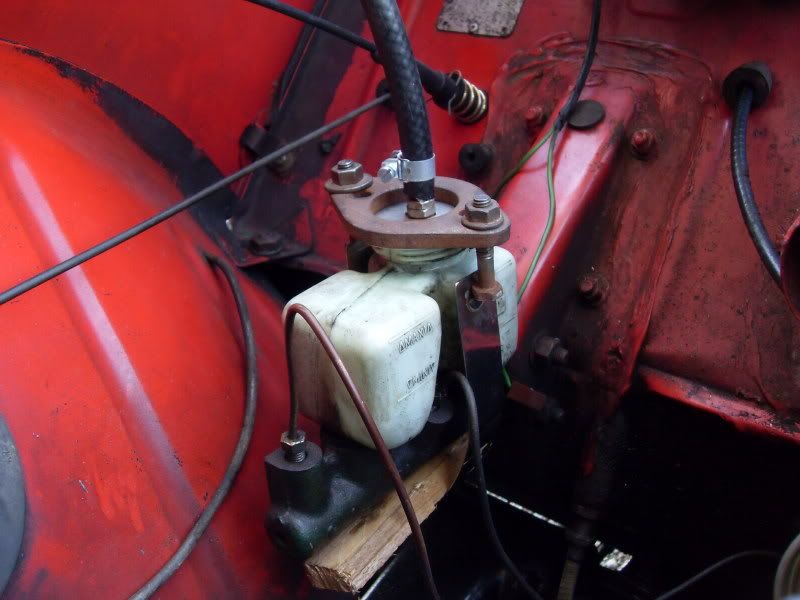 the piece of wood was a miscalculation in the clamp size. You could probably get the same results by fitting a tubeless valve into the top of a spare cap, it would have made topping the fluid up halfway through much easier, but I didn't have one I wanted to destroy, plus the U clamp gave me the peace of mind that the reservoir wasn't about to pop off. After turning on the air it was just a question of opening the bleed nipples one at a time and trying not to run out of fluid. It worked, the brake pedal is now back to how it was. But it's not perfect, ever since I've had the car, the first press has always had about 1/2" more travel than subsequent presses, is there still a little air in it somewhere? Should I keep trying? Or is that as good as it's going to get without changing parts?
_________________
|
| April 10th, 2010, 12:34 am |
|
|
|
hjbharry
Firing on two.
Joined: May 1st, 2009, 11:36 pm
Posts: 856
Location: hertfordshire
|
Re: Joolz's Red One thats cool a home made easy bleed  the bottle on here helps not to run out of fluid so quickly  
_________________

Low and Loud!
|
| April 10th, 2010, 11:19 am |
|
|
|
Joolz
Firing on two.
Joined: January 5th, 2009, 5:48 am
Posts: 1687
Location: Haven't a clue
|
Re: Joolz's Red One That's the luxury version! I had borrowed one before but couldn't find a cap that fitted, so it wasn't as 'eezi' as all that. But most importantly, mine cost all of zero pence.
_________________
|
| April 10th, 2010, 9:14 pm |
|
|
|
Joolz
Firing on two.
Joined: January 5th, 2009, 5:48 am
Posts: 1687
Location: Haven't a clue
|
Pimp my speedo Sometimes I fiddle with my car because it needs it, sometimes because I think it improves it, and sometimes I just fiddle because I can  . I recently had the dash out of my car and found myself with the speedo in my hand. That seemed like a good enough reason to take it apart. First step is using a sharp screwdriver unpeel the tabs holding the rim on. 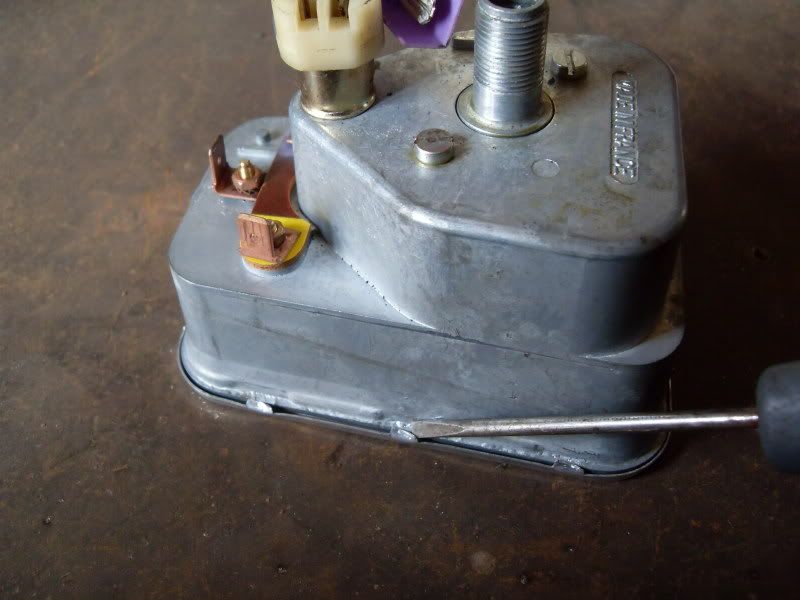 Remove the rim and then lever out the perspex and the inner cover(with the gear pattern on). Followed by removing the speedo mechanism which is retained by the two slotted screws in the back. Conveniently the speedo face is made up of two parts, a piece of perspex with the writing on and a coloured backing piece, these are retained by two small pins which can just about be persuaded out by levering a screwdriver between the face plate and the plastic body. 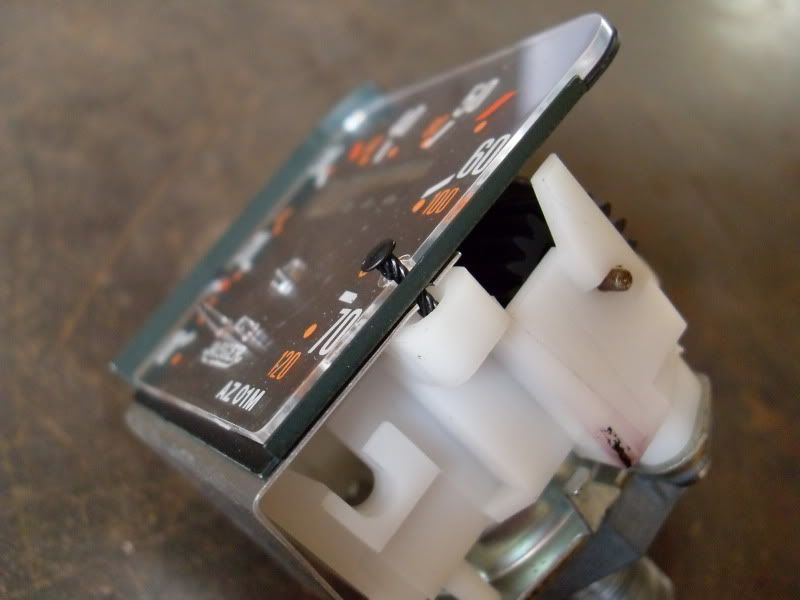 But before the face can be removed it's necessary to pull the needle from it's spindle, not difficult but having done so I realised there was no reference point to aide with putting it back in the right place, which is why before sealing it back up again I'm going to need to borrow a sat nav to check the calibration, doh. With the coloured face in my hand it was still an unattractive shade of greeny grey but a piece of satin black 'sticky back plastic' soon fixed that. 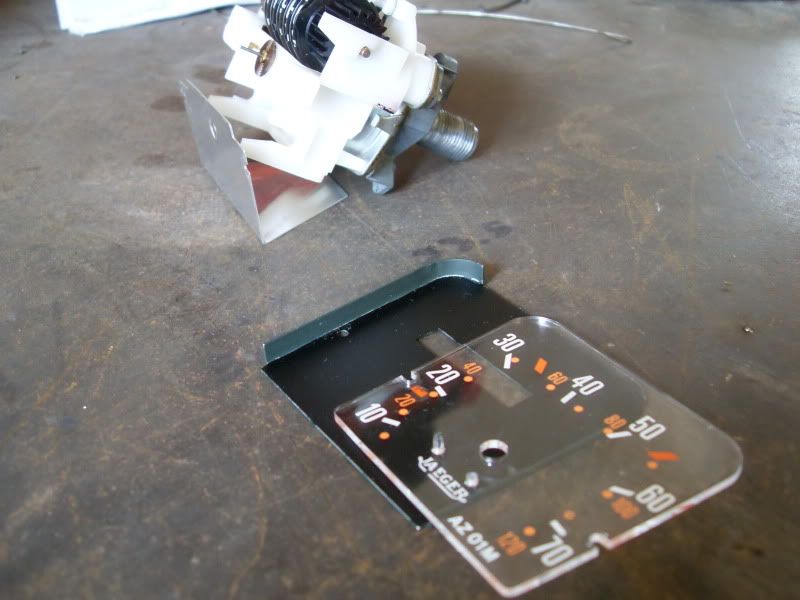 Painting it would have worked just as well, as would using fake carbon fibre for the particularly chavy, or wood veneer effect for the completely tasteless. Moving on to the fuel gauge, it was less cooperative, the face retaining pins had to be pressed out. 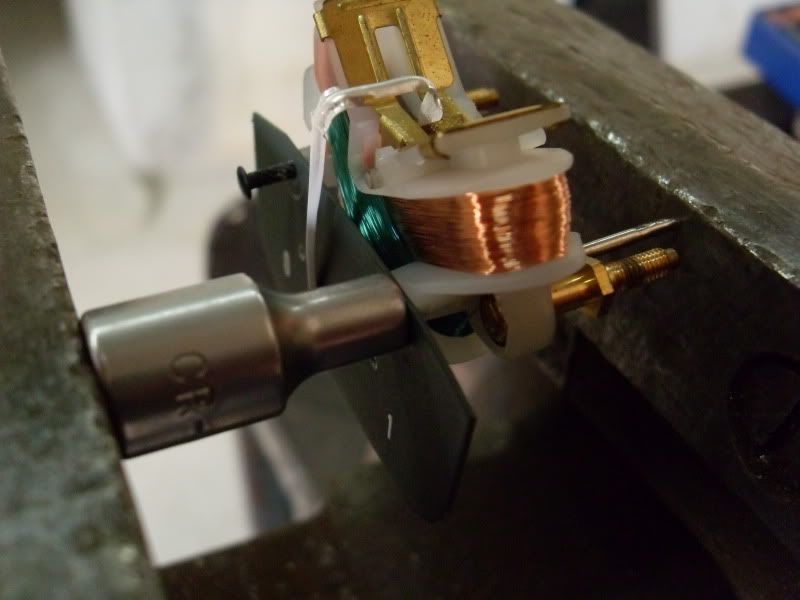 That's a 4mm socket on the left and the shiny 'drift' pushing the pin out, is a piece of 1.6mm welding rod. Plus the writing is painted directly onto the face, so I lightly center punched the three spots before giving it a quick flash with the rattle can. When the paint was dry I 'twiddled' a small drill bit by hand in the punch marks to give three shiny reference points. Forget the 0, 1/2 and 1 writing, I'm sure I can remember which end is which. Lastly I painted the front face, I didn't worry about keeping the gear pattern icon, but it could look good with some other logo in it's place, I just couldn't think of anything. Reassembly is doing what was done earlier but t'other way round, or however that saying goes! And there you go, although the center does look a little bare, I'm quite happy with that. I considered painting some part a contrasting colour, but in the end decided all black was classier. I haven't yet painted the plastic surround and it crossed my mind to do it red to match the body, but I think I'll stick with the black. Oh and I polished the aluminium rim. 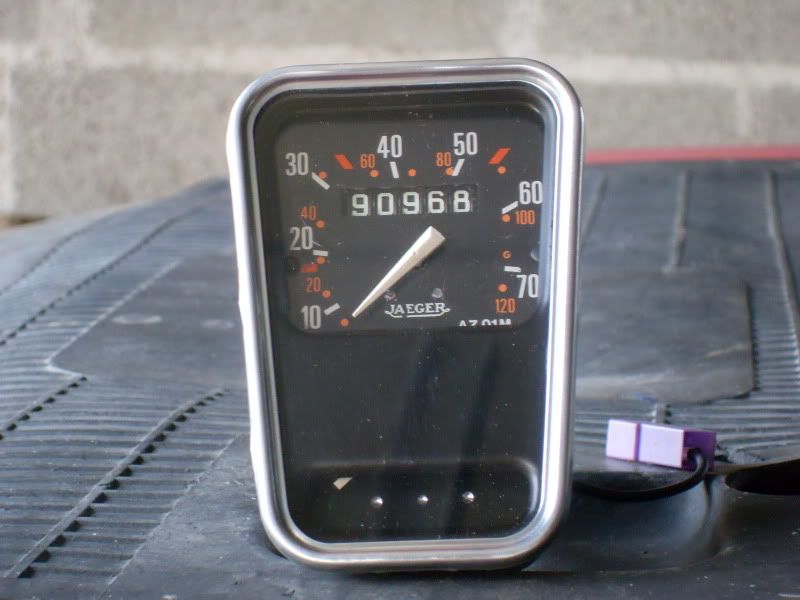 The sharp eyed amongst you may have noticed the two little stop pegs for the speedo needle, one for when it's stationary, and one for 'z' mph(flat out), and how the flat out one seems to have been removed. I wonder how fast it will go now?
_________________
|
| April 18th, 2010, 2:25 am |
|
|
|
Old-Nail
Firing on two.
Joined: October 7th, 2009, 12:10 pm
Posts: 2192
Location: NWUK
|
Re: Joolz's Red One ....Just when I thought I'd finished my dash panel.... I think i'll.... 
_________________

'Democracy my Arse'
|
| April 18th, 2010, 11:37 am |

|
|
|
Joolz
Firing on two.
Joined: January 5th, 2009, 5:48 am
Posts: 1687
Location: Haven't a clue
|
Re: Joolz's Red One Maybe I've got too much time on my hands or maybe I'm just trying to avoid doing anything useful. But for some reason I removed the writing from my rear lenses. Used a file, two grades of wet and dry, and some T-cut. 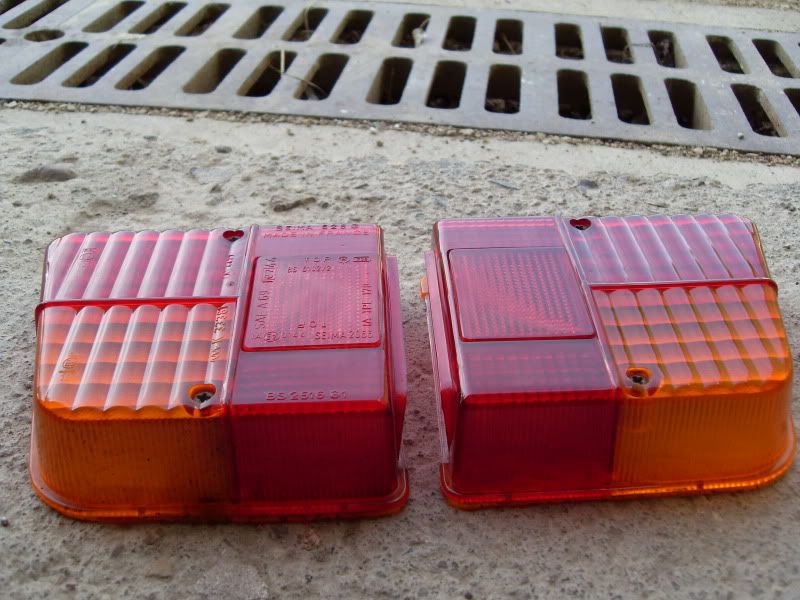 Before and after. So, a good use for 2 hours of my life? I'll let you decide. Have to admit that this is not the first (or even second) time I've done this to one of my vehicles. 
_________________
|
| April 28th, 2010, 12:47 am |
|
|
|
Max
Beard
Joined: December 9th, 2008, 8:00 pm
Posts: 2003
|
Re: Joolz's Red One Joolz wrote: So, a good use for 2 hours of my life? Yeh! I think it looks good. Ill make sure to point it out at the French national so you don't feel you have wasted your time.
_________________
.

.
http://www.rollingonfour.co.uk
|
| April 28th, 2010, 11:07 am |
|
|
Who is online |
Users browsing this forum: No registered users and 30 guests |
|
You cannot post new topics in this forum
You cannot reply to topics in this forum
You cannot edit your posts in this forum
You cannot delete your posts in this forum
You cannot post attachments in this forum
|
|

