In progress, words and more pics later..
This is a short guide to 2CV and other A series suspension, how it works, how to adjust and service it and how to remove and refit it.
The car in this example is being fitted with lowered springs, however the only difference between any other 2cv is simply the springs themselves. All the information here applies to most 2cvs with the exception of early exposed spring (ressorts apparent) 2cvs and vans/Ami Supers which are slightly different, I will explain how and where as I work through the post.
This is a standard 2cv Spring cannister, it runs along the chassis from front to rear and is connected to the suspension arms via the tie rods which are connected through the spring to a cup which pulls on the spring when the wheel hits a bump. There is nothing hard to understand here, however to give a better understanding of how it works, I am going to cut this can open and explain what is inside.
This is the end of the tie rod which screws into the knife edge shackle, which is the part that connects to the suspension arm. This is the key to adjusting the ride height of an A-series. The further this is screwed into the shackle, the higher that corner of the car will be, the further it is screwed out, the lower it will be. The thread size, should you need to clean the tie rods of dirt and rust which can build up, is M11x1mm. These can be very hard to turn if the car hasn't been worked on for a long time, the threads are exposed to dirt and salt from the road, and can be forgotten about. If this is the case it is worth soaking them in plusgas or a similar penetrating spray oil for a few days before you attempt to adjust or remove them.
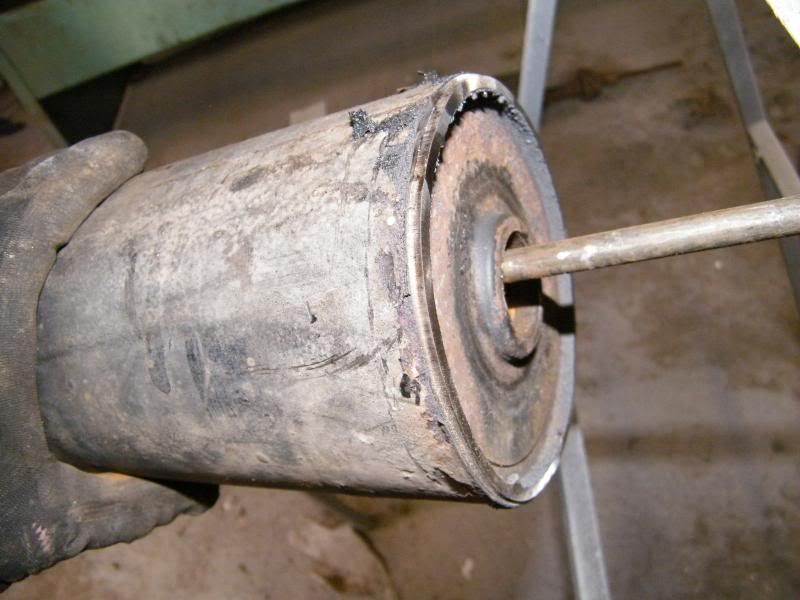
This is the end of the spring can. It is basically a cap welded into a sheetmetal tube. to remove it, you have to use a grinder to remove the weld as shown below.
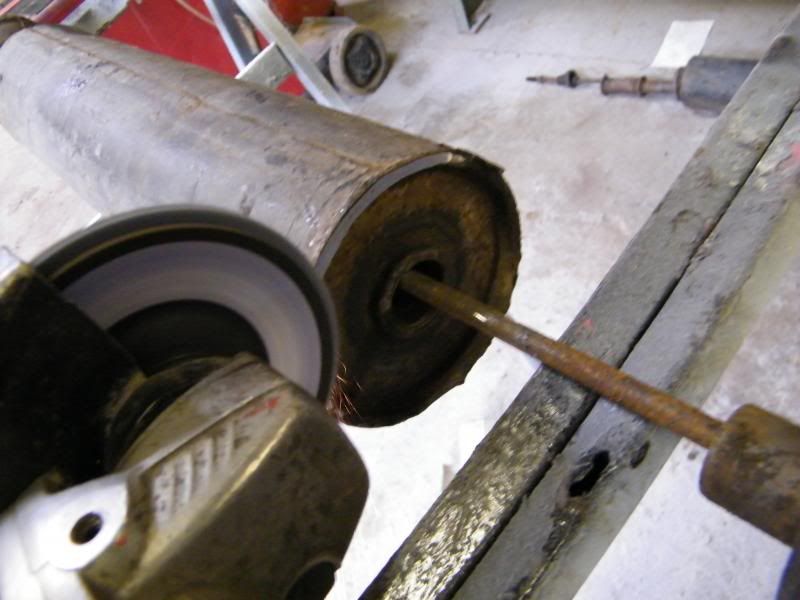
As you grind through the weld you'll start to see the join between the two pieces, you need to be able to see this all the way round to and then the end of the can will be free to come out.
Here, the weld has been ground through, and the cap is free to be pulled out.
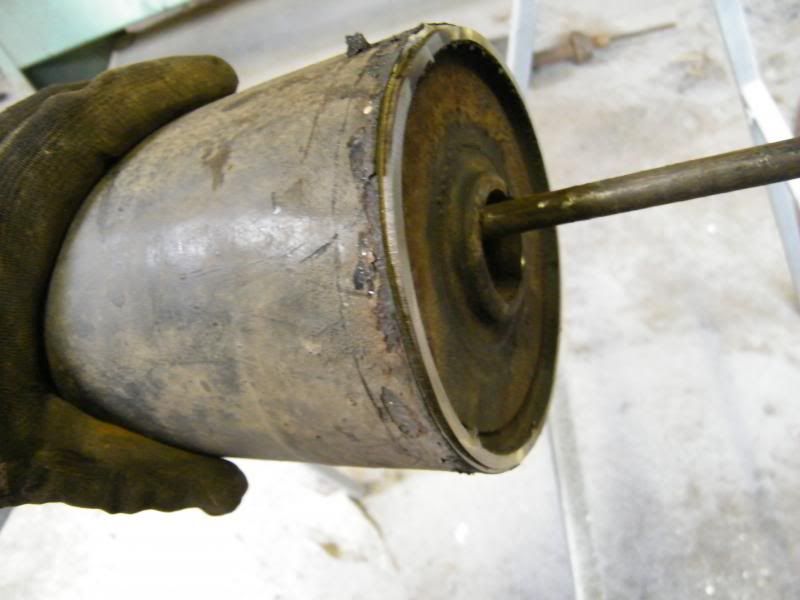
It might take a few good tugs on the tie rod to free it, it's a push fit once the weld is removed, and still in the tube quite tightly.
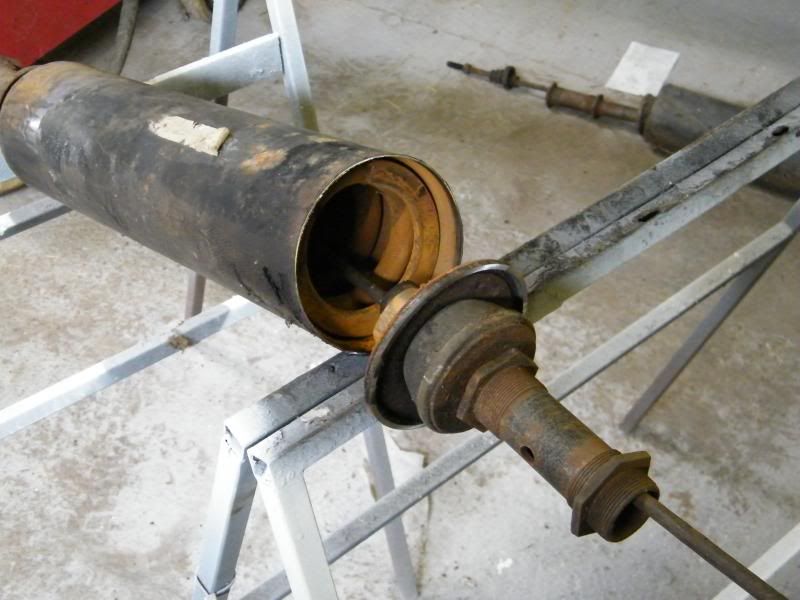
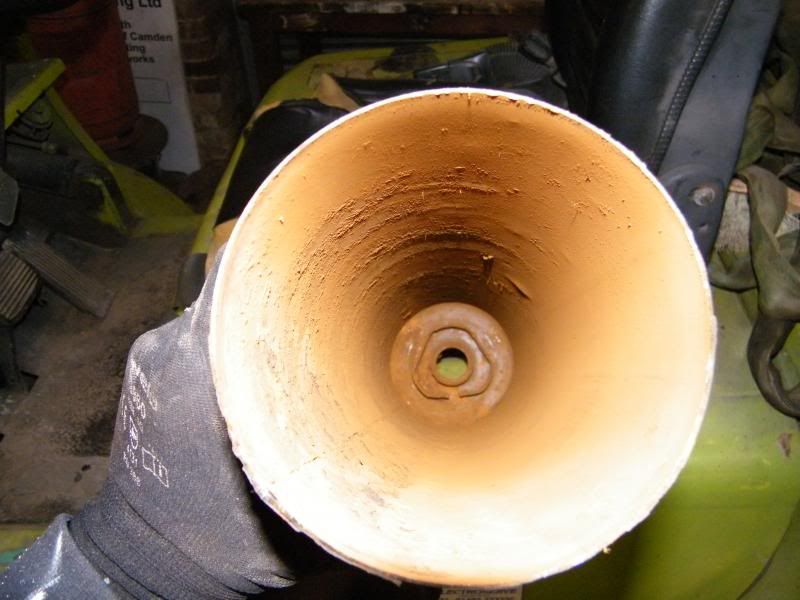
With one spring and cup removed, this is what you can see inside the can. In this case, a lot of water has got in amongst the oil and the can is a bit grotty. The round part at the end of the can acts as the seat for the other spring.
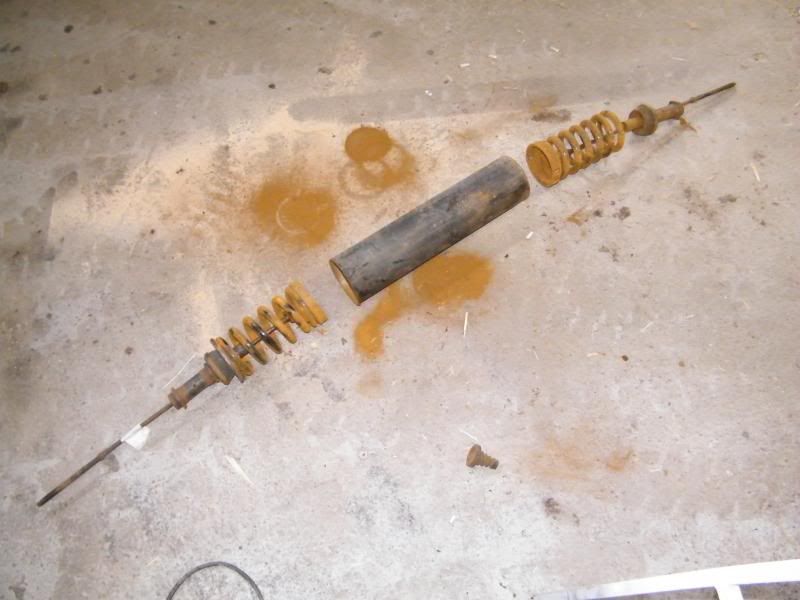
These are the two springs, tie rods and cups removed from the can. Take care not to mix them up, the front and rear are different, however I shall explain more on this later...
This is the end of the spring can which we removed earlier. The triangular piece attatched to it is to locate the spring. You can see a bush inside which is to allow the spring can to move back and forth smoothly, you'll see more of this further on..
These are the two springs sitting on the cups. The cups have a fibre outer ring held in with rivets which slides neatly inside the can and keeps the spring in line without touching the sides. This can expand if lubricated with the incorrect fluids, this expansion will prevent the movement of the cup and the spring, and will cause a poor ride. This example is covered in the gunk which had formed inside the can, it will need cleaning thouroughly before refitting.
These are the new springs which will be fitted on reassembly. They are condiderably shorter than the standard ones which they are next to in this shot.
These are the tie rods which pull on the cup and spring when the wheel is forced upwards. They are different lengths from front to rear, the rear being slightly longer. The rear spring is also longer than the front. It is important not to mix them up on reassembly. You may have noticed the can has 'AV' pressed into it, an abbreviation for the french word for 'FRONT'. It'll help you to keep a note of this and reassemble the cans with the front springs at this end, to save confusion in the future. More important is to ensure the long spring and rod are fitted towards the rear of the car.
This is a close up of the bush which is pressed into the end of the can. It appears to be a phosphor bronze bush, and just in front of it is a felt ring which is oiled to keep the bush lubricated.
Here, the springs have been reassembled into the can in the correct order, and the cap welded back on. The can is cleaned out inside as are the fibre rings and the cups. It is important to keep welding down to short bursts as a large heat build up will cause the felt ring to become damaged. The cap is placed into the end and tapped flush with a small hammer. It is tack welded first and between these tacks (about an inch apart) it is welded. It is a good idea to make sure your weld isn't porous and there are no gaps in it, as when the can is lubricated the oil will drip out onto your driveway!
Here you can see a slightly exploded view of the chassis mount and the rubber buffer which are fitted between the chassis and spring can. The buffer is the part which the can will pull against when it is required to move fore/aft.
This is the same part, but fitted closely together as they are when fitted to the car.
This is the knife edge shackle on the rear, which is connected to the rear suspension arm. The knife edge itself is held in with two clip, one each end. The hole it passes through in the arm is circular one end, and the same shape as the KE the other, to keep the right edge in contact with the shackle. More on this later.
This is the part of the chassis the mount we saw earlier fits into. This is the rear one, which is a solid tube, the front has a slot cut into it so you can fit the assembled suspension can and tie rods. The mount is held in place with two 46mm nuts. It can be adjusted fore and aft to hold the spring can between the rubber mounts.
This is the front which has the slot cut in, you'll see why in a moment.
On reassembly, making sure you know which end of the can is the front (!) you will need to slip the rubber buffer and one 46mm nut over the tie rod and upto the can, both ends of the can.
Once the buffer and nuts are in place, feed the tie rod through the rear mounting.
Then slip the front tie rod though the slot in the front mounting.
The can mounts/slider then goes through the chassis, the 46mm nut and the rubber, into the end of the can. The nut must be wound onto the threaded portion of the slider but not tightened up. Do the same to the other end so both ends of the can are sitting on the slider tube. The trickiest part (although by no means tricky!) is then sdjusting the slider tubes so that the can is slightly compressed between the rubber buffers. Not tightly though, you should still be able to turn it but there should be some resistance when you do. It's handy if you can adjust both sides so that the 46mm nuts are about the same distance away from the rubber buffer each side, this will make adjusting the height easier.
With the can held in place correctly, the other nut can be wound on and tightened.
The next step is to lubricate the springs inside the can, this is done with either vegetable oil or caster oil, but importantly, not engine oil! Once you have oiled them with about half a litre of veg oil each side, you can slip the rubber boot back on. This stops any road dirt and water washing up from the wheels and getting into the springs. It helps to turn the cans around slowly to make sure the oil has coated the inside. It's a good idea to do this at every service too. The rubber boot is prone to coming adrift, and can be better secured with a cable tie.
to be continued..