| Author |
Message |
|
subarupete
Firing on two.
Joined: March 5th, 2009, 6:23 pm
Posts: 2151
Location: Near Monmouth

|
 Re: Dave 411's 1967 AK350. busy boy, heating in workshop/den?
|
| February 7th, 2012, 5:09 pm |

|
|
|
Neil
super slot
Joined: November 28th, 2008, 11:14 pm
Posts: 8797
Location: Cornwall, UK
|
Re: Dave 411's 1967 AK350. This will be the third time I have tried to put this post on.Internet Explorer kept freezing,maybe a dodgy pic,so now I am trying Mozilla.  The next job on my list was to strip and overhaul the steering rack.As the front axle was off the van it was a relatively easy job,a tad messy,and not many pic of the strip down because my hands were dirty.Cant have a greasy i phone now can we chaps. So,after un bolting the rack assembly from the axle,lifting the one end up and pulling it out was easy peasy.Very messy/greasy. The next thing was to take out the nut that holds it all in.This is the same type that is used on the track rod ends,so the special tool is quite handy!! After removing the split pin and the nut,a cup came out,then the first ball pin.Now this was quite difficult to remove,never having done it before,but a good tug and out it came. 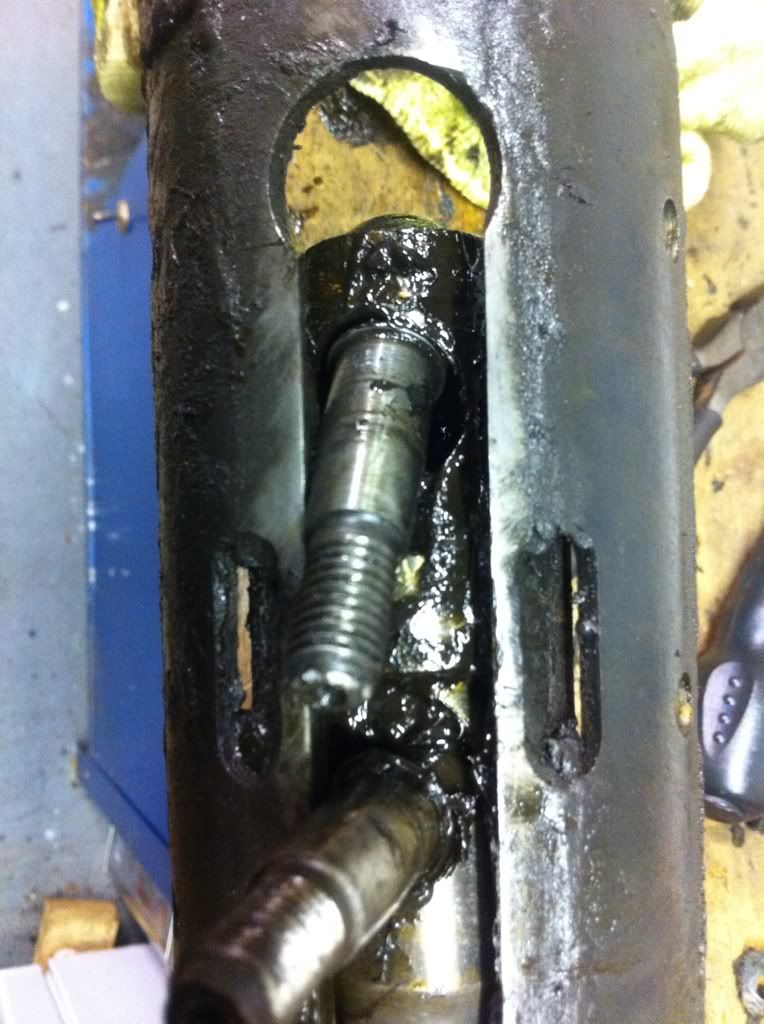 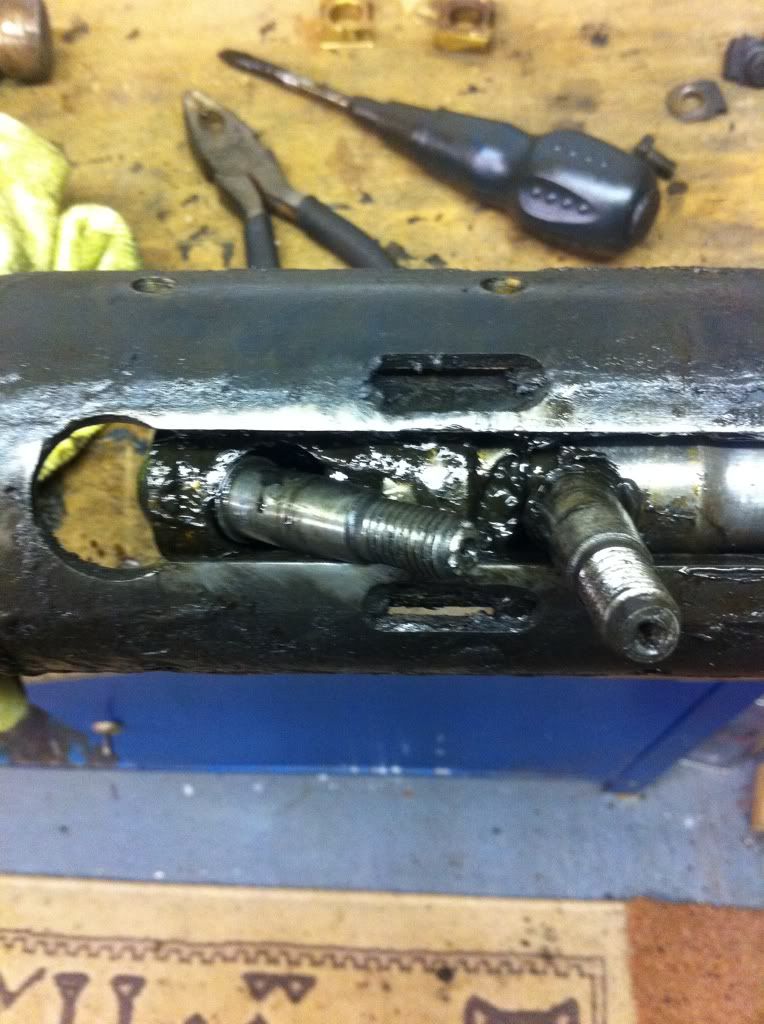 Next came a cup,then a spring and sleeve,another cup,the last ball pi,and another cup.The rack now pulls out of its housing.All the parts were cleaned,and to be honest,the amount of wear was negligable,but I had bought a kit from Ecas to do the job,so that was going in regardless.The guide ring had some slight marking,but was ok to re use. So,cleaned everthing,splash of primer and ready to put back together. All the bits ready to go. 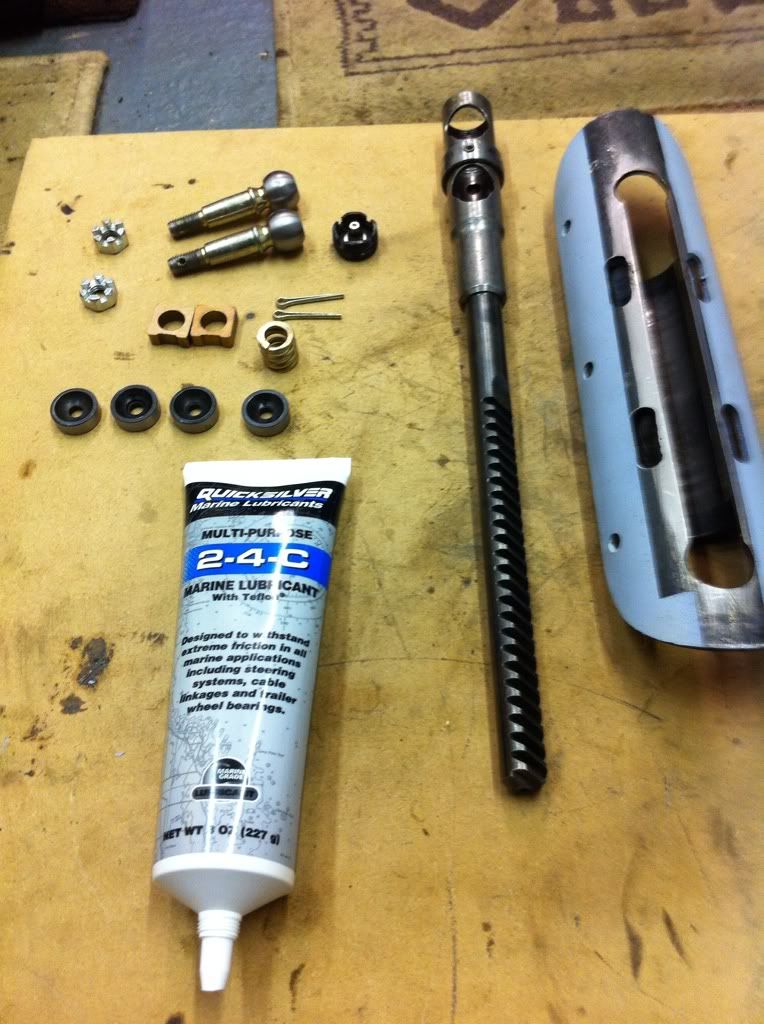 First thing to go back in was a cup, 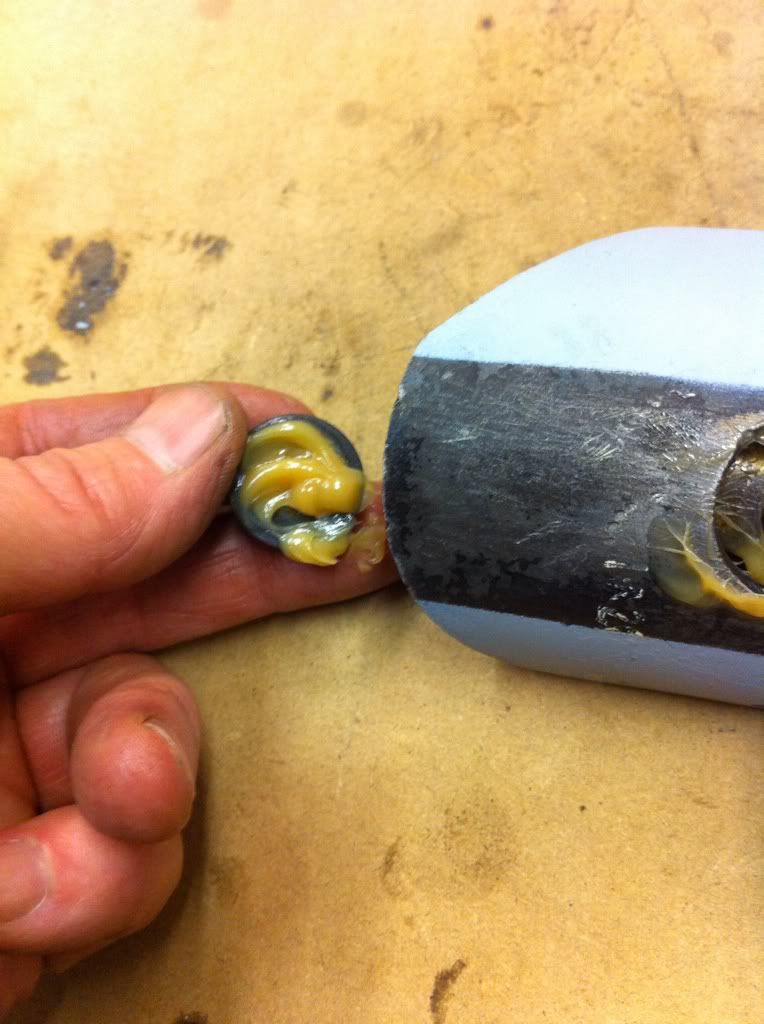 Followed by a ball pin, 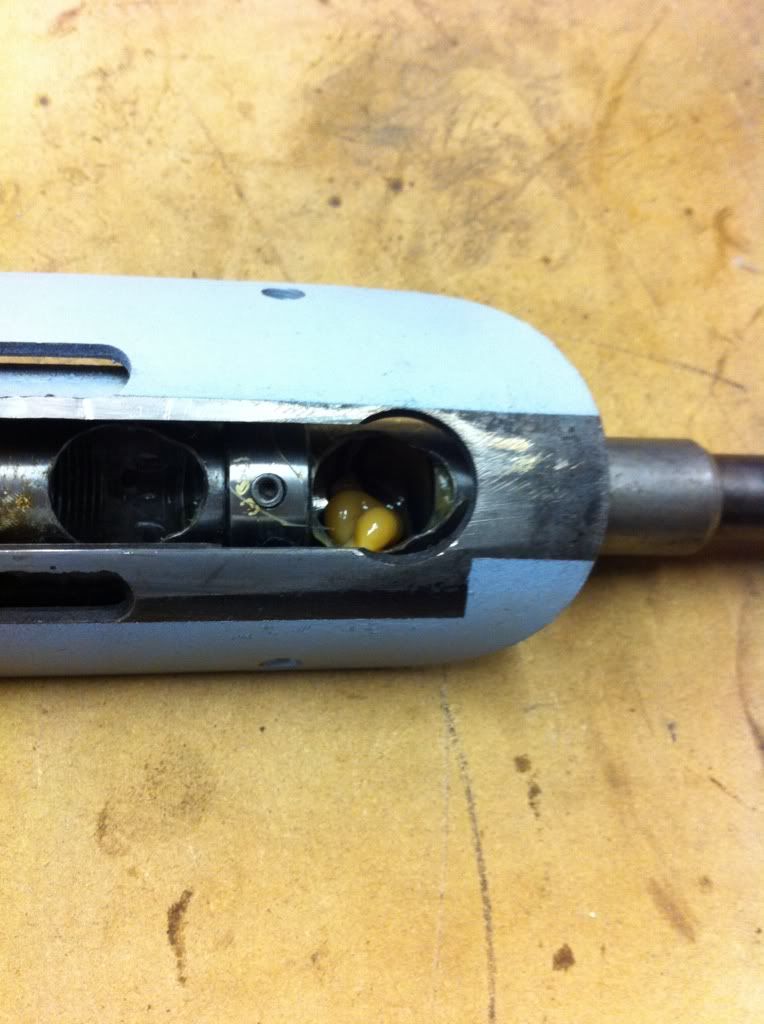 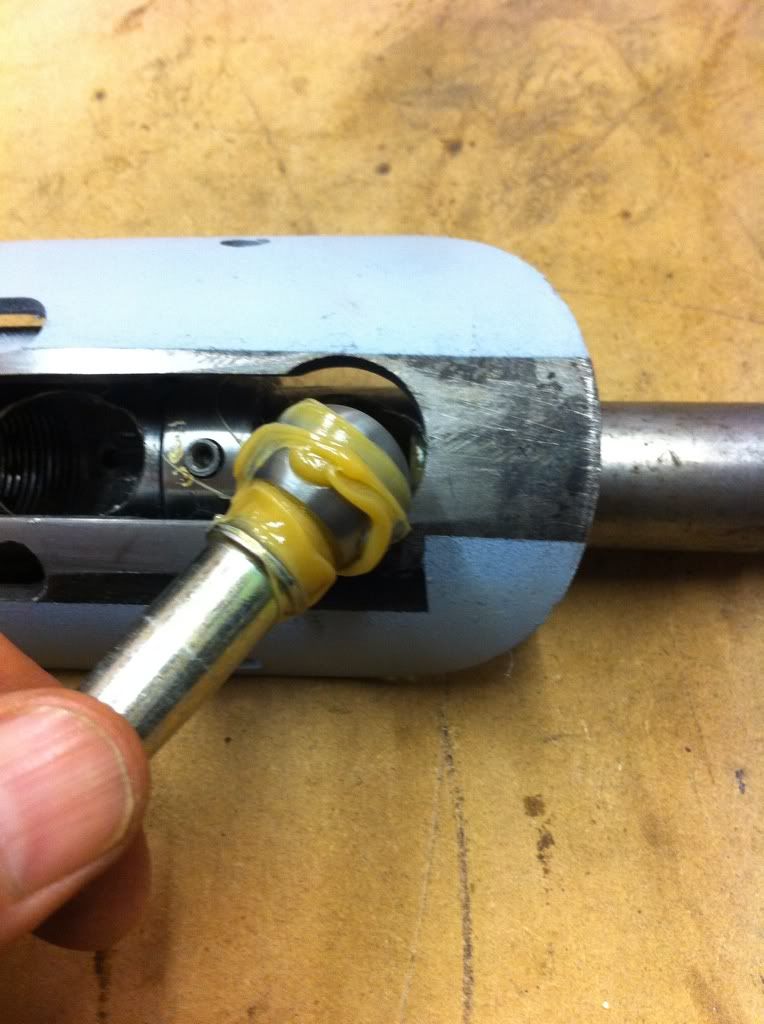 Then another cup,the spring and sleeve,  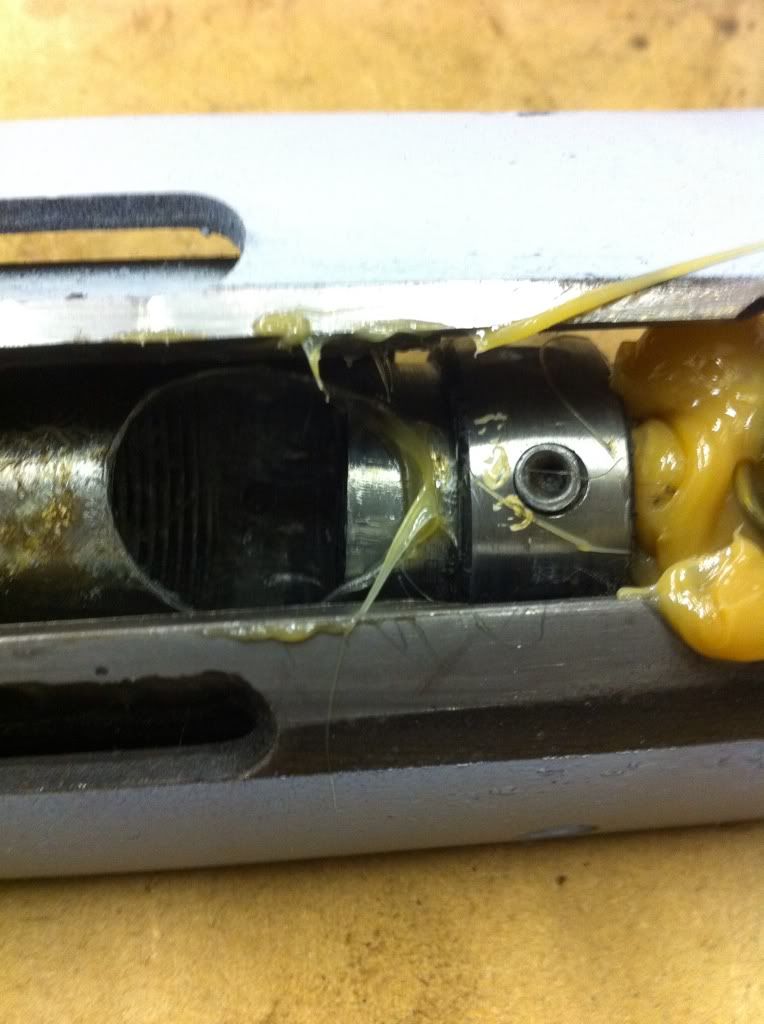 Another cup and ball pin, 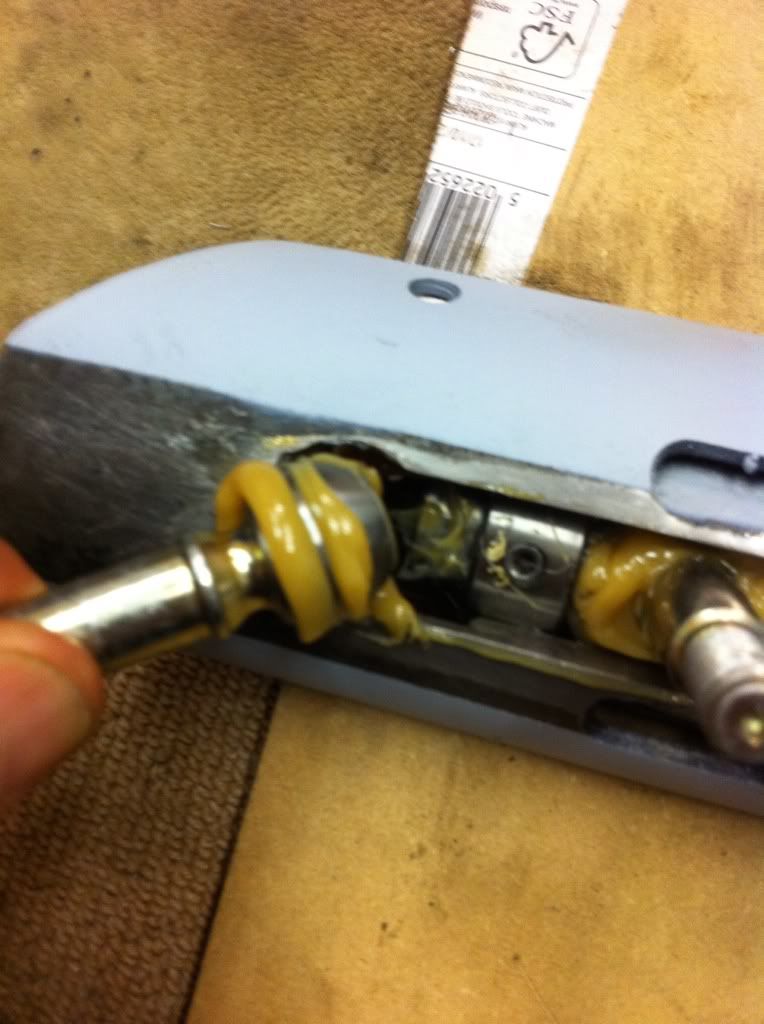 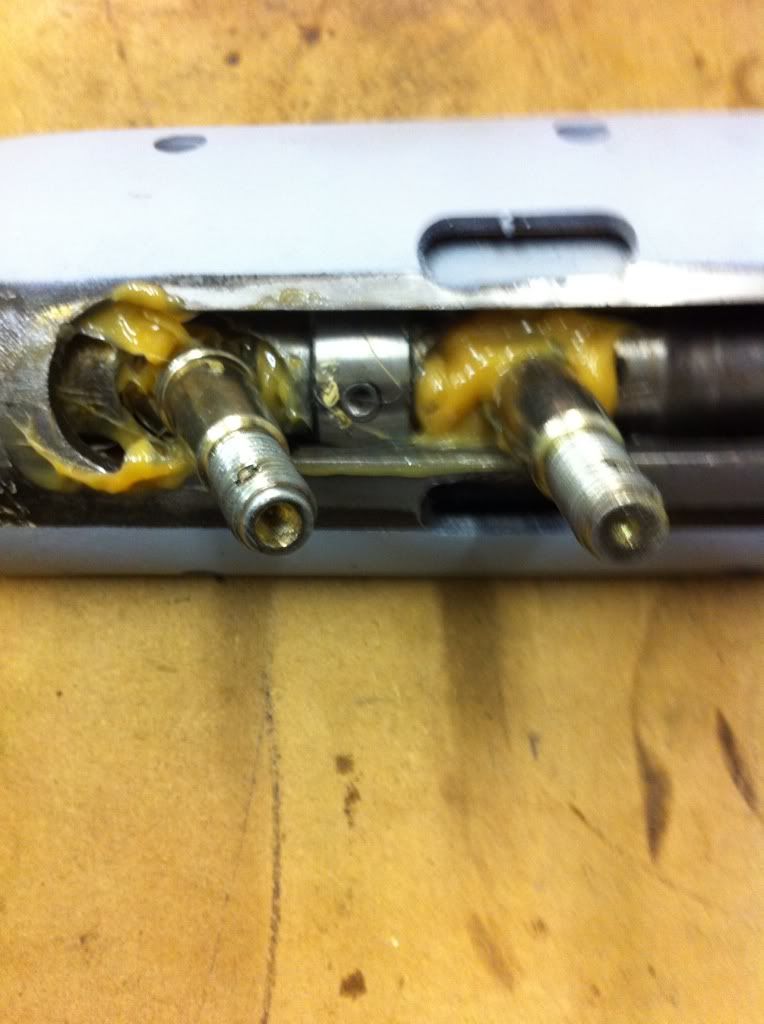 The last cup and lastly the nut, 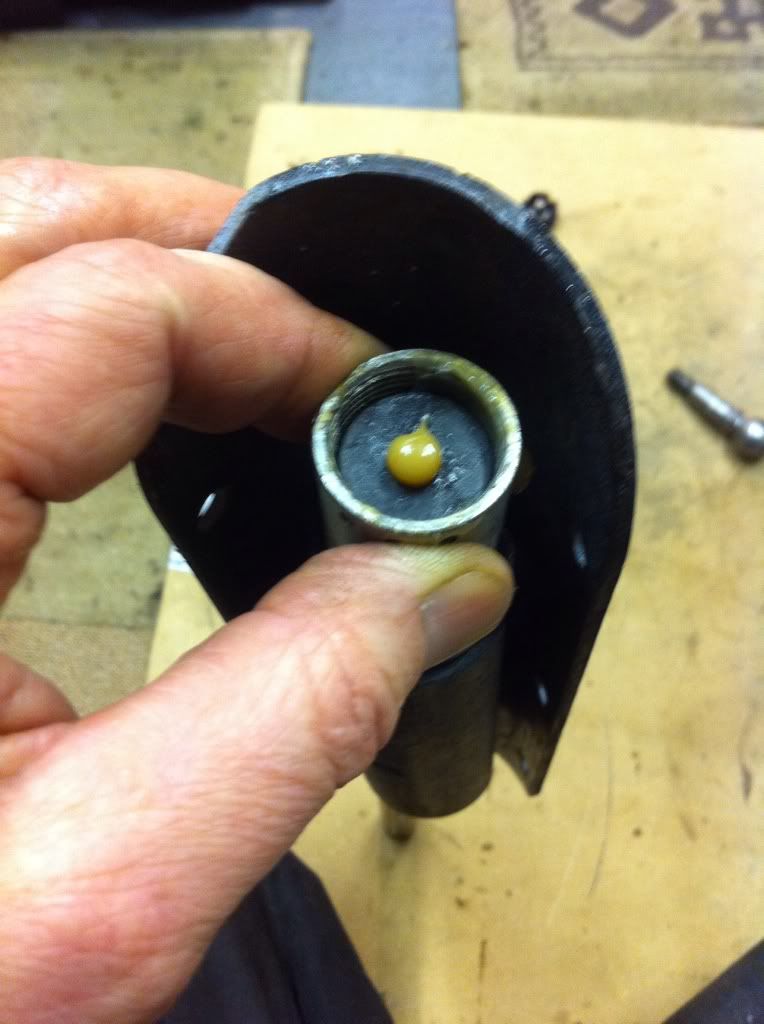 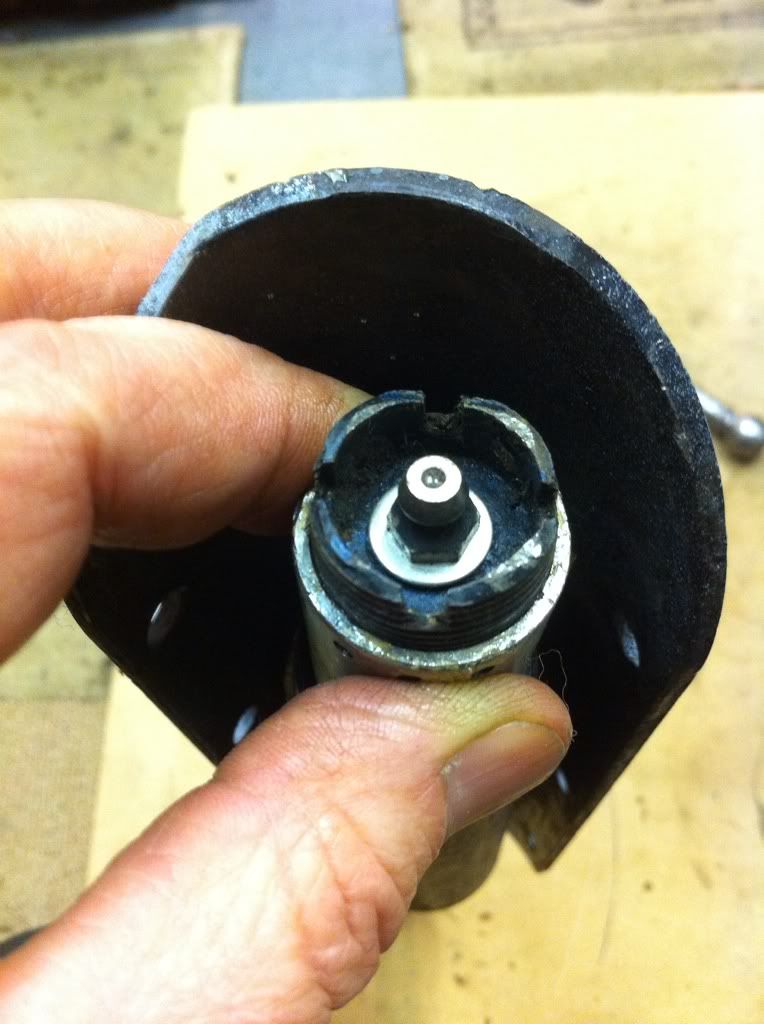 You can see in the end of the nut I have fitted a grease nipple.Right or wrong,I have drilled three small holes in the rack just before the last ball pin.The idea is to remove the plate holding the shock absorber on,and pump some grease into it,thus greasing the guide ring tube. 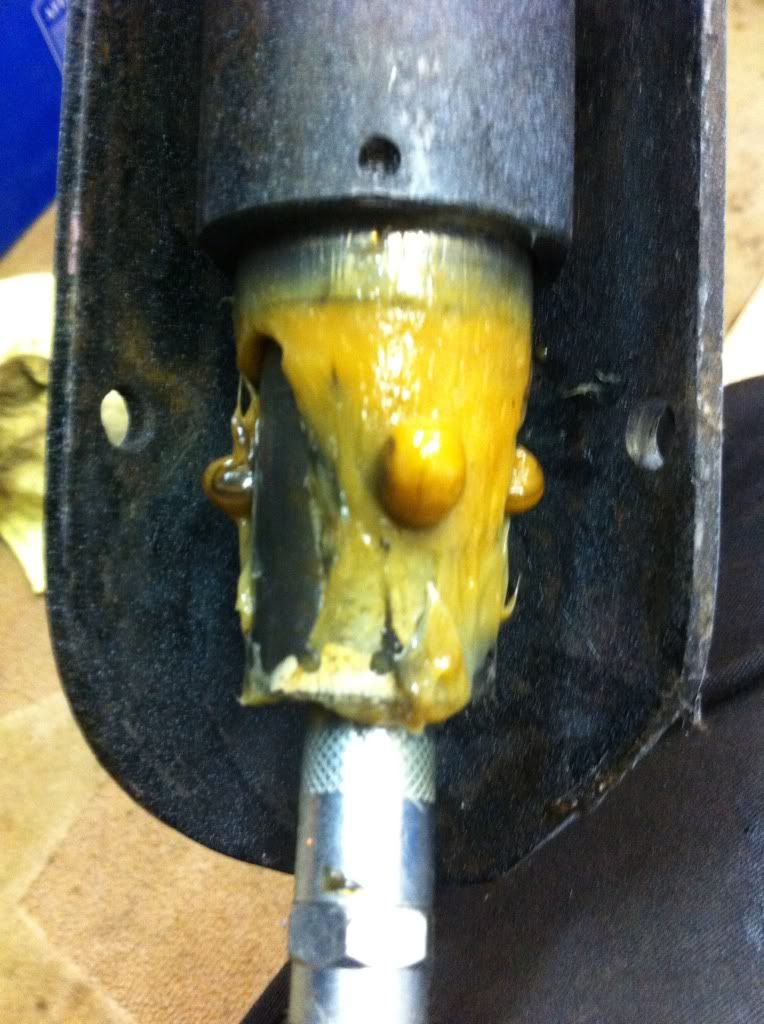 The rack is now ready to put back into the axle. 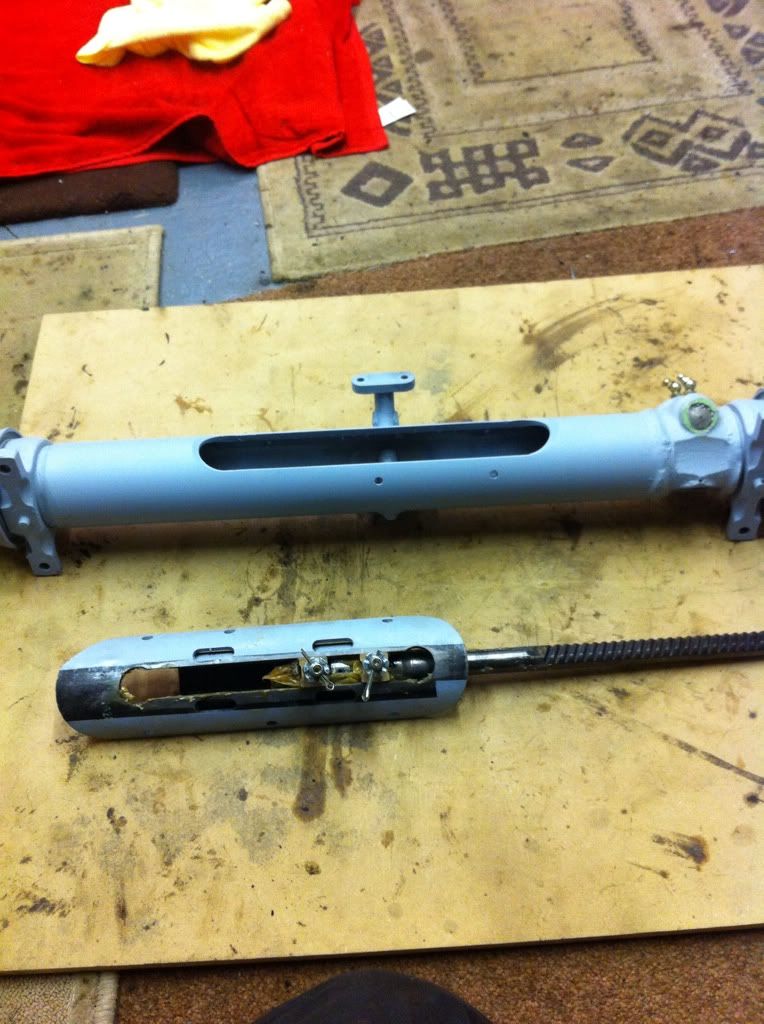 It slides in,tilting the one end up, 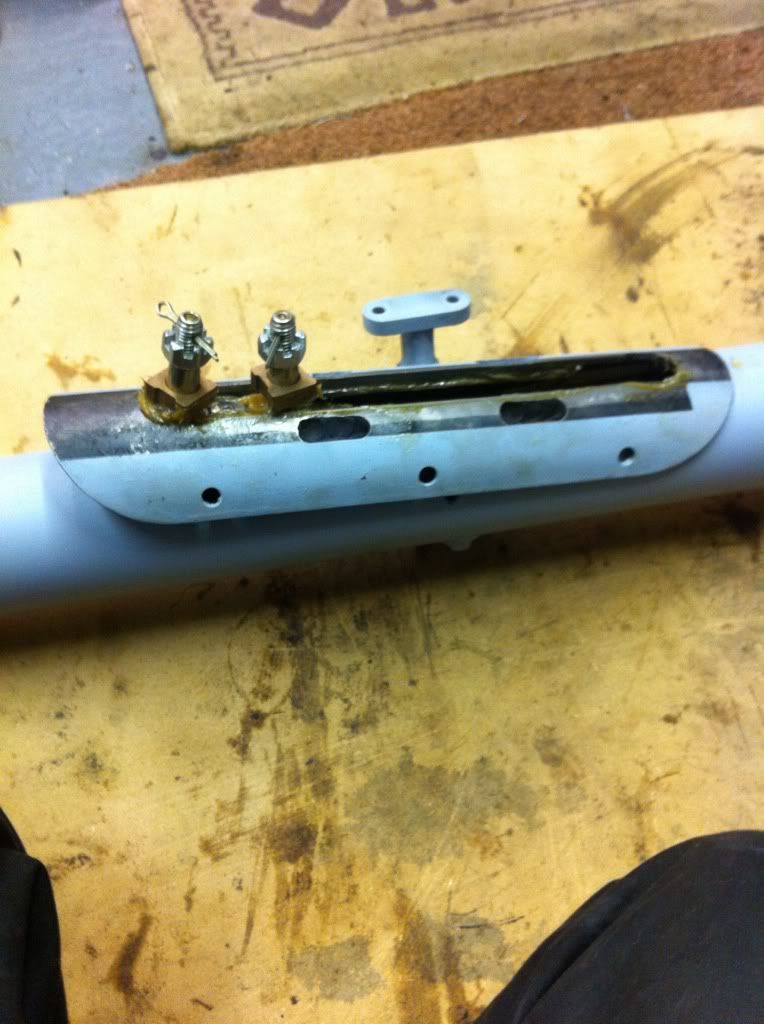 And drops into place, 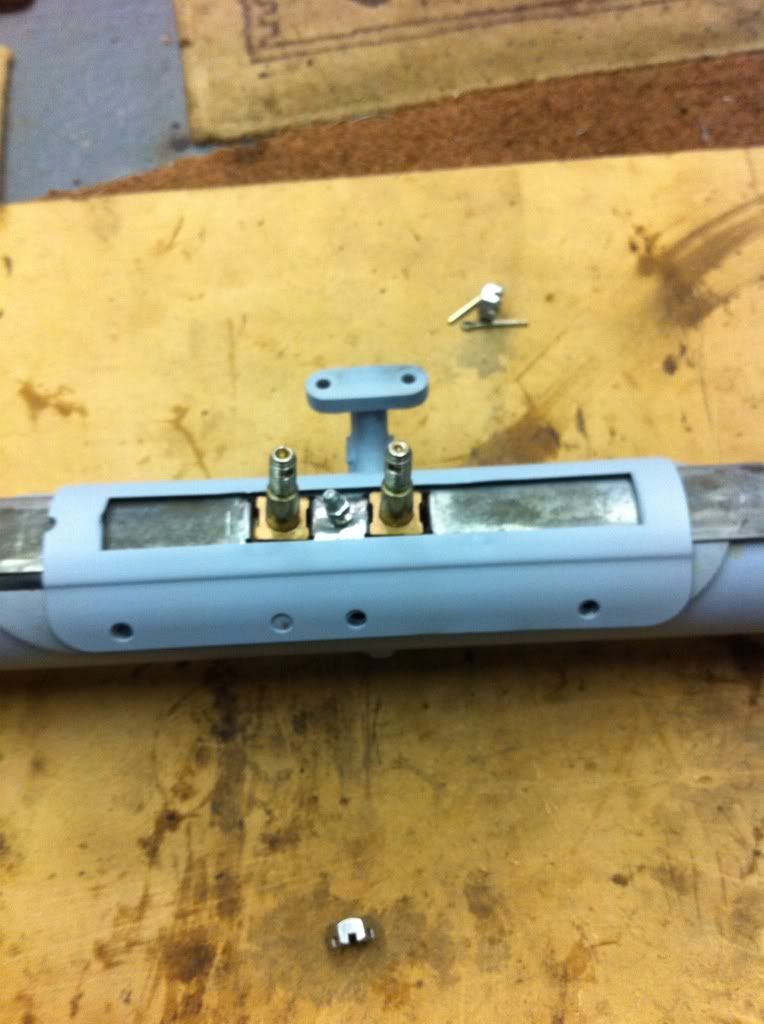 Now bolt it back onto the axle,job done. 
_________________

|
| February 7th, 2012, 5:13 pm |

|
|
|
Neil
super slot
Joined: November 28th, 2008, 11:14 pm
Posts: 8797
Location: Cornwall, UK
|
Re: Dave 411's 1967 AK350. I know i should have put this one before the rack,but hey ho  The pinion gear bushing and ball bearing were well worn, 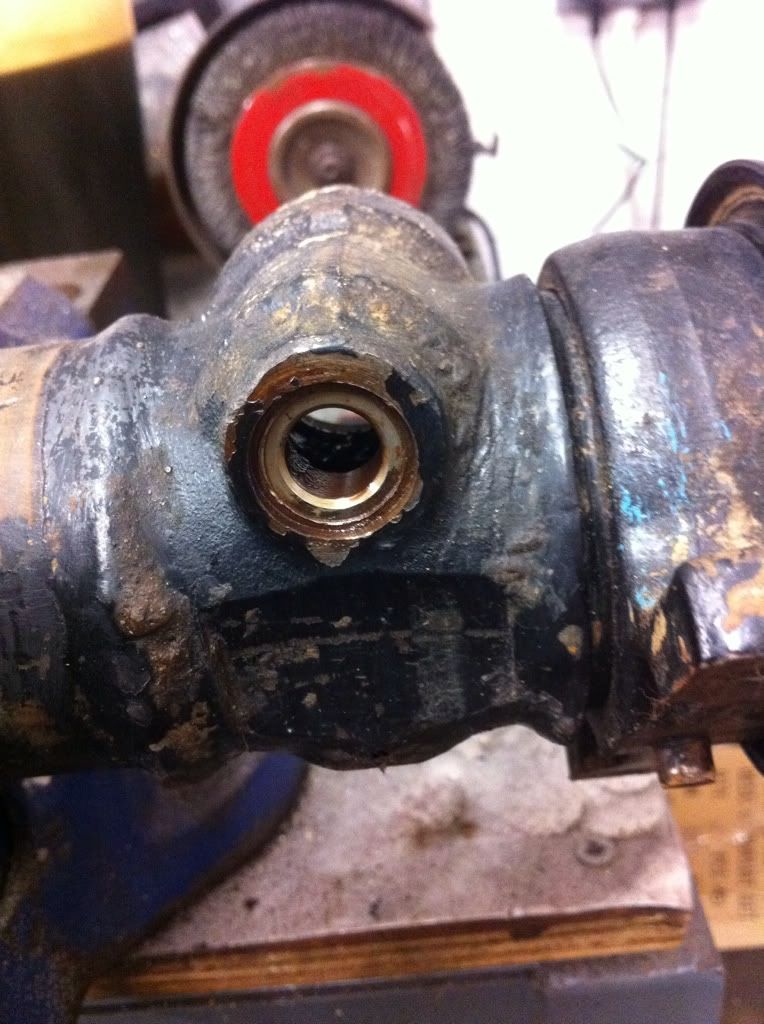 So the bushing was removed,after knocking the welch plug out of course. 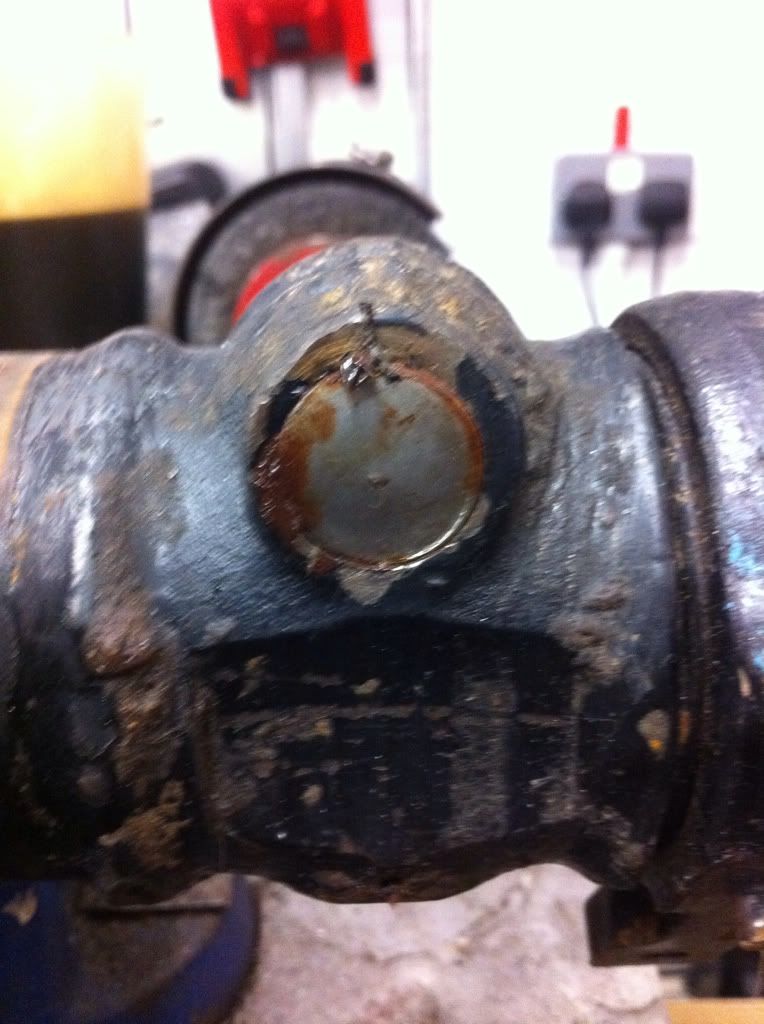 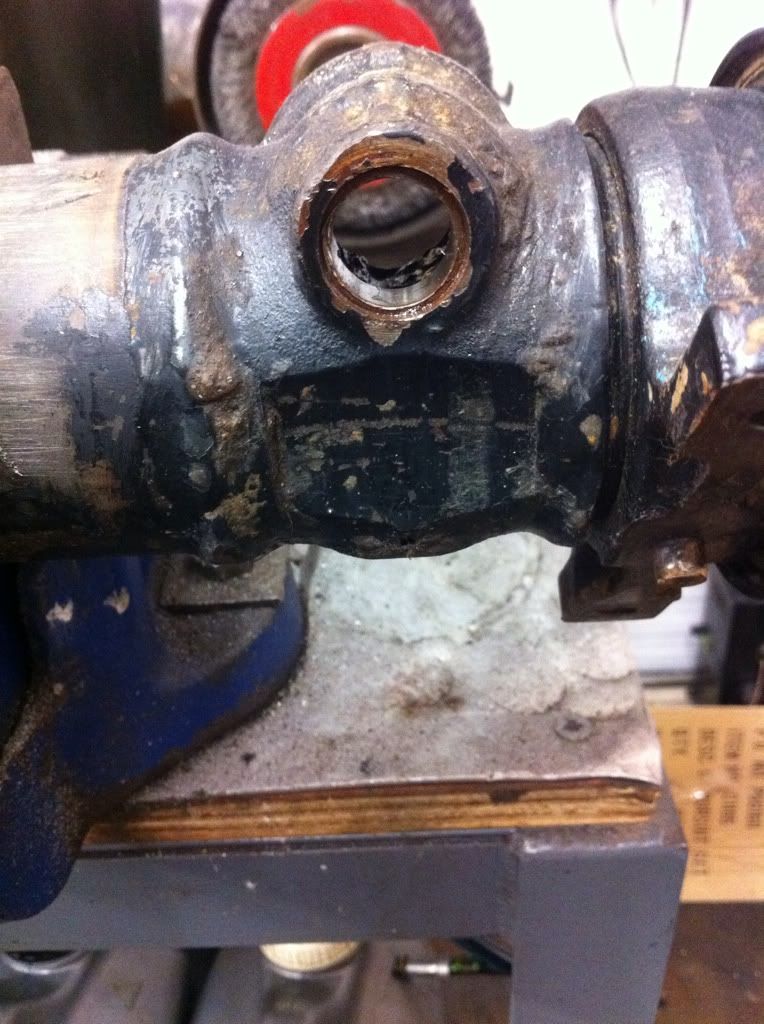 A new pinon and lower bush from Ecas did the job.The ball bearing in not removable from the pinion shaft,it appears that the inner race is acctually part of the shaft  ,God knows why. 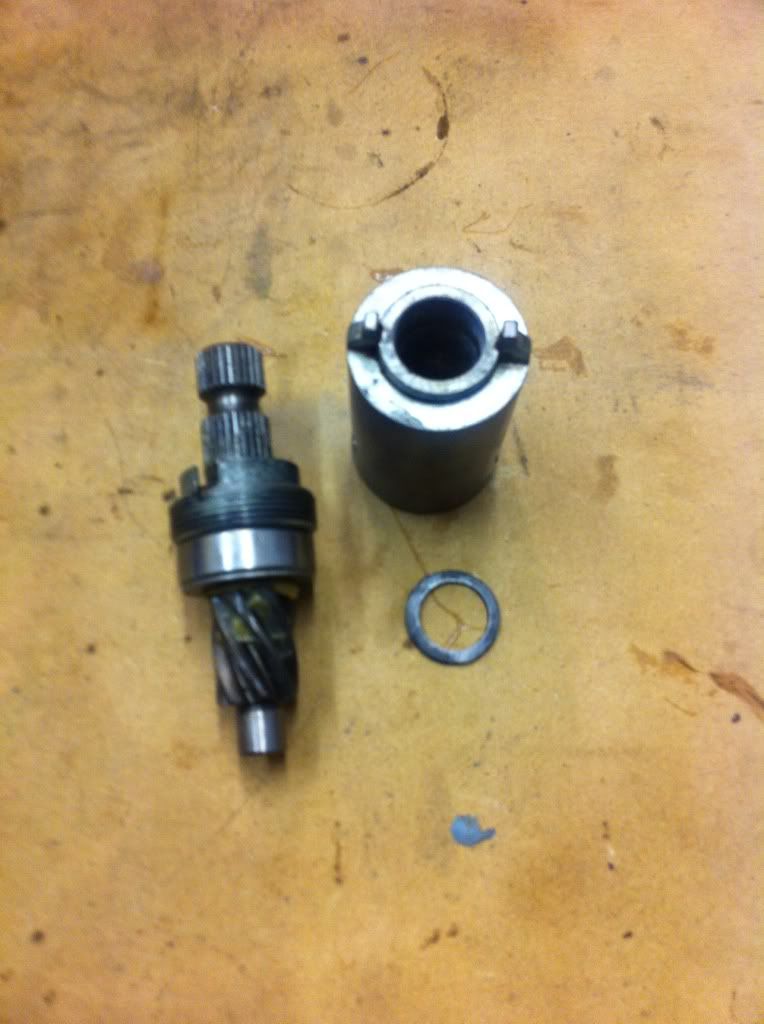 New pinion greased and ready to go in.I decided to use the old retaining nut and felt wiper.The felt was in good condition,and as grease nipples were now fitted,courtesy of Subaru Pete from Monmouth,no muck would be getting in there now. 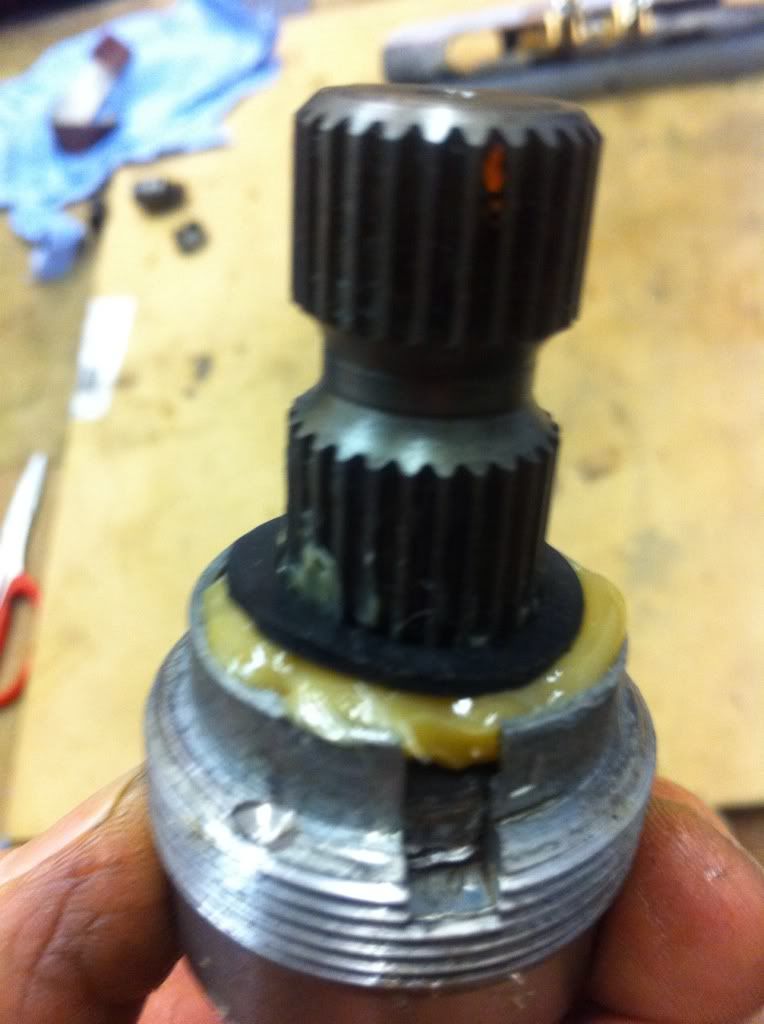 Pinion in place,dont forget to stake the retaining nut to the axle, 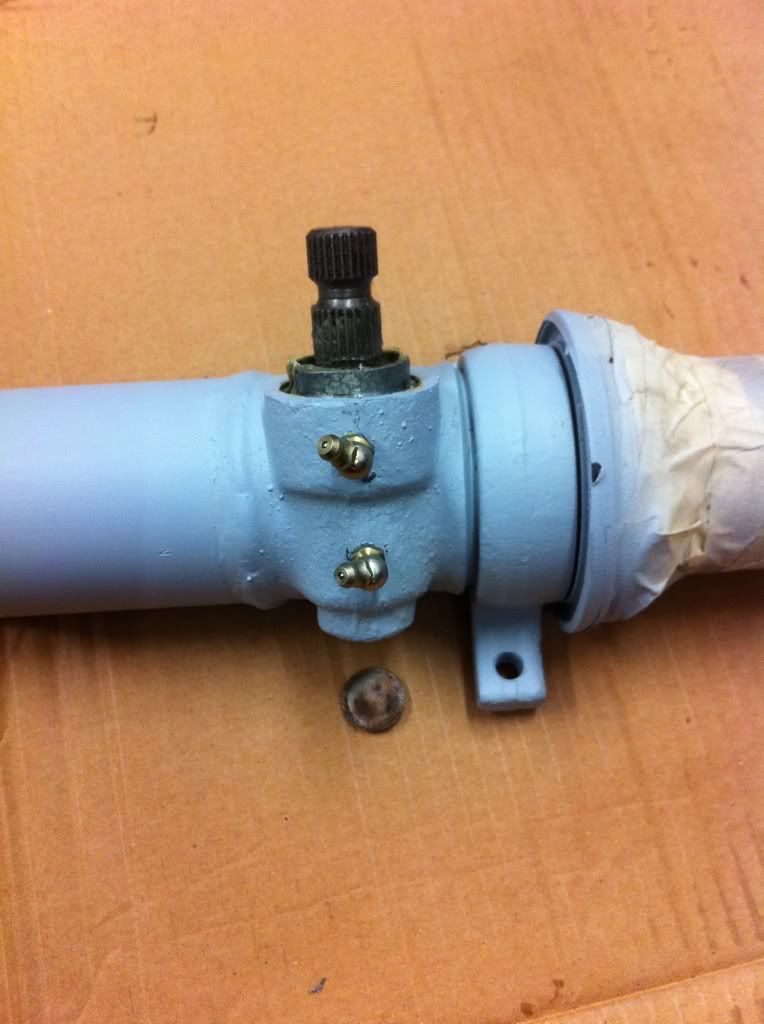 And greased ready for the welch plug to go in. 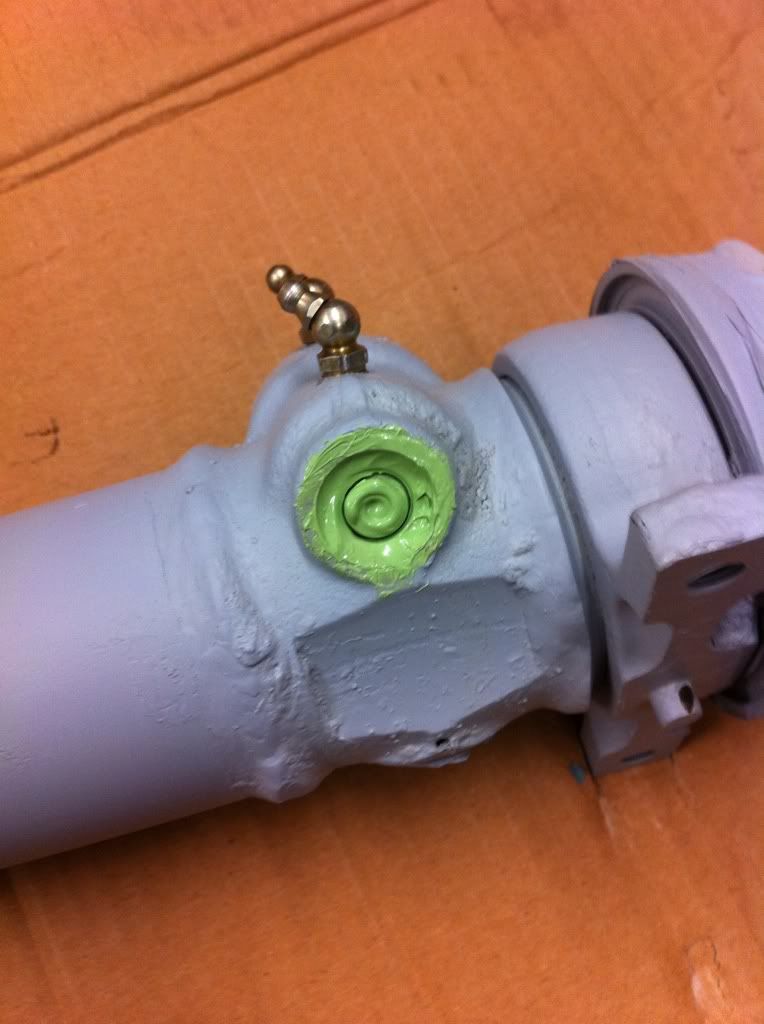 Next to go in is the rack "tensioner".This goes in from the back/bottom of the axle and it puts tension on the rack to mesh it with the pinion gear. 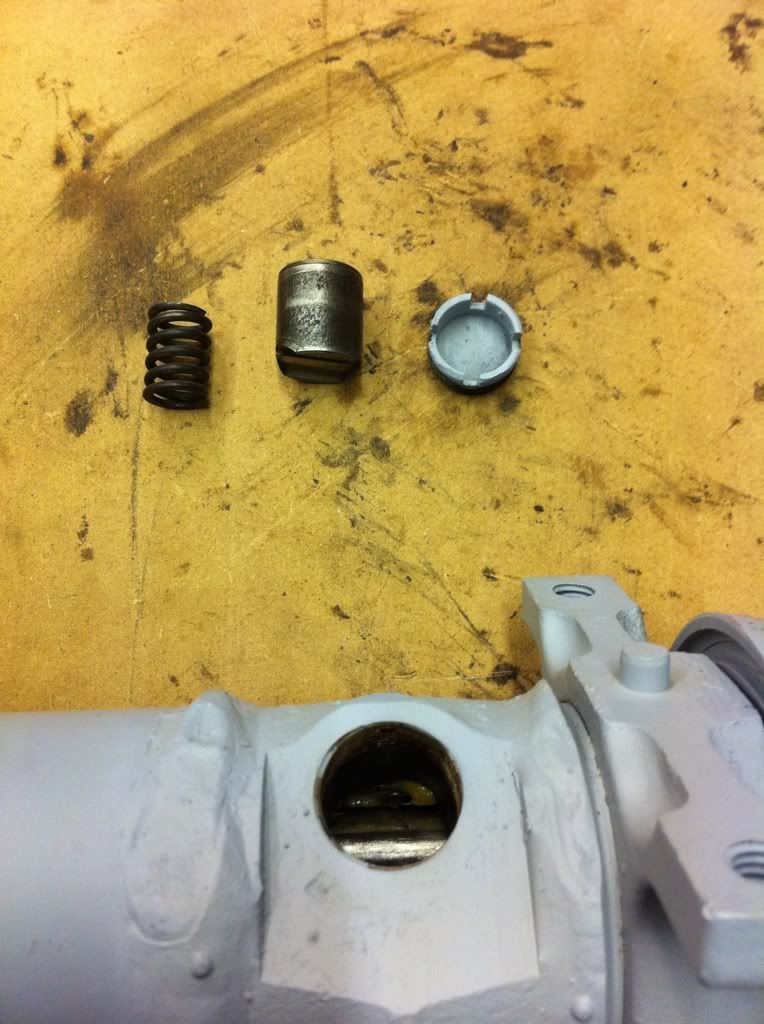 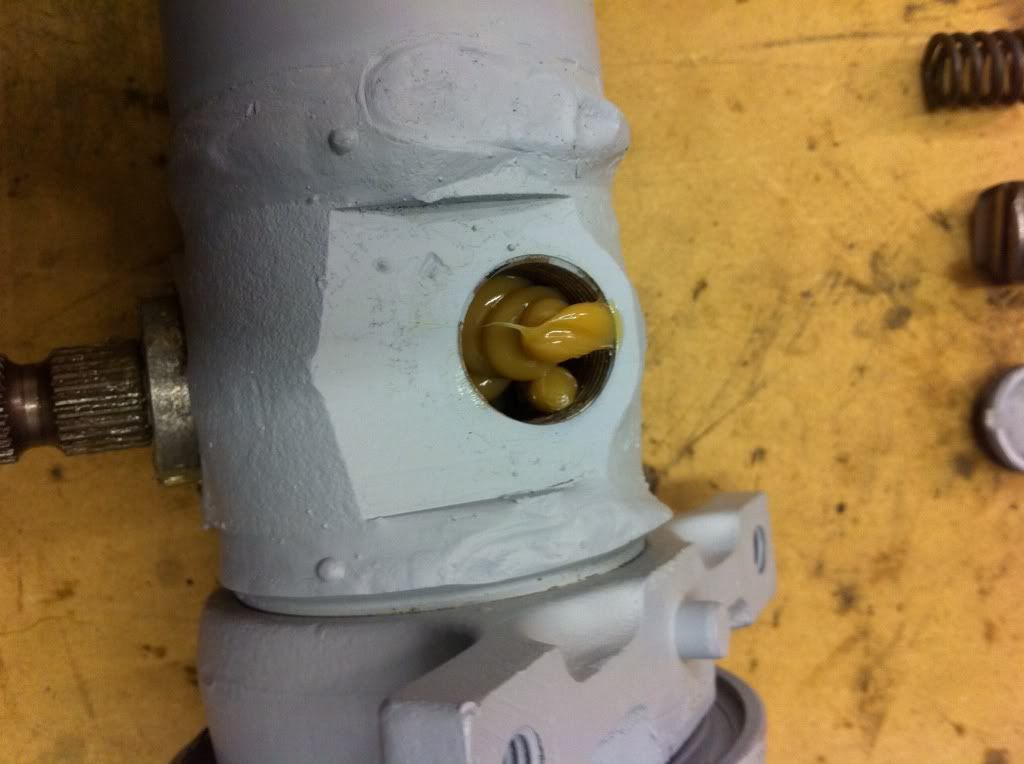 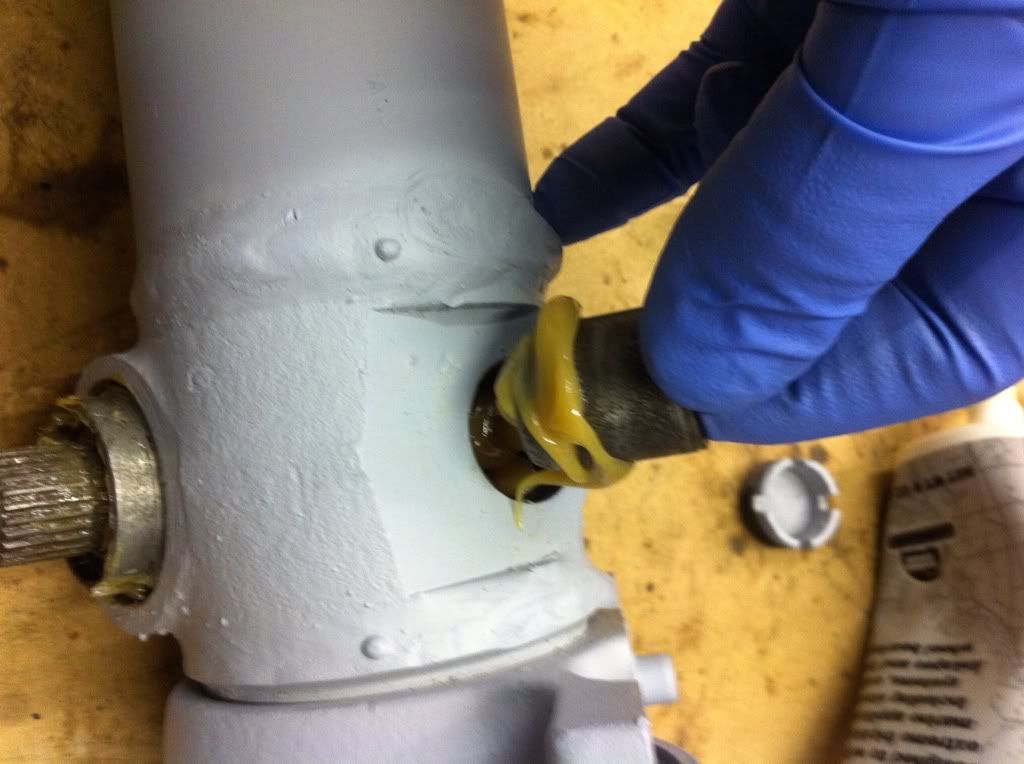 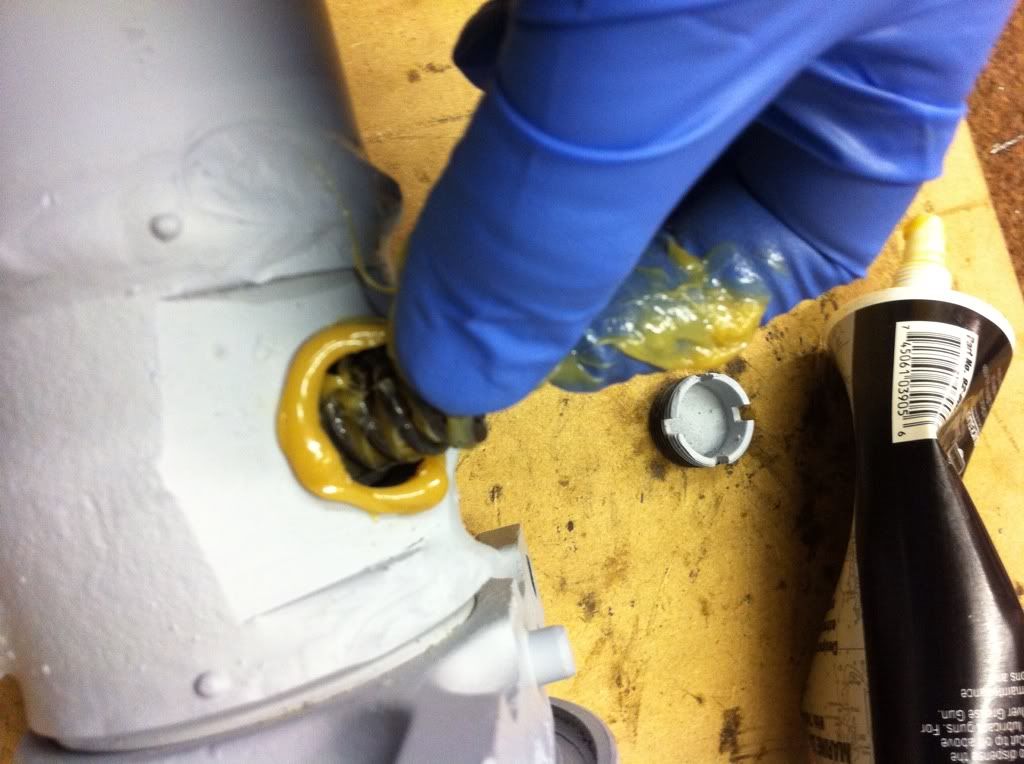 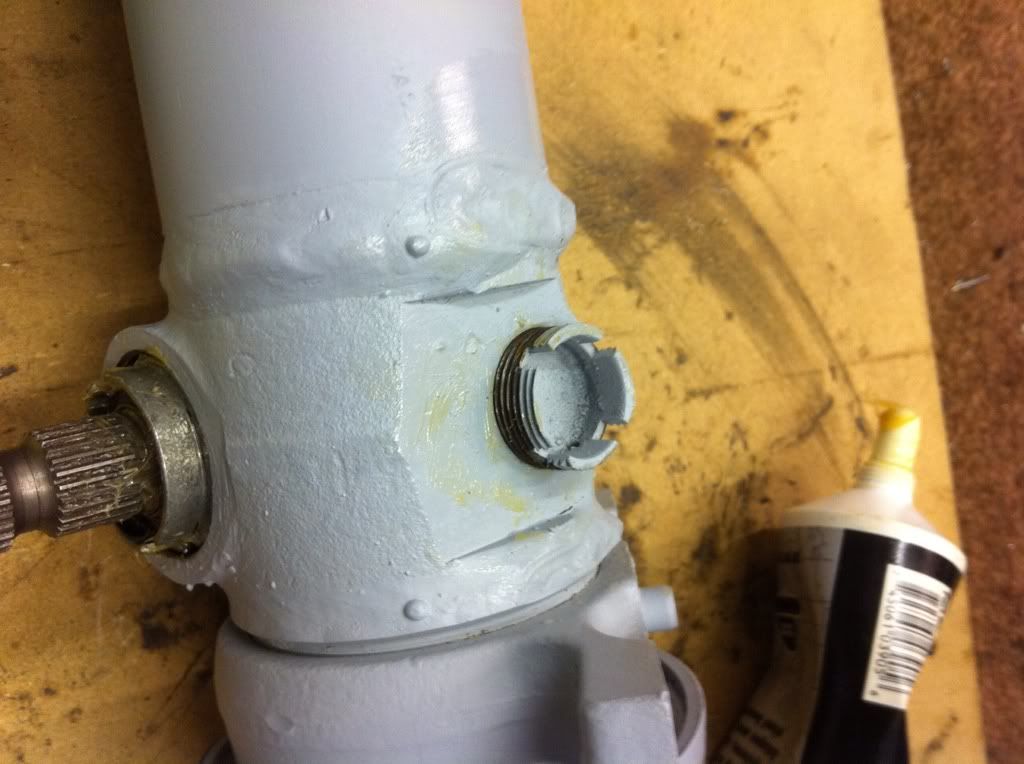 You can just see in the first pic that theguide has a round cut away,this has to go in correctly,as its this that the back of the rack runs on. Once it all goes in,I turned the pinon to move the rack from lock to lock about half a dozen times,felt good. To tension it correctly,I screwed the tensioner nut in slowly as I was turning the pinion until I felt the gears"over meshing",then just backed it off until it felt smooth.At this point,there was a tiny amount of free play,but with all the grease in there its hard to tell,but it "felt" fine,you know what I mean. So,thats it,my first steering rack overhaul.Not difficult really. Just one thing I forgot to mention,adjusting the nut on the end of the steering rack.It has to be done before you put the rack back ito the axle,and a split pin put in.I just tightened it up so the ball pins felt nice and snug,not too tight so they lock up,but not too loose so they flop about like a c!!! in a sock. 
_________________
|
| February 7th, 2012, 5:18 pm |
|
|
|
Neil
super slot
Joined: November 28th, 2008, 11:14 pm
Posts: 8797
Location: Cornwall, UK
|
Re: Dave 411's 1967 AK350. As I had some spare time yesterday,I decided to clean off the front arms and hubs. 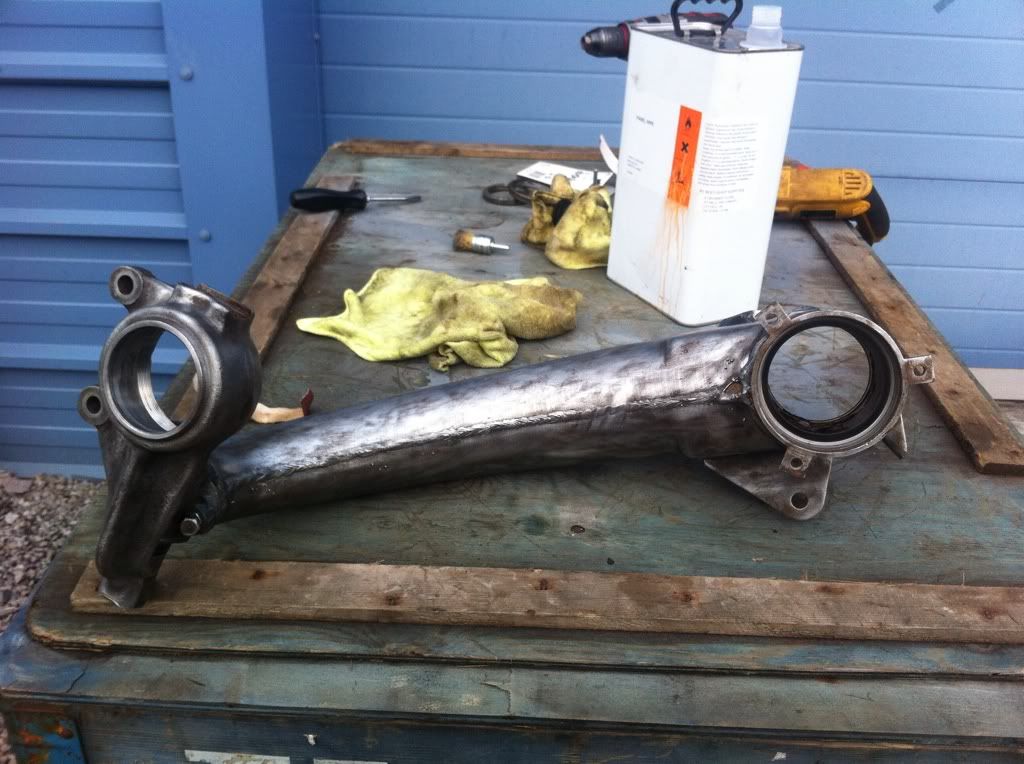 Gave them a good coating of etch primer,looking good. 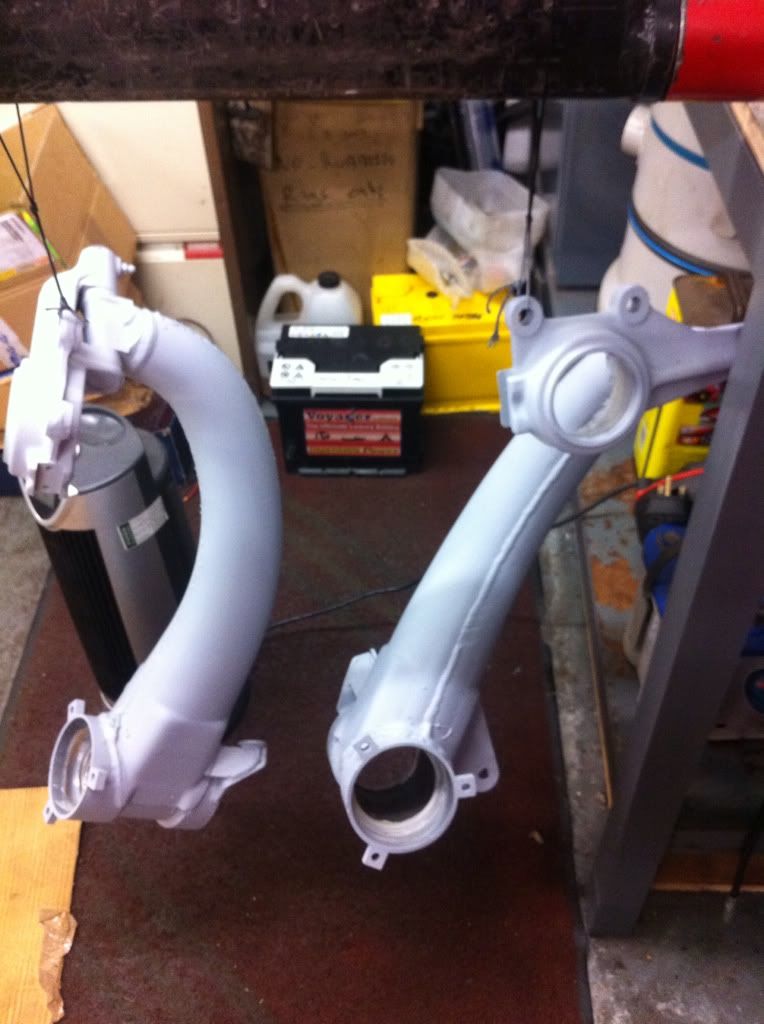 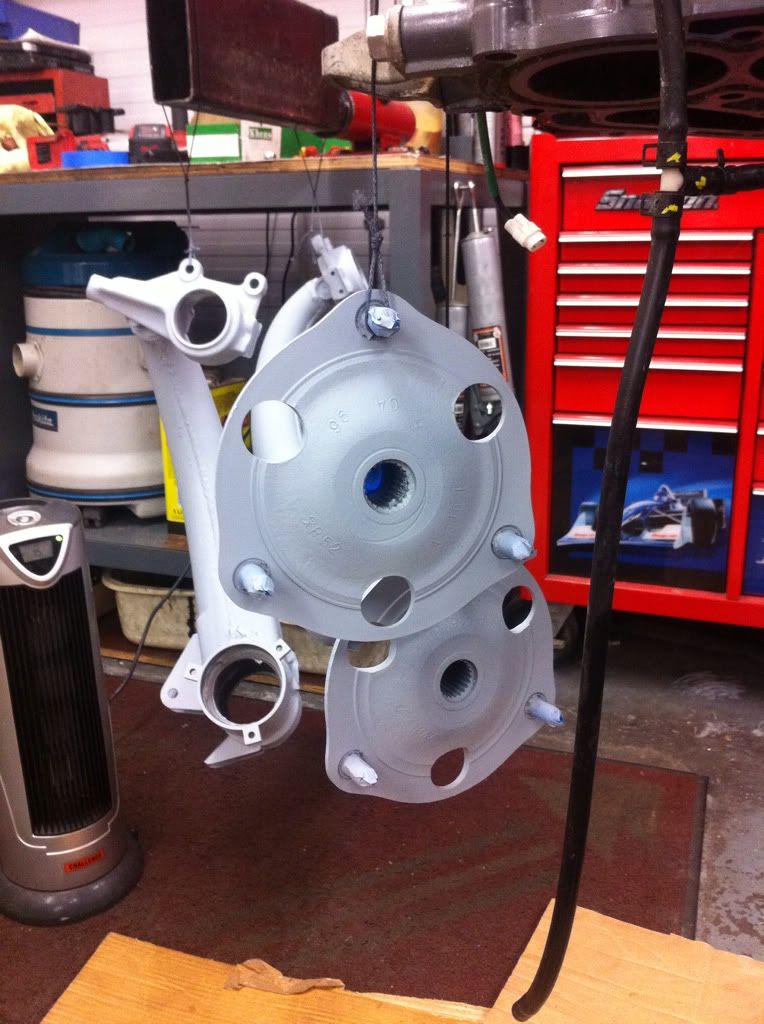
_________________
|
| February 7th, 2012, 5:19 pm |
|
|
|
Neil
super slot
Joined: November 28th, 2008, 11:14 pm
Posts: 8797
Location: Cornwall, UK
|
Re: Dave 411's 1967 AK350. So I dragged the gearbox into the garage and started to remove the brake drums(well one actually),and found this  : 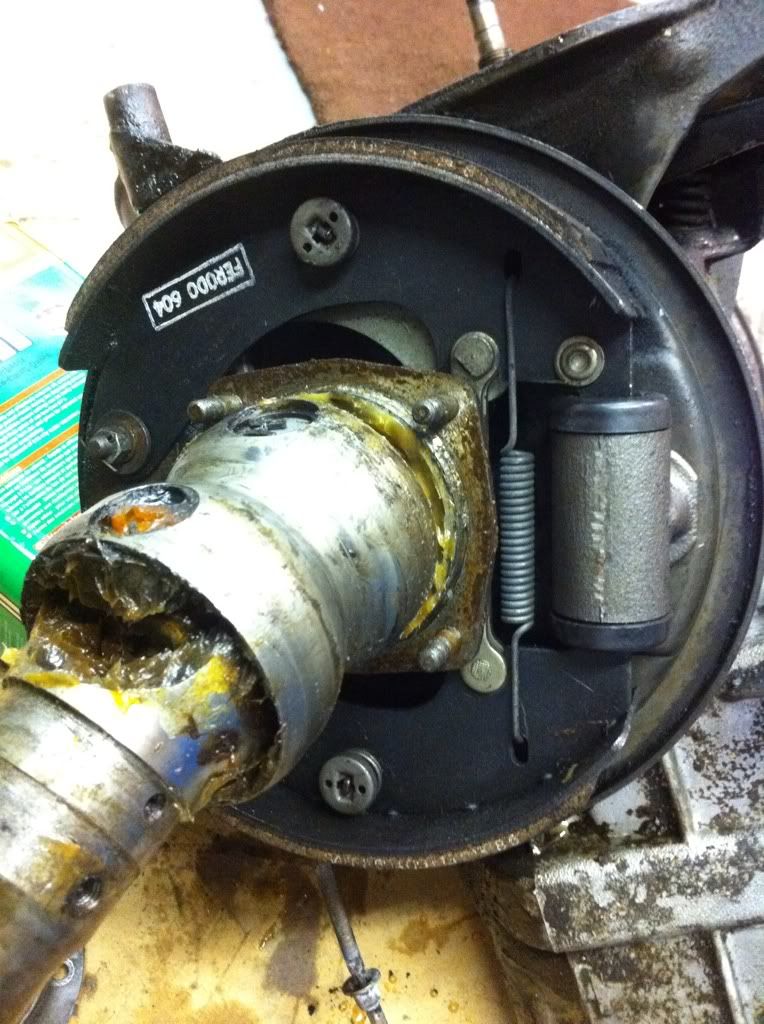 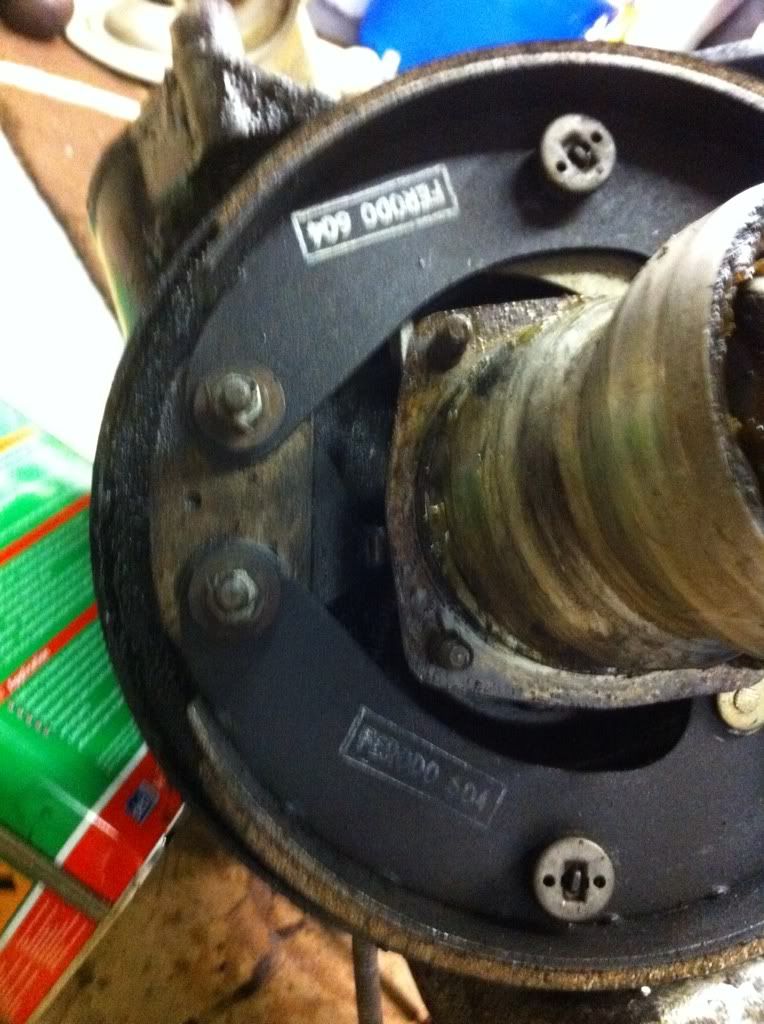 Probably not that noticeable on these pics,but the oil seal on the driveshaft has been leaking and covered the new brake shoes in oil.A great shame,as just before I bought the van,Ronan had spent a fortune on all the braking system.Ah well,never mind,hopefully just an oil seal.
_________________
|
| February 7th, 2012, 5:21 pm |
|
|
|
Neil
super slot
Joined: November 28th, 2008, 11:14 pm
Posts: 8797
Location: Cornwall, UK
|
Re: Dave 411's 1967 AK350. Made a start on the gearbox.Citroen sure did have some weird ideas,like inaccesable nuts! 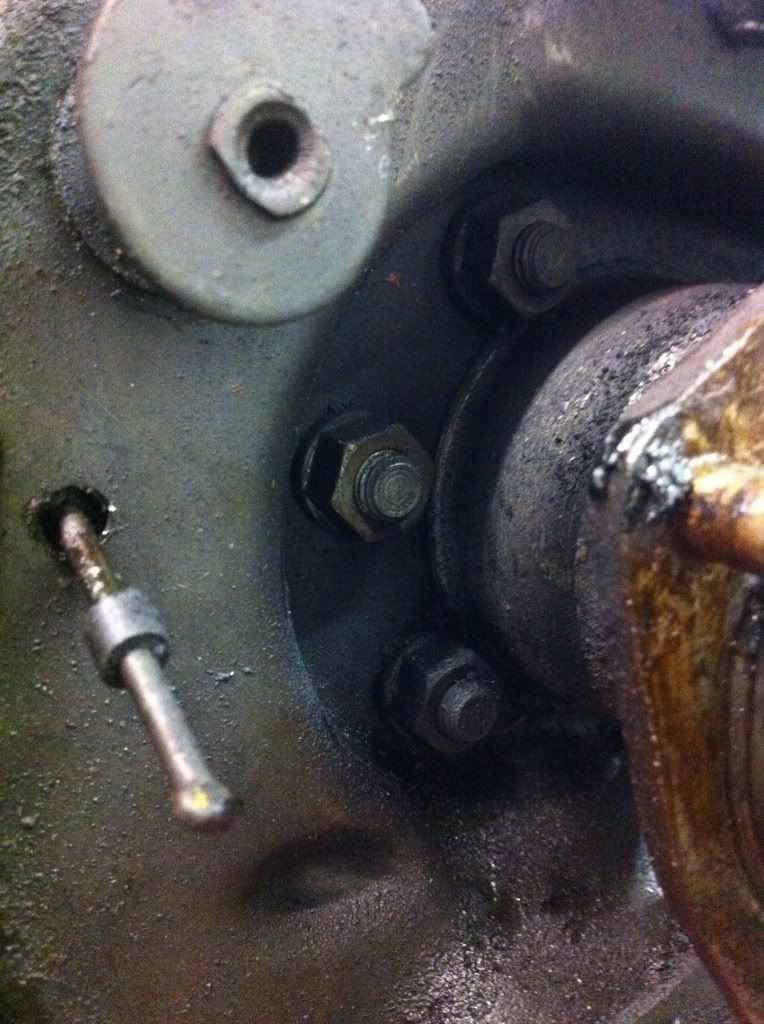 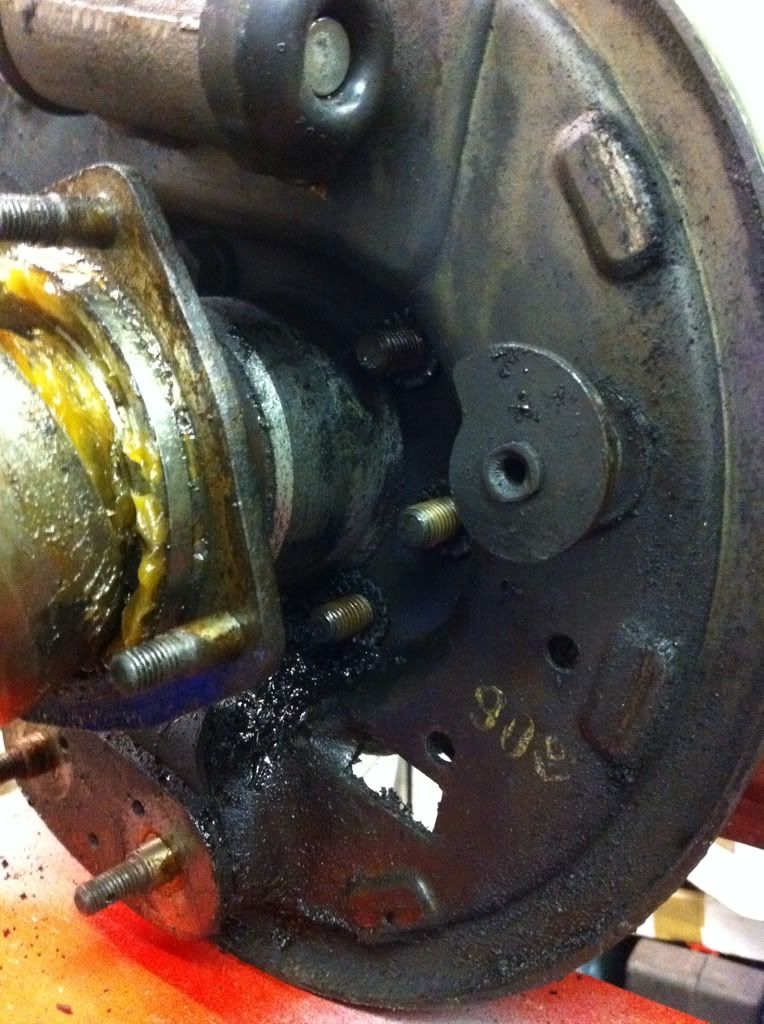 Got them off,pull the whole lot out.Came out fairly easily. 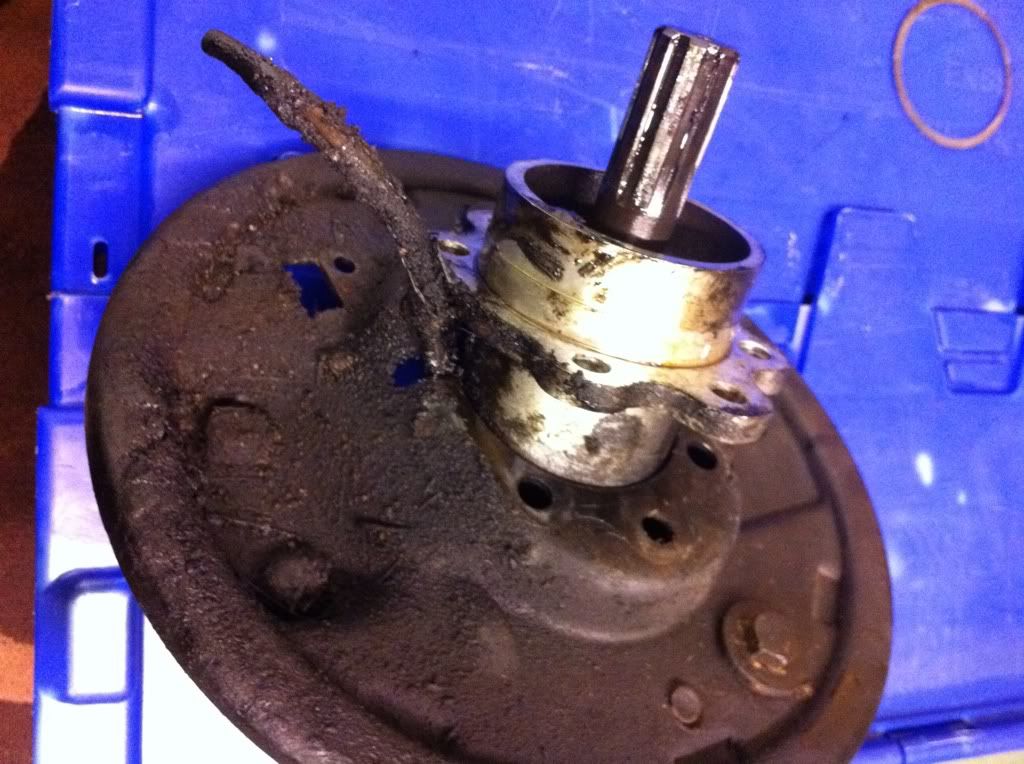 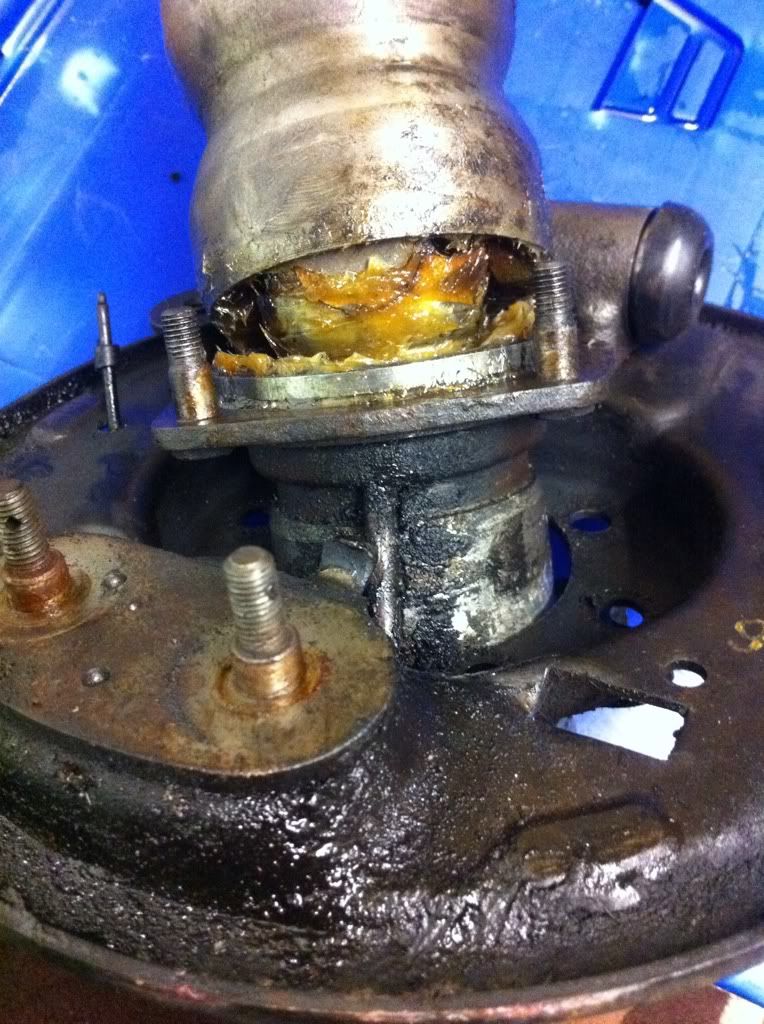 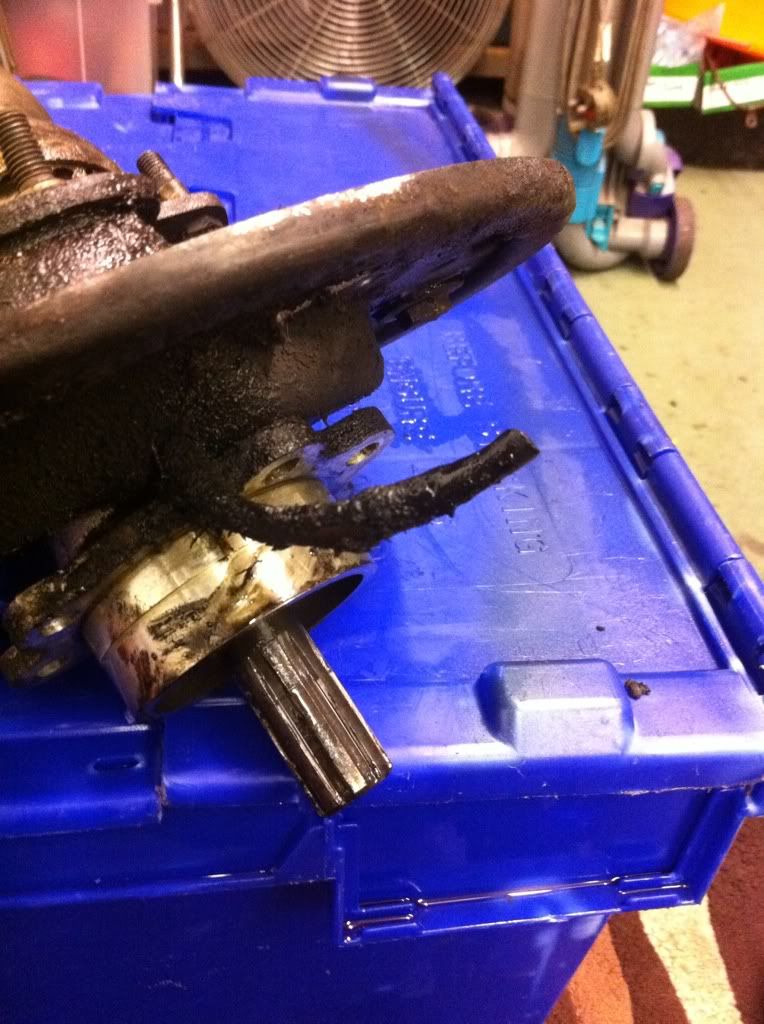 If you look closley at the hub,you can see a pipe coming out of it.That is to take any oil that leaks past the oil seal away from the brake linings.Must be blocked. Now I'm stumped.There's a nut down inside the hub so I need a deep socket to remove it.Don't have one at home,so I'll take it to work and see what we have. 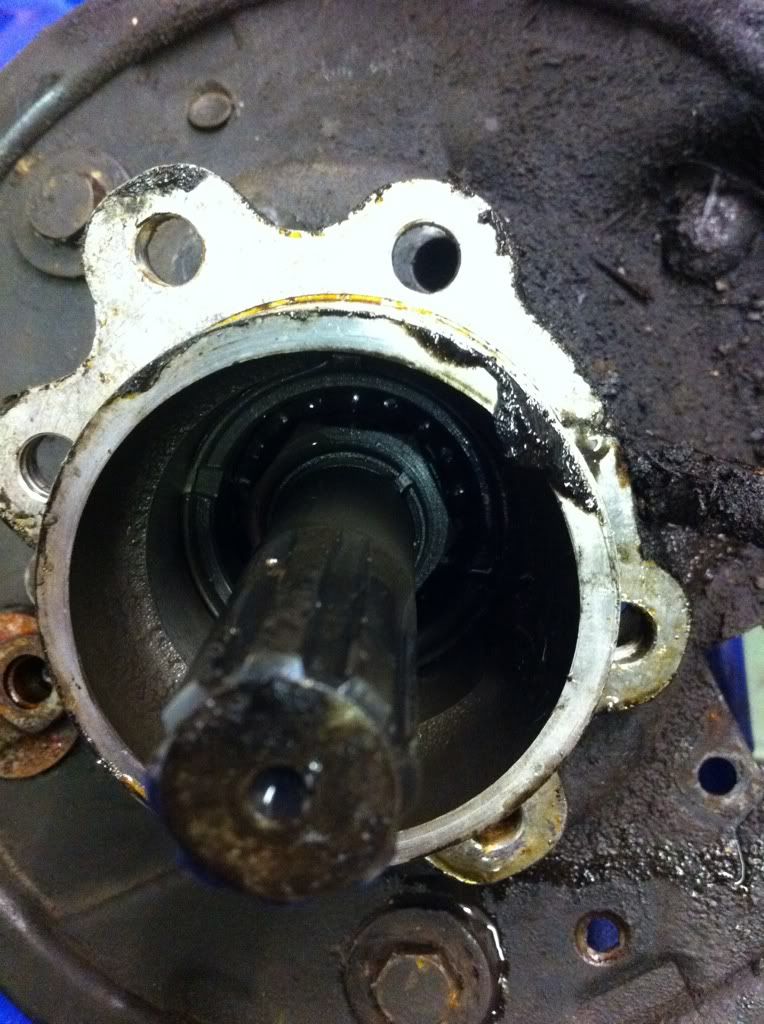 I noticed a stange thing as I was looking at the clutch release bearing.It does'nt sit in the middle of the spigot shaft. 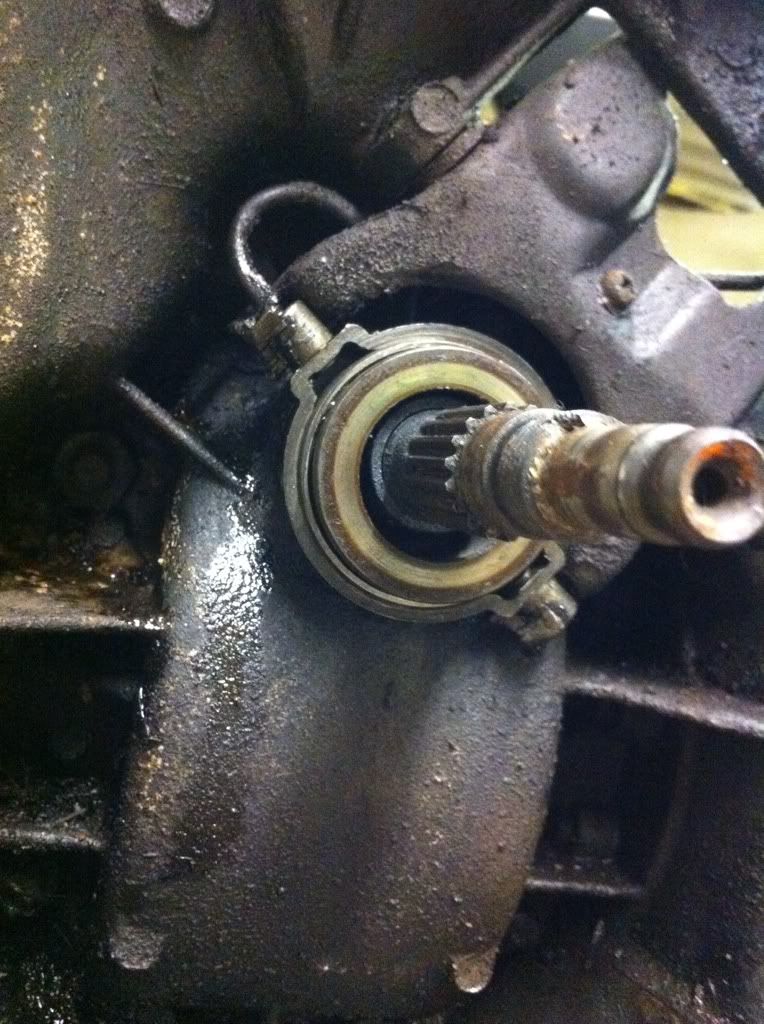 You can just make it out in this pic.I have another gearbox and its the same on that one,so I think it must be correct.
_________________
|
| February 7th, 2012, 5:24 pm |
|
|
|
Neil
super slot
Joined: November 28th, 2008, 11:14 pm
Posts: 8797
Location: Cornwall, UK
|
Re: Dave 411's 1967 AK350. Well,didnt have a deep,deep socket,so made this, 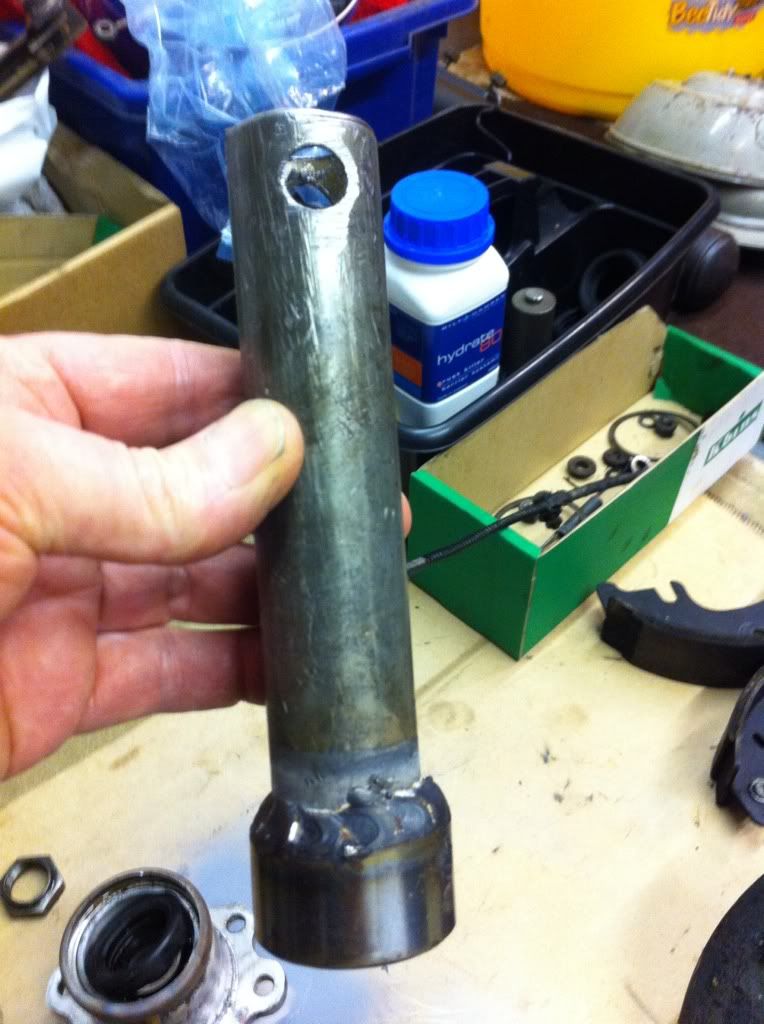 It worked a treat.Just an old socket cut down and welded onto a pipe. It all came apart quite easily,except for getting the driveshaft through the hub bearing.That was tight,very tight. So now its all in bits, 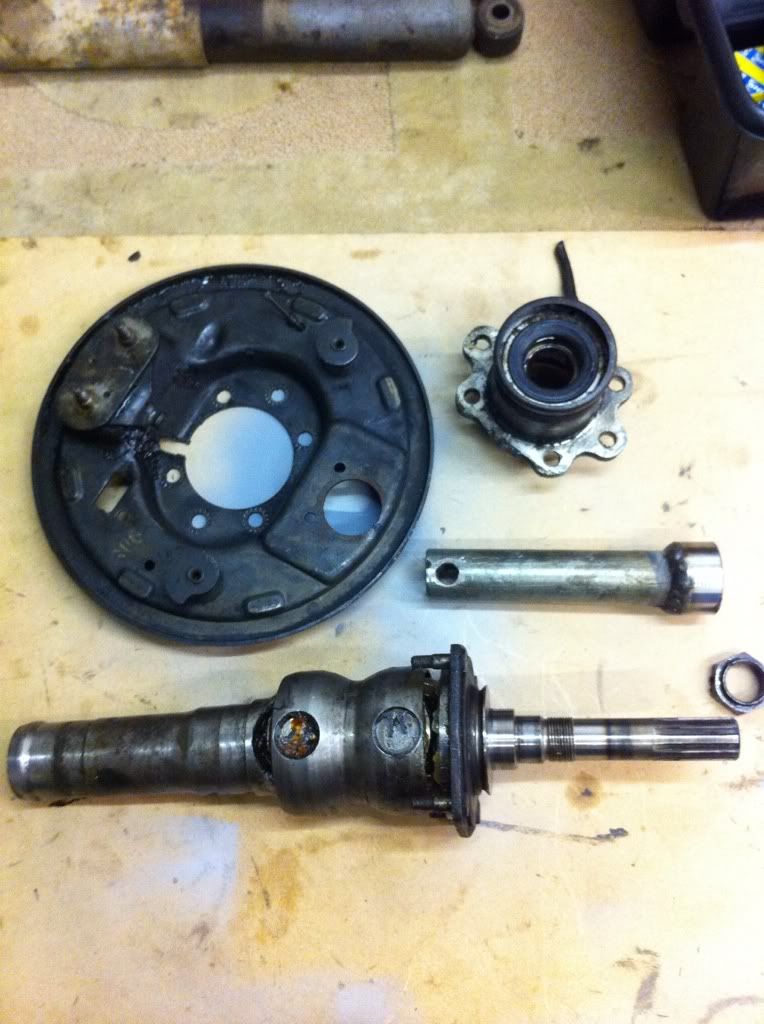 And heres the leaky oil seal. 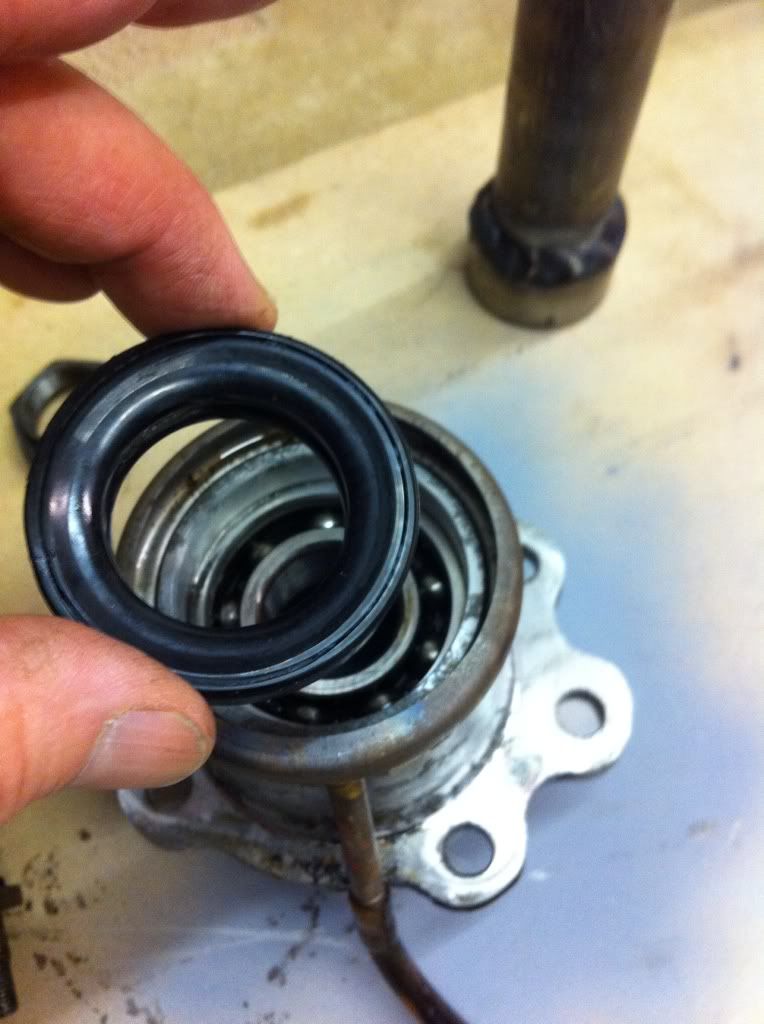 I will order new seals and gaskets from Roy,then re build the hubs etc.I have had the shoes relined,they look ok. One thing that I am sure is not right is the amount of up and down movement in the spigot shaft.It also move in and out slightly, 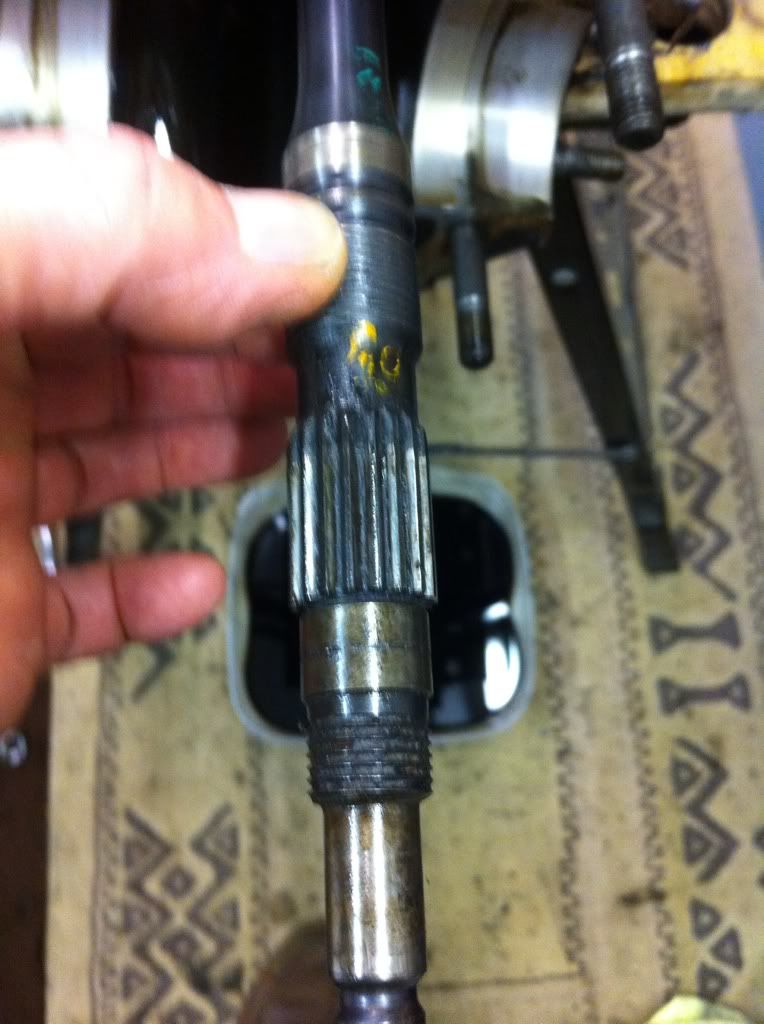 So I stripped the gearbox to have a look inside.Yep,just as I thought,full of gears and shafts and selector forks.I think that there are to many tools neede to strip it fully,and I dont have them,so I will ring the gearbox guru and see what he says. 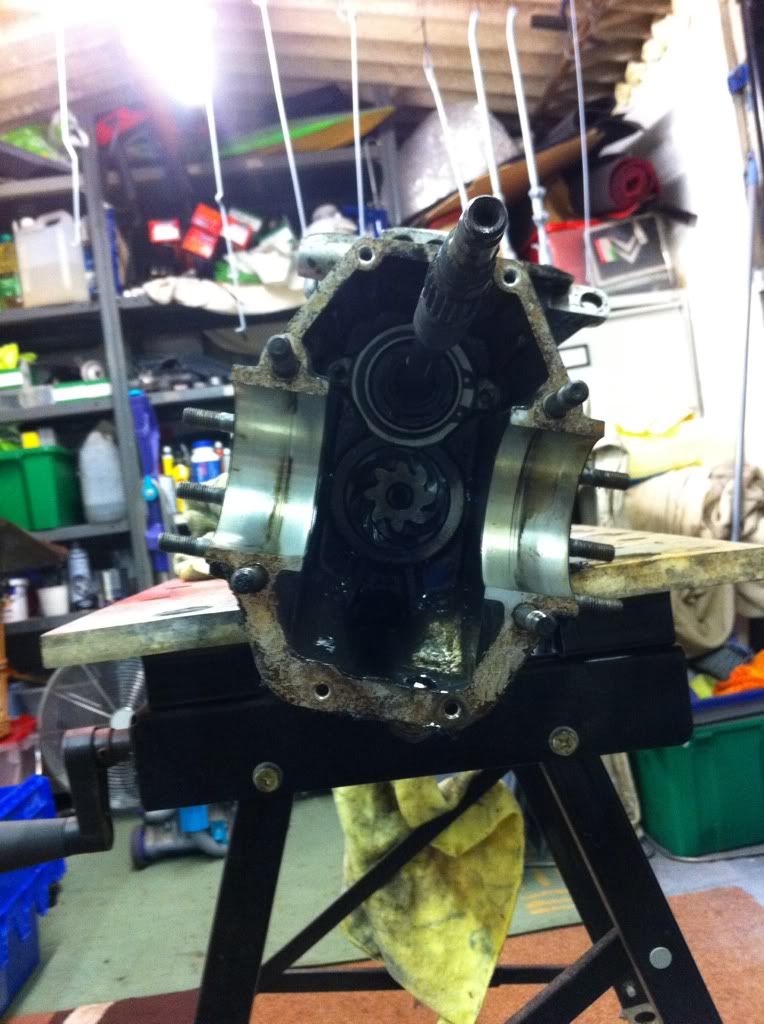 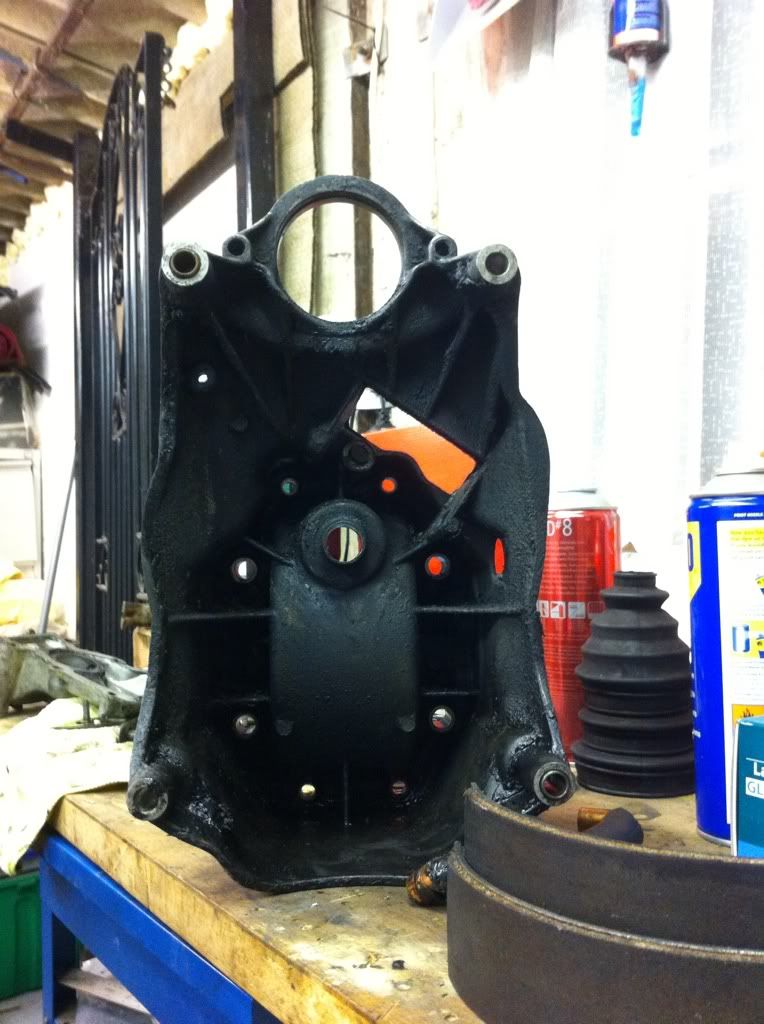 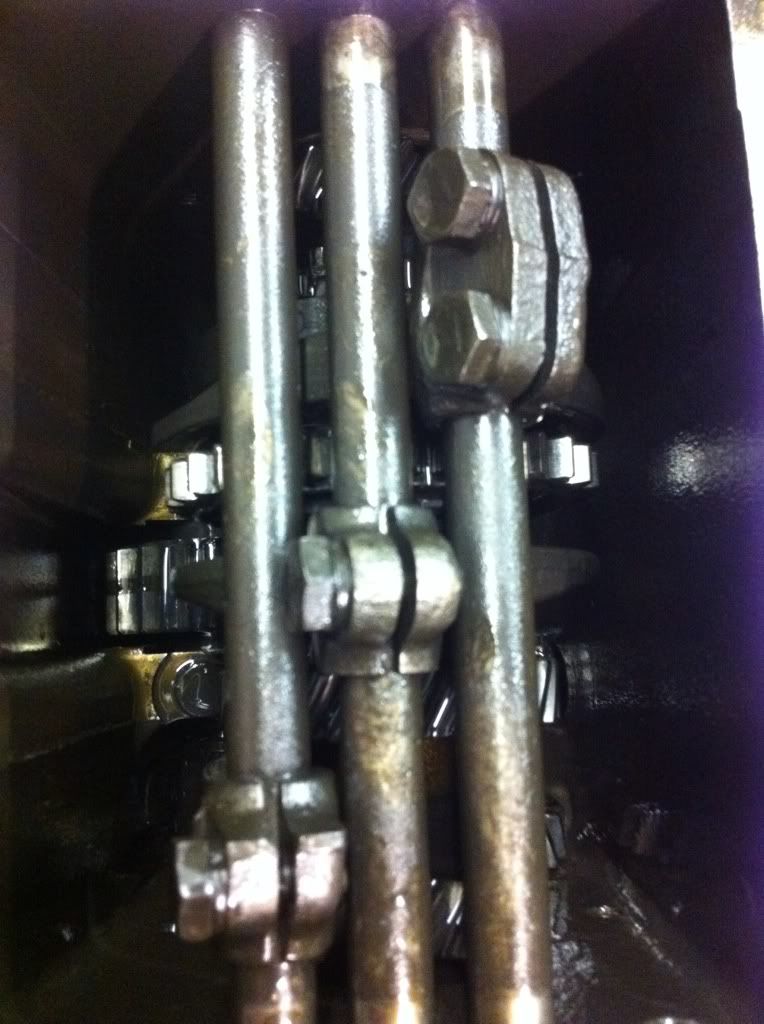 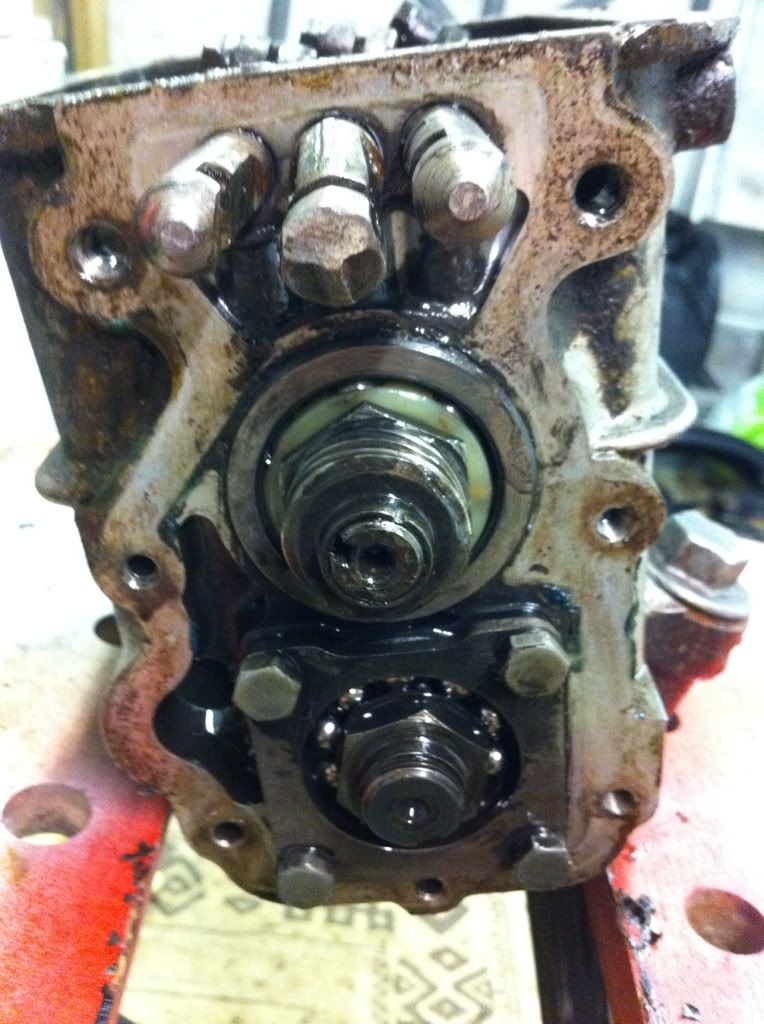 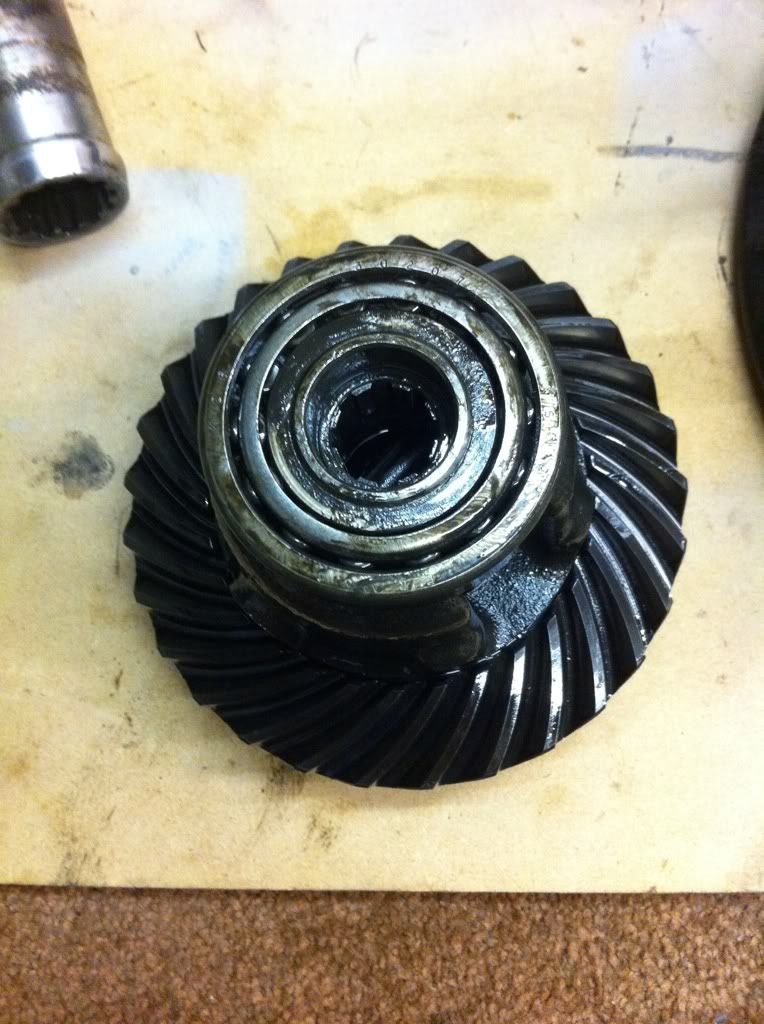 Thats ya diff that is 
_________________
|
| February 7th, 2012, 5:28 pm |
|
|
|
Neil
super slot
Joined: November 28th, 2008, 11:14 pm
Posts: 8797
Location: Cornwall, UK
|
Re: Dave 411's 1967 AK350. I thought it was about time I made a start on the engine.So I lugged two boxes of bits home,and made a start. Bad,bad news.After sliding the rear main bearing off,I found this   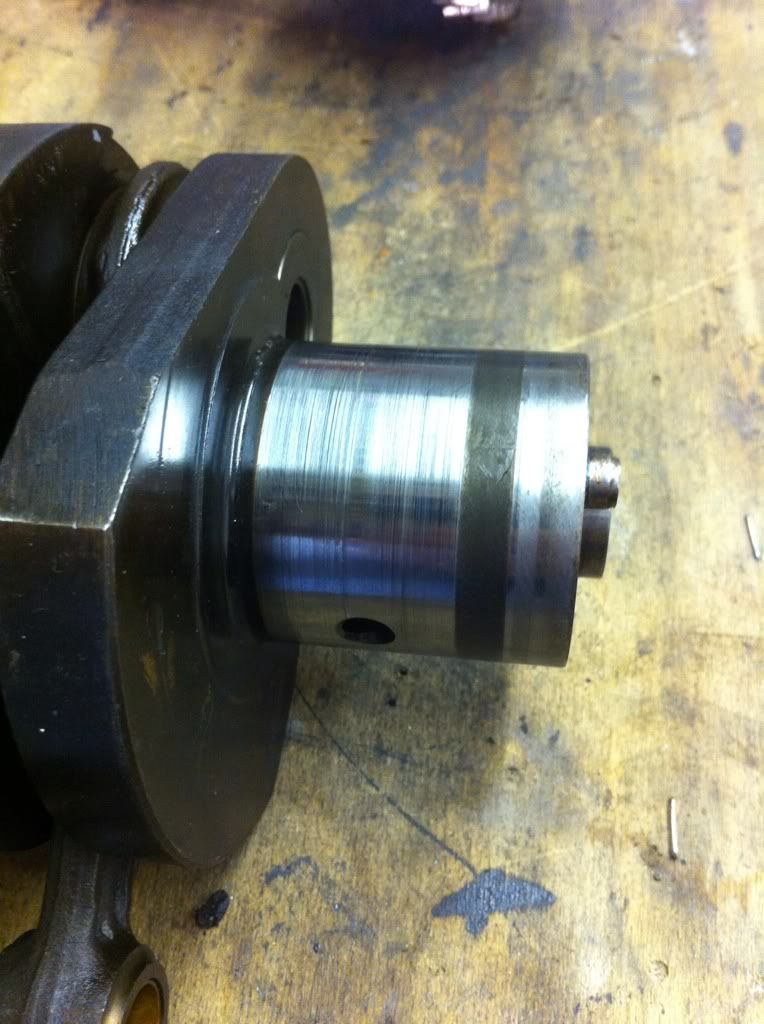 As you can see,the shell bearing is knackered,and really,so is the crank.Its got more tram lines than Blackpool Seafront I have looked at all the websites and found a few,just waiting for them to reply.Also found (hopefully) some M4 engines,so watch this space. Ecas do have a brand new one in stock,Amazing,but its quite expensive,so I must try and find a second hand one first.No,its very expensive,but thats just the way it is,supply and demand and all that. So,after crying into me tea,I decided to hide the crank,and get on with some more cleaning. First thing was the oil cooler.To say it was dirty was an understatement. Now its clean,its metal coloured,I thought it was painted black. 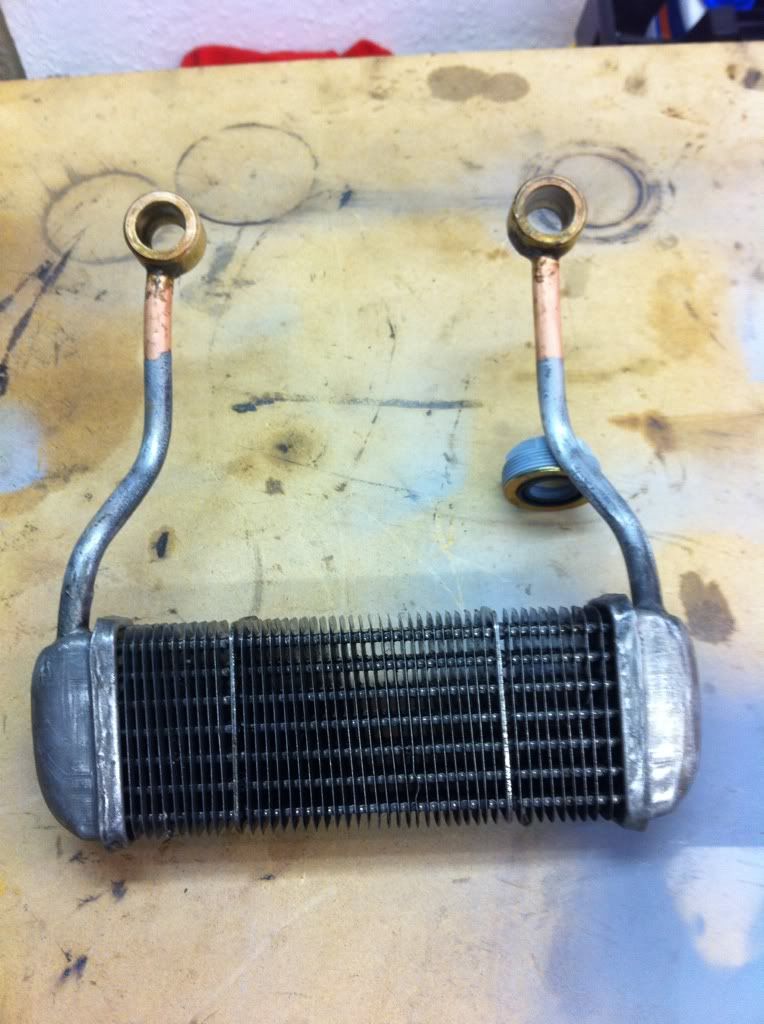 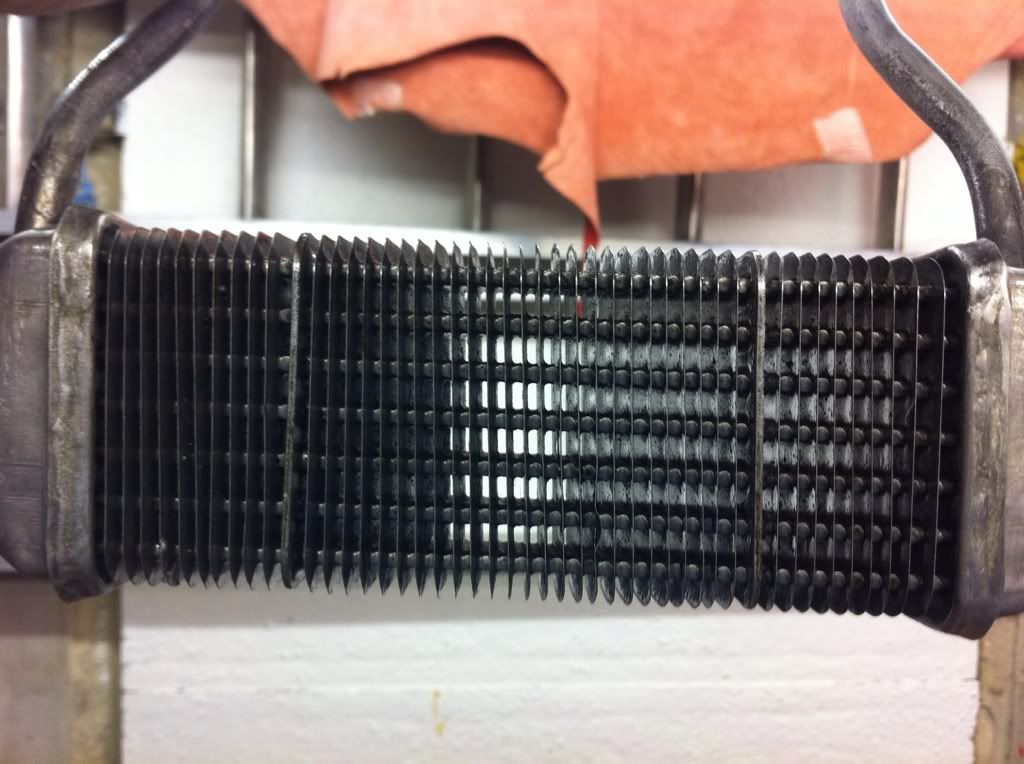 The crankcases were already clean,as was the cam and inlet/exhaust manifold. 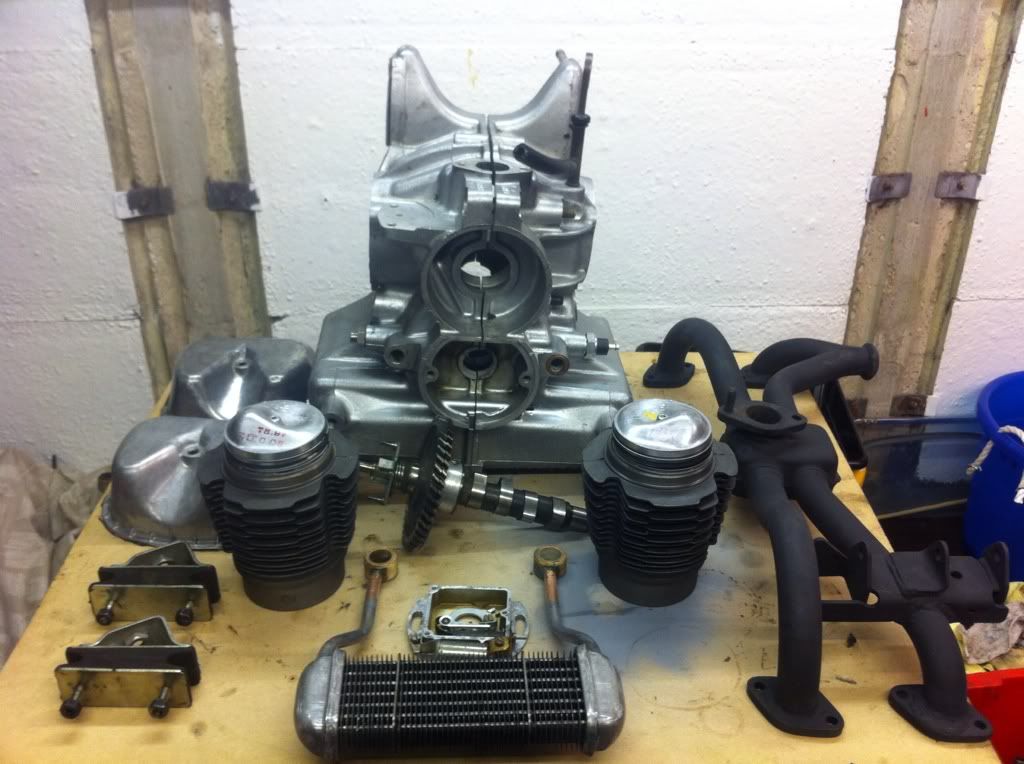 All ready to go back together,when I sort out the crank.
_________________
|
| February 7th, 2012, 5:30 pm |
|
|
|
Neil
super slot
Joined: November 28th, 2008, 11:14 pm
Posts: 8797
Location: Cornwall, UK
|
Re: Dave 411's 1967 AK350. An update on the crank situation. I have managed to buy a complete M4 engine,I wont say from where at the moment! 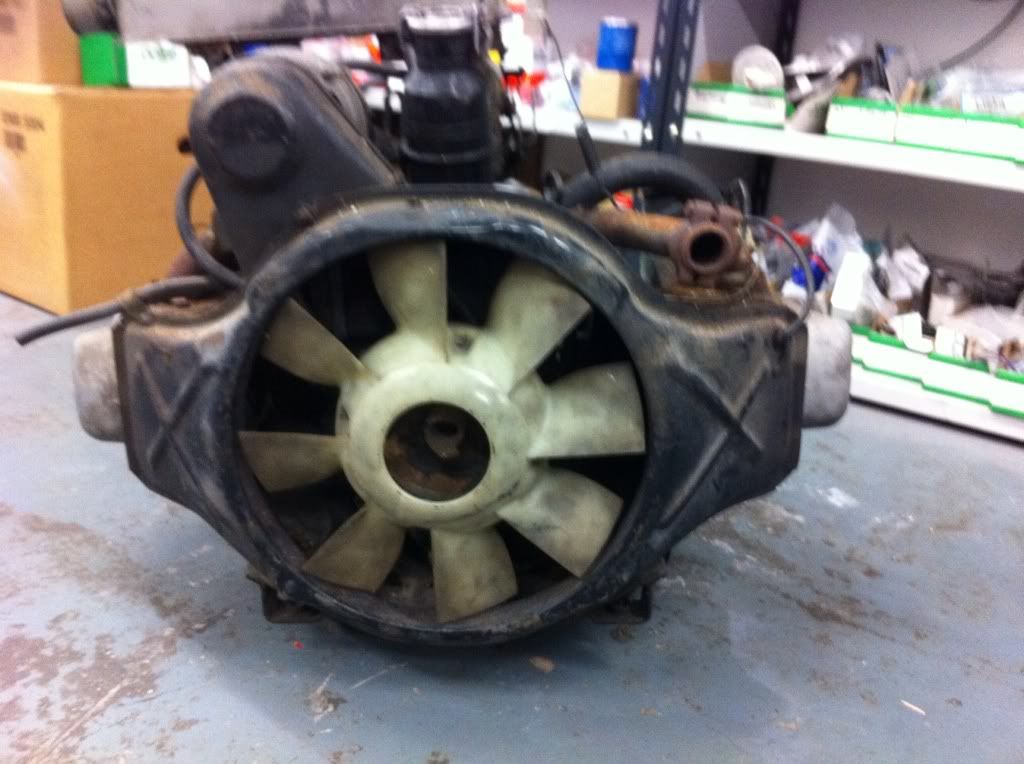 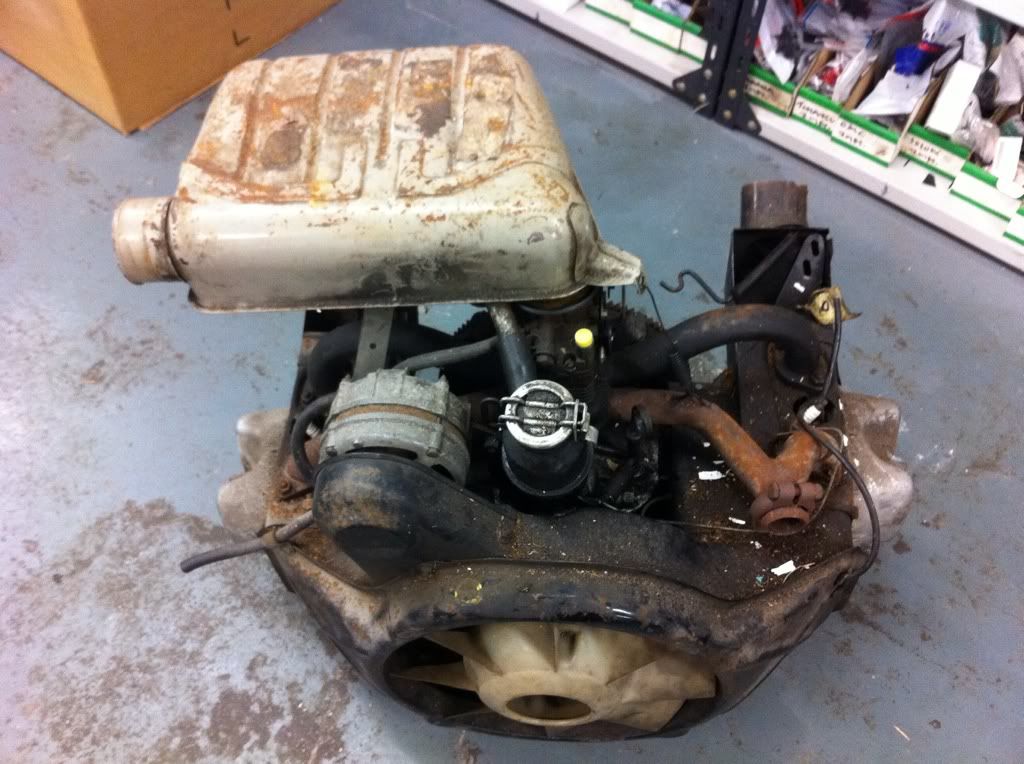 And joy of joys,it has a fan,,my quest is now over.  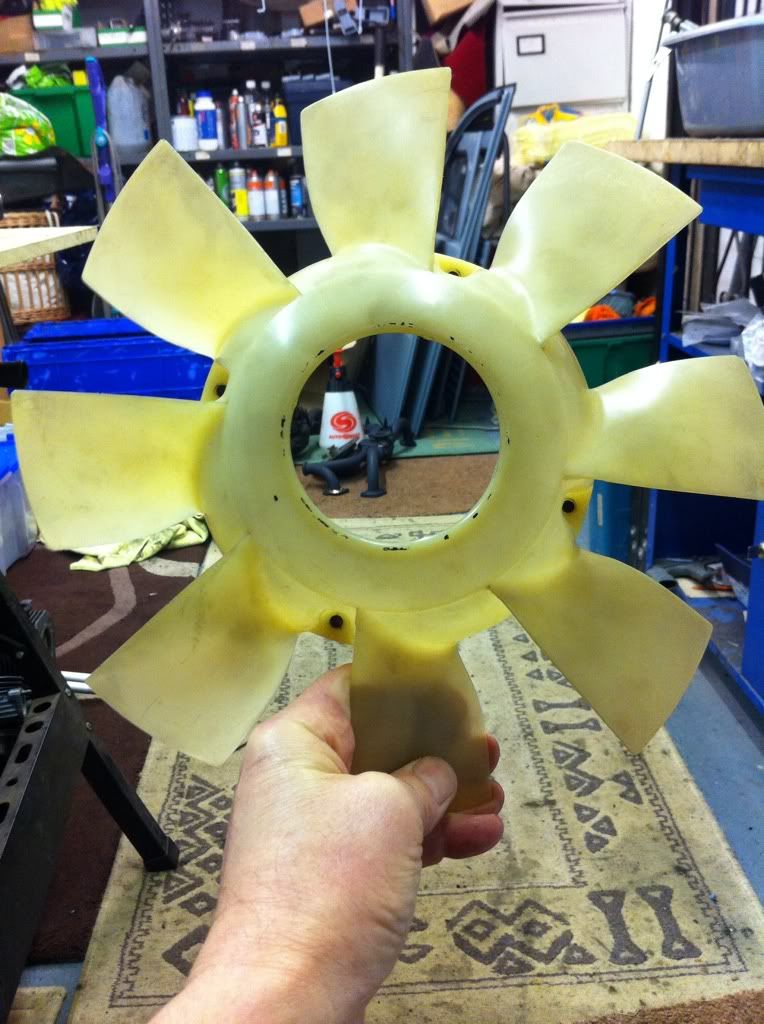 So I have stripped the engine,and the crank is fine,but sadly the rear bearing is on its way out.Same as the original.I am wondering if this is a common problem due to the lack of oil filter,and that bearing getting the oil last.Will have to find an oil flow diagram. I am now thinking about getting the bearing repaired.Found a company on interweb that say that they can do it,although they said that the groove for the oil flow may be a problem as its not a perfect circle inside the bearing,it goes of to one side,then comes back again ( hard to explain,but I know what I mean).They charge 70.00 to do the job,so I will make my mind up over the weekend.Its a 5 week turnaround,still,plenty more to be getting on with.
_________________
|
| February 7th, 2012, 5:35 pm |
|
|
|
Neil
super slot
Joined: November 28th, 2008, 11:14 pm
Posts: 8797
Location: Cornwall, UK
|
Re: Dave 411's 1967 AK350. Next thing to get on with are the cylinder heads,But which ones.  Do I use ones with valve guide oil seals,or the ones without.As far as I can tell,the combustion chamber/ports look identical.I am thinking that the heads without the seal are better,no particular reason other then the valves "feel" better in their guides.No slop and really smooth compared to the heads with seals. Any advice? Pics to follow.
_________________
|
| February 7th, 2012, 5:36 pm |
|
|
Who is online |
Users browsing this forum: No registered users and 427 guests |
|
You cannot post new topics in this forum
You cannot reply to topics in this forum
You cannot edit your posts in this forum
You cannot delete your posts in this forum
You cannot post attachments in this forum
|

|