Thanks, and if you could overlook the gaping hole in the rear panel immediately underneath them that would be great.
| International2cvFriends.com http://www.international2cvfriends.com/forum/ |
|
| �Joolz's Red One http://www.international2cvfriends.com/forum/viewtopic.php?f=5&t=137 |
Page 5 of 54 |
| Author: | Joolz [ April 28th, 2010, 10:15 pm ] |
| Post subject: | Re: Joolz's Red One |
Thanks, and if you could overlook the gaping hole in the rear panel immediately underneath them that would be great. |
|
| Author: | Max [ April 28th, 2010, 10:30 pm ] |
| Post subject: | Re: Joolz's Red One |
Joolz wrote: Thanks, and if you could overlook the gaping hole in the rear panel immediately underneath them that would be great. Consider it done. |
|
| Author: | hjbharry [ April 28th, 2010, 10:50 pm ] |
| Post subject: | Re: Joolz's Red One |
Joolz wrote: Maybe I've got too much time on my hands or maybe I'm just trying to avoid doing anything useful. But for some reason I removed the writing from my rear lenses and if you could overlook the gaping hole in the rear panel immediately underneath them that would be great. You have your priorities right then |
|
| Author: | Joolz [ April 28th, 2010, 11:02 pm ] |
| Post subject: | Re: Joolz's Red One |
It's a familiar scenario, titting about with something unnecessary to avoid the difficult jobs. |
|
| Author: | Joolz [ May 2nd, 2010, 12:58 am ] |
| Post subject: | Re: Joolz's Red One |
Alright, so something slightly less pointless today. Uprated shocks, this is based entirely on instructions originally posted by pete sparrow. I had a rummage around through my spares to pick out the two best rear shocks, and cleaned the gunge off them. After cleaning up the relevant area with a wire brush, I drilled a 9mm hole 20mm along from the dimple that indicates the top. 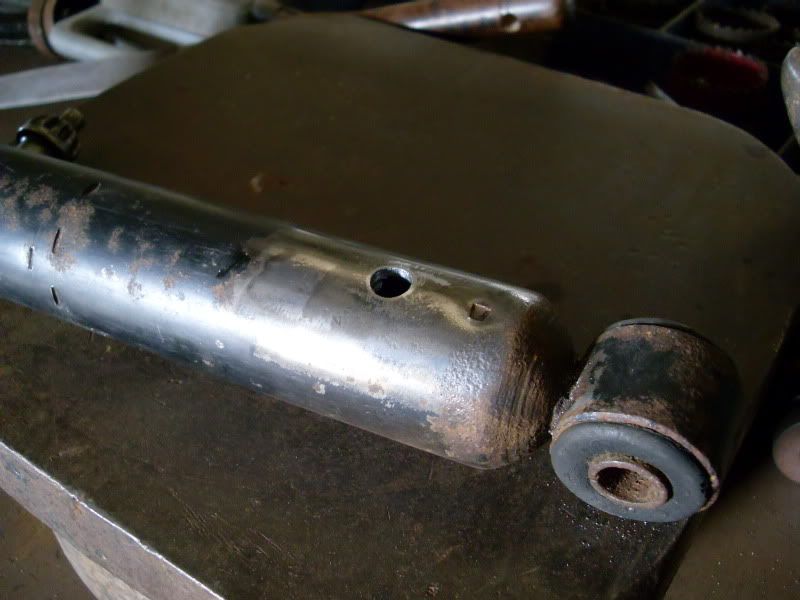 Followed by emptying out the oil into a measuring beaker, hopefully taking any swarf with it. It was a bit black looking. 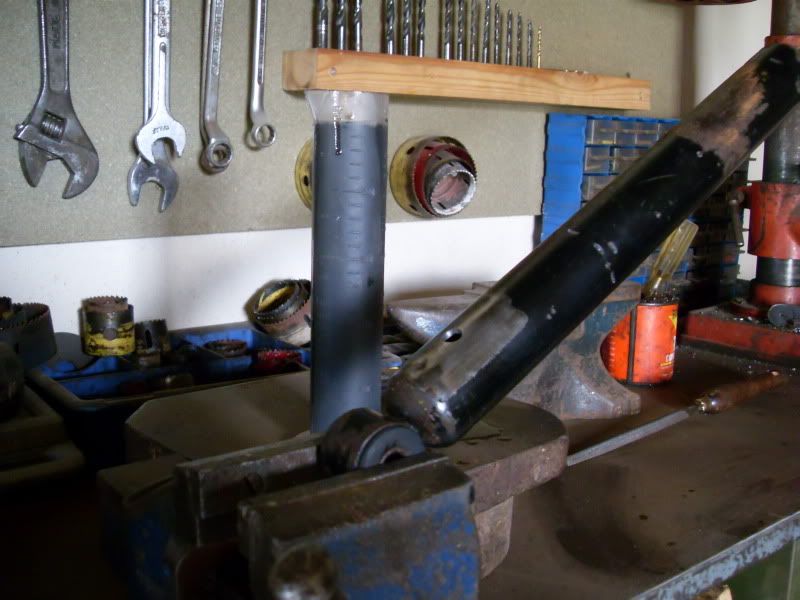 It took a bit of effort to work all the oil out of the shock, but once it's out the shock can be compressed quite easily. I got 230ml of oil out of one and 240ml out of the other, I can't explain the difference, they were the same make but not a pair. Next I welded 8mm nuts over the holes, welding one flat of the nut at a time and cooling the shock body with a wet rag in between. This is TIG welding, it's slower than MIG so makes the shock hotter, but it easier to get a good seal, and it looks nice. 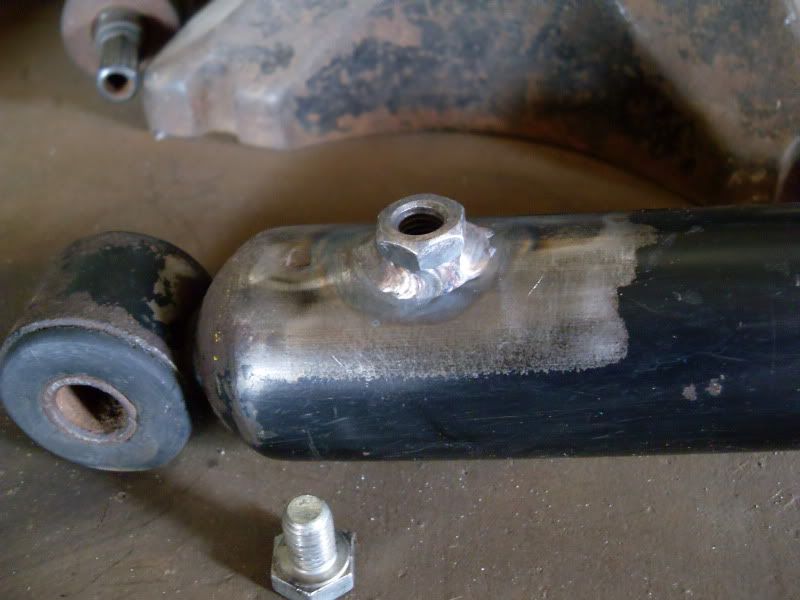 Refilling the shock was made quite easy thanks to a large syringe body which fitted perfectly onto the 8mm nuts. With the syringe filled, extending the shock sucked the new oil into the body while compressing it blows bubbles of air back out. The oil going in is 80w90 gear oil and was measured in the beaker to make sure that the same amount went back in as came out. 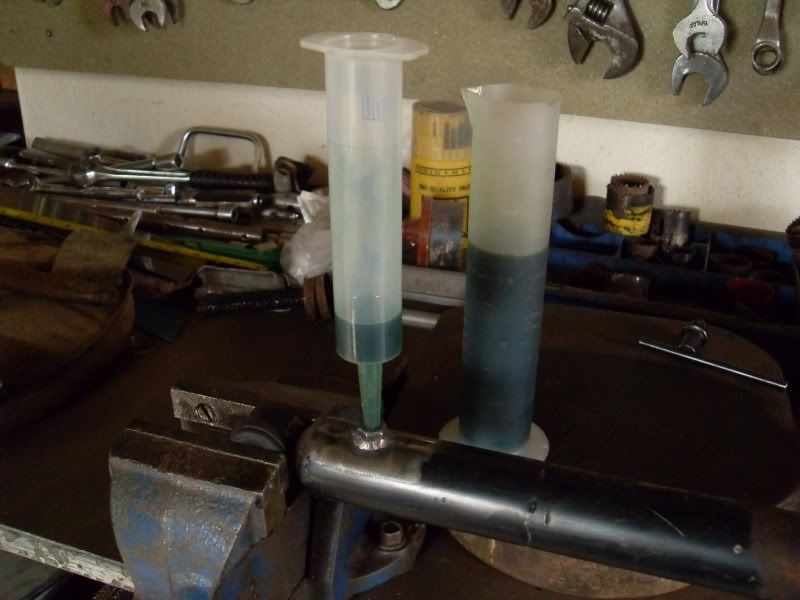 Once the shock is full again it's very hard to compress and a short bolt and copper washer seal it up. 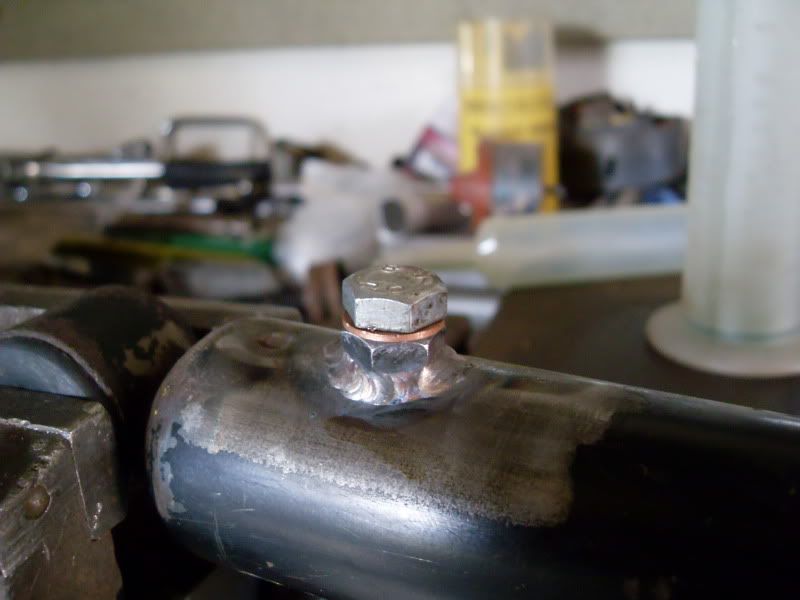 Now all it needs is a coat of paint and we're ready to fit. |
|
| Author: | Max [ May 2nd, 2010, 1:22 am ] |
| Post subject: | Re: Joolz's Red One |
Good work! |
|
| Author: | Simon Crook [ May 2nd, 2010, 9:02 am ] |
| Post subject: | Re: Joolz's Red One |
really neat job - good work |
|
| Author: | Neil [ May 2nd, 2010, 9:26 am ] |
| Post subject: | Re: Joolz's Red One |
Tidy! |
|
| Author: | Old-Nail [ May 2nd, 2010, 1:05 pm ] |
| Post subject: | Re: Joolz's Red One |
I need to learn to weld like that! |
|
| Author: | Tim2cv [ May 2nd, 2010, 2:09 pm ] |
| Post subject: | Re: Joolz's Red One |
you put the rest of us to shame... |
|
| Page 5 of 54 | All times are UTC + 1 hour [ DST ] |
| Powered by phpBB © 2000, 2002, 2005, 2007 phpBB Group http://www.phpbb.com/ |
|